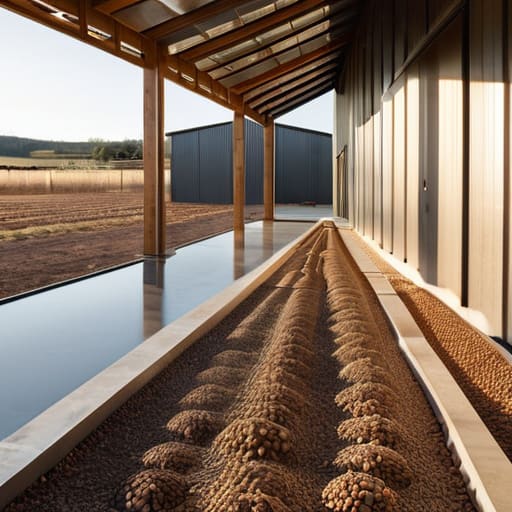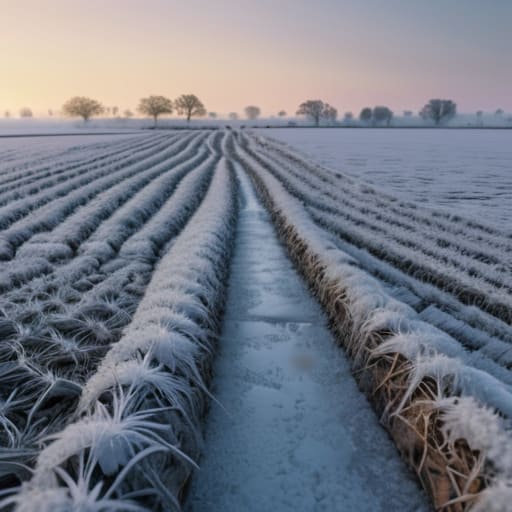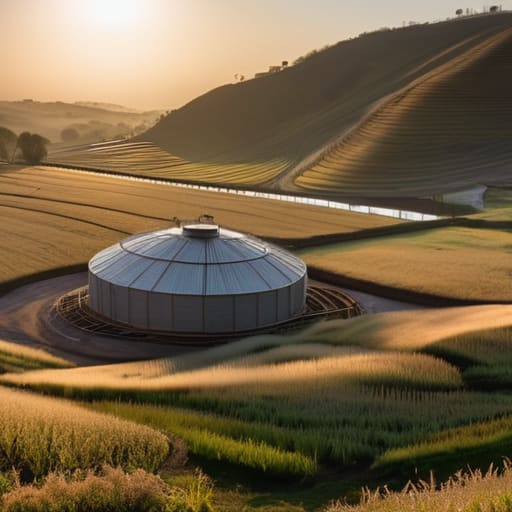
How to manage farm water supply winter.

Water Supply Is a Winter Problem

I’ve spent half my life watching salesmen in clean wellies try to convince me that a high-tech, sensor-driven automated system is the only way to handle how to manage farm water supply. They’ll show you glossy brochures full of gadgets that promise to monitor every drop, but they never mention what happens when a frost cracks a plastic valve or a cow decides a trough is a better place to urinate than drink. I’ve seen more money vanish into fancy, broken kit sitting idle in a shed than I ever have from a simple, well-maintained gravity system. If you’re looking for a way to automate your way out of common sense, you’re talking to the wrong man.

What I’m going to do here isn’t give you a lecture from a textbook, but rather a breakdown of what actually keeps a herd hydrated without bleeding your cash flow dry. I’ll tell you which parts of your water infrastructure are worth the investment and which ones are just expensive distractions. We’ll look at the real costs of neglect—from the ground up—and focus on the practicalities that ensure your cattle are actually drinking, rather than just standing around waiting for a repairman to show up.

Table of Contents

Understanding How to Manage Farm Water Supply

Understanding How to Manage Farm Water Supply.

Before you go buying any more fancy kit, you need to look at your topography. I’ve seen men spend thousands on high-tech livestock hydration systems only to have the whole lot fail because they didn’t account for the slope of the hill or the way the frost settles in the hollows. You can’t manage what you haven’t measured. I always start by looking at the source—is it a borehole, a spring, or a tank? If it’s a tank, you need to know exactly how much “buffer” you have before the bottom drops out. If you’re relying on a single source during a dry spell, you aren’t farming; you’re gambling.

It’s also about the plumbing, which is where most people let the money leak away. I’ve lost more money to a single cracked line than I ever did to bad feed. Preventing water pipe bursts isn’t just about burying the lines deep enough; it’s about understanding how your ground moves when it gets saturated. If you aren’t managing water pressure for livestock correctly, you’ll either have troughs that overflow and turn your best grazing into a bog, or you’ll have nothing but a trickle when the cattle are actually thirsty. Both scenarios end with your margins looking thinner than a starved ewe.

Key Things to Know

Key Things to Know: Water storage solutions.

First, you have to stop thinking about water as a utility and start treating it like your most volatile input. I’ve seen men spend a king’s ransom on high-spec agricultural water storage solutions, only to watch their margins bleed out because they neglected the basics. If your tanks are sized for a dry year but you’re planning for a wet one, or vice versa, you’re playing a losing game with your cash flow. It isn’t just about having enough volume; it’s about the reliability of the delivery. A tank is useless if the line feeding it is choked with silt or if the float valve is stuck halfway.

Then there is the matter of the infrastructure itself. You can buy the most expensive livestock hydration systems on the market, but if you haven’t accounted for the ground settling or the frost line, you’re just buying a very expensive way to flood a field. I’ve lost more money to a single burst pipe in a January freeze than I ever did on bad breeding decisions. You need to know your system’s limits—not what the salesman told you, but what it actually does when the temperature drops and the cattle are all pushing for a drink at once.

Practical Tips and Steps

Practical Tips and Steps for pipe insulation.

Start with the basics: the pipes. You can buy the most expensive agricultural water storage solutions on the market, but if your lines are freezing or bursting in January, they’re nothing more than expensive plastic ribbons. I’ve learned the hard way that insulation is cheaper than a midnight repair job in a freezing field. If you’re running lines to far pastures, don’t just bury them and hope for the best; check your depth against the frost line for your specific ground.

Once the water is moving, you need to watch the delivery. I’ve seen too many lads invest in fancy livestock hydration systems only to find the pressure is so low the cattle won’t bother, or so high they’re splashing half the supply into the mud. If the trough is a swamp, you aren’t just wasting water; you’re inviting lameness and rot. Keep your troughs clean and your pressure steady, and you’ll find the animals drink more consistently, which keeps your margins from leaking out through the dirt.

Common Mistakes to Avoid

The biggest mistake I see is treating water as a “set and forget” part of the business. People spend a fortune on fancy livestock hydration systems, thinking the technology will do the thinking for them, only to find a trough has been blocked by mud or a float valve has seized for three days. By the time you notice the cattle looking hollow-eyed in the field, you’ve already lost weight on the animals and, more importantly, you’ve lost money. You can’t manage what you don’t monitor, and relying on luck is a poor way to run a business.

Another trap is neglecting the infrastructure when the weather is kind. I’ve seen too many lads skip out on preventative checks, only to be caught out by a hard frost. Preventing water pipe bursts isn’t about buying the most expensive insulation; it’s about the common sense of draining lines or burying them deep enough before the ground freezes solid. If you wait until the pipes have split to start thinking about agricultural water storage solutions, you’re not managing a farm—you’re just managing a crisis.

Final Thoughts

At the end of the day, you can buy the most expensive agricultural water storage solutions on the market, but they won’t do a lick of good if you haven’t accounted for the reality of your terrain. I’ve seen too many men chase the latest gadget only to realize they’ve ignored the basic physics of their own hills. If you aren’t managing water pressure for livestock with a bit of common sense, you’re just inviting a headache that will cost you more in diesel and frustration than the equipment was worth.

Don’t get distracted by the shiny brochures. Focus on the basics: keep your troughs clean, keep your pipes buried deep enough to avoid the frost, and keep a sharp eye on your margins. A dry cow isn’t just a welfare issue; it’s a direct hit to your bottom line that shows up in the weight shed months later. Watch the ground, watch the weather, and watch your cash flow. If you get those three right, the rest of this business becomes a lot more manageable.

Five Ways to Stop Your Water Supply From Bleeding You Dry

  • Check your troughs every single morning before you do anything else. I don’t care if the weather is fine or if you’ve got a hundred hectares to check; if a float valve is stuck or a pipe has cracked under a heavy tractor, you won’t know until you see the ground turning into a bog and your water bill—or your well level—taking the hit.
  • Stop thinking about water as a fixed cost and start looking at it as a seasonal variable. In a dry July, your demand is going to spike exactly when your grass is struggling; if your storage isn’t sized for the heat of the summer rather than the easy flow of spring, you’re going to be chasing a receding water line while your cattle lose condition.
  • Don’t buy the most expensive automated system just because the salesman says it’s “smart.” If it can’t handle a bit of grit in the line or a freezing night in February without failing, it’s just a very expensive bit of scrap metal sitting in the shed. Stick to mechanical simplicity that you can actually fix with a wrench when it breaks at 5:00 AM.
  • Watch your stock movement as closely as you watch your rainfall. If you move a herd into a new paddock and they aren’t congregating around the water, don’t assume they’re being “efficient”—assume the trough is either dirty, too high, or the pressure is so low they can’t get a decent drink. A thirsty cow is a cow that isn’t growing.
  • Keep a mental map of your ground’s drainage before you ever think about laying a pipe. I’ve seen men spend a fortune on pumps only to realize they’ve placed their supply points in a natural collection area that turns into a swamp every time it rains, making the whole setup inaccessible when you actually need to service it.

The Bottom Line on Water

Stop looking at water as a utility and start seeing it as a driver of performance; if your cattle are walking an extra half a hectare to find a decent drink, you’re losing weight gain and losing money.

A fancy new trough won’t fix a broken system, so check your pipes, your pressure, and your cleanliness before you go spending money on kit that’ll just sit in the shed collecting dust.

Water management isn’t a seasonal job you can ignore until the heat hits; if you aren’t checking your troughs and ground drainage when the weather is good, you’ll be paying for it when the dry spell or the deluge actually arrives.

The Bottom Line on Water

At the end of the day, managing your water isn’t about buying the most expensive automated sensor or a shiny new trough system that looks good in a brochure. It’s about the basics: checking the lines for leaks, ensuring the cattle can actually reach the supply without trampling the ground into a bog, and knowing exactly how much your storage can handle when the rain stops for a fortnight. If you aren’t looking at your water supply through the lens of cash flow and animal health, you’re just playing at farming. A broken pipe or a fouled trough isn’t just a nuisance; it’s a direct hit to your margins that most people don’t notice until the weight gain slows down or the vet shows up.

I’ve spent forty years watching seasons change and watching men lose sleep over things they could have fixed with a bit of foresight and a walk across the field. Don’t get distracted by the gadgets that promise to do the thinking for you. Instead, get out there, look at your ground, and understand how your water moves. If you get the water right, the grass follows, the livestock thrive, and you might actually find yourself with a bit of a buffer when the weather turns sour. It’s not glamorous, but it is the foundation of everything we do out here.

Frequently Asked Questions

How much of a difference does it actually make to my bottom line if I spend the money on automatic float valves versus just checking the troughs manually once a day?

It’s a question of time versus risk. If you’ve got a man on the farm who’s already out checking fences, manual checks aren’t the devil. But if you’re relying on a part-timer or your own exhausted eyes at dusk, a stuck valve is a disaster waiting to happen. One dry afternoon in July can tank your weaning weights or kill a heifer. I’d rather pay for the valve than lose a calf to dehydration.

When the ground is as wet as it's been this month, how do I keep the water supply from turning my main drinking areas into a bog that'll ruin my soil structure?

If the ground is soup, you’ve already lost the battle if you’re letting them congregate in one spot. You need to move the drink. If you can’t move the troughs, you’ve got to move the animals to better ground, even if it means a bit more walking. I’ve seen men try to fix a bog with a mountain of expensive stone, only to have the cattle churn it back into mud by Tuesday. Use sacrificial paddocks or heavy-duty mats if you must, but mostly, just don’t let them stand in one place until the soil structure is gone for good.

If I’m looking at a new pump or a bigger tank, how do I know if I’m actually buying something that’ll work in five years, or if I'm just paying for a bit of shiny marketing?

Don’t look at the brochure; look at your worst drought year and your wettest winter. A pump that works in July might burn out when the silt levels rise in a wet October, and a tank that looks huge on paper won’t mean a thing if your pipes can’t deliver the volume when the herd is thirsty at midday. If the salesman can’t tell you exactly how many litres per hour that kit delivers under pressure, walk away.

Learning how fencing should be planned.

Fencing Properly Once Instead of Patching Forever

I’ve lost more money to poorly thought-out boundaries than I ever did to a bad year of grain prices, and I’d wager most of you have too. You’ll see plenty of glossy brochures claiming that the latest high-tensile mesh or some fancy automated gate system is the secret to a tidy farm, but they never mention the cost of the labour or the way the soil behaves when it’s sodden in November. Most people approach a new project by looking at a catalogue, when really, how fencing should be planned starts with a pair of boots and a willingness to walk the perimeter in the rain. If you haven’t accounted for the drift in a corner or the way a heavy ewe treats a flimsy strainer, you aren’t planning; you’re just gambling with your cash flow.

I’m not here to sell you a specific brand of wire or tell you that expensive kit will solve your problems. My aim is to walk you through the practicalities of what actually stays upright when the weather turns, from the ground up. I’ll tell you where I’ve wasted money on materials that didn’t suit the terrain and how to map out a system that works for your stocking rates and your wallet alike.

Table of Contents

Understanding How Fencing Should Be Planned

Understanding How Fencing Should Be Planned.

Before you even think about calling a contractor or driving a post-driver into the dirt, you need to stop looking at the price per metre and start looking at the topography. I’ve seen too many lads jump straight into fencing budget planning by looking at a catalogue, only to realize halfway through that they’ve bought the wrong gear for a wet hillside. If you’re planning to run cattle through a boundary that’s more bog than bank, that shiny new wire won’t mean a damn thing if the posts are leaning by Christmas. You have to account for the ground and the drainage first; otherwise, you’re just burying cash in a place where it’ll never grow.

You also need to be clear on what you’re actually trying to contain. There is a massive difference between a boundary that just marks a line and a fence that has to hold a hundred stubborn ewes in a gale. When you’re choosing fence styles, don’t get distracted by what the neighbour has done. Look at your specific stock, your specific terrain, and your specific margins. If you spend your whole budget on a perimeter that looks grand but lets the best heifers wander into the next parish, you haven’t planned a fence—you’ve just built an expensive invitation to a headache.

Key Things to Know

Key Things to Know: choosing fence styles.

Before you even look at a catalogue, you need to stop thinking about what looks tidy and start thinking about what actually holds. I’ve seen too many lads get caught up in choosing fence styles based on what the neighbour has, only to find out six months later that the wire can’t handle the weight of a wet ewe or a stubborn heifer. You have to look at the terrain first. If you’re running line along a slope or through a boggy patch, that wire is going to sag or the posts are going to sink, no matter how much you spent on the initial materials.

Then there is the matter of the money. Proper fencing budget planning isn’t just about the cost of the posts and the wire; it’s about the man-hours and the fuel to get it into the ground. If you don’t account for the extra labour required for a difficult boundary, your margins will vanish before the first calf is even born. Don’t forget to check your property line considerations too. There is nothing more expensive than having to pull up a perfectly good run of fencing because you realized you were three feet into the next man’s field.

Practical Tips and Steps

Practical Tips and Steps for fence planning.

First, get off the tractor and walk the perimeter. You can’t plan a single thing from the cab of a Massey. I’ve seen too many lads jump straight into fencing budget planning without accounting for the fact that a “straight line” on a map is a lie once you hit a bog or a granite outcrop. You need to know exactly where the ground dips and where the drainage will turn your new posts into toothpicks. If you don’t account for the slope and the soil type, you aren’t building a fence; you’re just donating money to the local hardware store.

Once you’ve actually seen the ground, look at your property line considerations. It’s all well and good to pick the prettiest wire, but if you’re sharing a boundary with a neighbour who thinks a hedge is a legal barrier, you’re in for a headache. When you’re finally moving through the fencing installation steps, don’t skimp on the strainers. I’ve spent more money replacing cheap, flimsy posts that couldn’t handle a single heifer leaning on them than I ever spent on the actual wire. Buy for the animal you have, not the one you wish you had.

Common Mistakes to Avoid

The biggest mistake I see is people treating fencing budget planning like it’s just a trip to the merchant for wire and posts. They look at the price of the materials and think they’re done, forgetting that the real cost is often in the labor and the unforeseen headaches. I’ve seen plenty of lads buy the cheapest wire they can find, only to spend three times that amount two years later when the sheep have found a way through or the tensioners have snapped. You aren’t just buying a barrier; you’re buying the time you won’t spend fixing it.

Another trap is ignoring the ground itself. You can spend all day choosing fence styles that look grand on a brochure, but if you haven’t accounted for the slope of the hill or the way the water sits in that bottom field after a heavy rain, you’re just burying money in a hole. Don’t get caught out by property line considerations either—nothing turns a neighbor into an enemy faster than a fence that’s six inches over the mark. Check your boundaries twice, because moving a fence once it’s in the ground is a fool’s errand.

Final Thoughts

At the end of the day, a fence isn’t just a line on a map or a way to keep the neighbors from complaining about your stray heifers. It’s a long-term commitment of both your labor and your capital. If you try to shortcut your fencing budget planning by buying the cheapest wire or the thinnest posts you can find, you’ll find yourself out in the wind and rain three years from now, fixing a break that shouldn’t have happened. I’ve spent more money than I care to admit replacing “budget” gear that simply couldn’t handle a wet winter or a heavy animal leaning against it.

Don’t get caught up in the vanity of it all, either. You don’t need the most expensive durable fencing options for a boundary that only separates two fields of empty grazing. Match the kit to the job, and more importantly, match it to the ground you’re actually standing on. If you take the time to walk the perimeter and think through the practicalities now, you’ll save yourself a lot of heartache—and a lot of wasted cash—down the road.

Five ways to stop your fencing from becoming a hole in your pocket

  • Walk the boundary when it’s raining. You can look at a map all day in the kitchen, but you won’t know if you’re dealing with a peat bog or a limestone slope until you’ve actually stood in the muck and seen where the water sits. If you don’t plan for the wet bits, you’ll be spending your life digging post holes that won’t stay upright come winter.
  • Match the wire to the beast, not the price tag. I’ve seen lads buy the cheapest high-tensile they could find, only to have a single stubborn heifer push through it like it was cobwebs. If you’re running cattle, you pay for the strength; if you try to save a few quid on the wire, you’ll end up paying triple in labor when you’re out there at midnight patching it up.
  • Don’t forget the gates and the corners. A fence is only as good as its weakest point, and usually, that’s where the tension pulls or where a gate hangs crooked because the ground shifted. Spend the extra money on proper strainers and heavy-duty hinges now, or you’ll spend every spring wrestling with a gate that won’t shut.
  • Plan for the movement, not just the boundary. A fence isn’t just a line on a map; it’s a tool to manage your grass. If your layout doesn’t allow you to rotate stock effectively or get them to the water without a three-mile trek, you haven’t planned a fence—you’ve just built a very expensive wall that makes your daily work harder.
  • Check your cash flow before you check the catalog. It’s tempting to buy all your materials in one go to get a bulk discount, but if that leaves you short when the vet’s bill comes or the price of feed spikes, you’ve made a mistake. Buy what you need for the immediate job, do it right, and keep enough in the bank to actually finish what you started.

The Bottom Line on Fencing

Stop looking at the price of a roll of wire and start looking at the cost of the ground it’s going in; if you haven’t walked the boundary in the rain to see where the water sits, you’re just planning to dig holes for nothing.

Fencing isn’t a one-off expense, it’s a long-term commitment to your cash flow, so don’t buy the cheapest kit just to save a few quid now if it means you’ll be out there patching it every time a heifer leans on it.

A fence is only as good as the management it allows, so plan your gates and internal divisions around how you actually move stock, not how you wish the farm worked on a sunny afternoon.

The Bottom Line on Wire and Wood

At the end of the day, planning your fencing isn’t about finding the prettiest posts or the most expensive brand of wire; it’s about making sure you aren’t throwing money into a ditch. You’ve looked at the ground, you’ve accounted for the rainfall, and you’ve matched the kit to the livestock you’re actually running, not the ones you wish you had. If you’ve done the work to map the boundaries and checked your cash flow before the first post-hole is even dug, you’re already ahead of half the people I see out in the fields. Remember, a fence is only as good as its weakest point, and if you haven’t planned for the heavy ground or the pressure of a crowded mob, you’re just buying a future headache by installments.

I’ve spent forty years watching men go broke trying to fix mistakes that could have been avoided with a bit of walking and a pencil. Farming is hard enough without fighting your own infrastructure every time a storm rolls in or a ewe decides to test a corner. Don’t let the shiny brochures convince you that complexity equals quality. Build it right, build it for the ground you actually have, and build it so you can sleep at night knowing the stock is where they belong. A well-planned fence isn’t just a barrier; it’s one less thing to worry about when the real work begins.

Frequently Asked Questions

How much should I actually be setting aside for repairs and maintenance in my yearly budget, rather than just the initial cost of the wire and posts?

If you’re only budgeting for the wire and the posts, you aren’t budgeting for a fence; you’re budgeting for a dream. Realistically, I set aside 10% to 15% of the initial capital cost every year for maintenance. Between the damp rot in the posts and the inevitable bit of wire a rogue heifer finds, that money disappears quickly. It’s better to have a line item for repairs than to be scrambling when a boundary fails mid-winter.

If I’m dealing with heavy clay or boggy ground, is it worth the extra expense for heavier timber posts, or will a standard post just sink and leave me with a mess in two years?

If you’re working heavy clay or bog, don’t even bother with standard posts; you’ll be out there re-driving them before the first frost. It’s a fool’s errand. You need the heavier timber, but more importantly, you need to get them deep enough to hit something solid. If you can’t find firm ground, you’re better off investing in concrete footings or steel. It costs more upfront, but it beats paying for the same job twice.

When I'm looking at electric fencing for rotational grazing, how do I know if the voltage is actually going to hold up when the grass gets long and wet?

If you’re relying on a little battery-powered box from the local co-op, you’re asking for trouble come August. When the grass gets rank and the ground turns to soup, that voltage will bleed out faster than a cut ewe. You need a heavy-duty energizer—one that’s overkill for the dry spells. If it can’t push a decent pulse through a wet, tangled mess of rye, you aren’t grazing; you’re just decorating the field with wire.

How to maintain farm tracks in winter.

A Track That Survives a Wet Winter

I spent three thousand pounds last autumn on a specialized drainage kit because a salesman in a clean fleece told me it was the only way to stop the north field from turning into a soup bowl. Six months later, the track is still a graveyard for tractor tyres, and that money is sitting at the bottom of a muddy hole where it’ll never do a lick of good. Most of the advice you get on how to maintain farm tracks is designed to separate a man from his cash, focusing on fancy surfacing or expensive machinery that’ll just sit in the shed once the novelty wears off. The truth is, if you don’t understand your ground and your rainfall first, you’re just throwing good money after bad.

I’m not here to sell you a dream of concrete-smooth lanes; I’m here to talk about what actually keeps a vehicle moving when the weather turns sour. I’m going to show you how to look at your topography, how to use a bit of cheap hardcore effectively, and most importantly, how to stop your tracks from bleeding your cash flow through broken axles and wasted diesel. This is about practical, seasonal maintenance that works for a real farm, not a brochure.

Table of Contents

Understanding How to Maintain Farm Tracks

Understanding How to Maintain Farm Tracks.

You can’t talk about tracks without talking about the water. I’ve seen men spend thousands on fancy stone only to watch it vanish into a slurry of mud the first time we had a wet April. The secret isn’t just throwing more grit at the problem; it’s about water runoff management. If you don’t give the rain a way to get off your track, it’ll find a way to get under it, turning your investment into a bog that’ll swallow a tractor axle whole.

It’s also about what you’re putting down. I’ve wasted a fair bit of money on soft, cheap stone that just disappeared into the subsoil. You need to understand your farm road gravel types; you want something with angular edges that lock together, not rounded river stones that slide around like marbles under a load. If you don’t get the foundation right, you’re just decorating a puddle. Most importantly, don’t skimp on the drainage. A well-placed culvert costs a few quid now, but it’s a hell of a lot cheaper than replacing a drive shaft or rebuilding a track that’s been washed out from underneath.

Key Things to Know

Key Things to Know: Water Runoff Management

If you’re looking for a list of expensive gadgets to fix a bad track, you’ve come to the wrong place. The first thing you need to grasp is that a track isn’t just a path; it’s a drainage problem masquerading as a road. If you don’t get your water runoff management sorted, you aren’t building a track, you’re just building a very expensive canal that will eventually wash your topsoil straight into the bottom field. You can pour all the stone you want into a hollow, but if the water has nowhere to go, it’ll find its way under the surface and turn your investment into a slurry pit by next November.

Secondly, stop thinking about “fixing” the surface and start thinking about the foundation. Most of the lads I know go straight for the flashy, expensive crushed granite, but if you haven’t addressed soil compaction prevention by getting a proper sub-base down first, that fancy gravel will be gone in a single season. You need to understand your farm road gravel types—not because a salesman told you to, but because you need to know which ones actually lock together under the weight of a loaded slurry tanker rather than just rolling around like marbles under your tyres.

Practical Tips and Steps

Practical Tips and Steps for water management.

First thing you need to do is stop treating your tracks like they’re permanent fixtures of the landscape. They aren’t. If you see water pooling in the middle of a lane, you aren’t just looking at a puddle; you’re looking at the start of a washout. You need to get serious about water runoff management before the autumn rains turn your main access into a canal. I’ve spent more money than I care to admit digging out ruts that could have been avoided if I’d just spent a weekend clearing a ditch or checking a pipe. If the water has nowhere to go, it’s going to go through your track, and it’ll take your stone with it.

When it comes to the actual surfacing, don’t go buying the cheapest bag of grit the local merchant offers just to tick a box. You need to pick your farm road gravel types based on the weight you’re actually moving. If you’re running a tractor with a heavy slurry tanker or a forage trailer, you need angular stone that locks together, not rounded river pebbles that just slide around under pressure. If you don’t get the foundation right, you’re just throwing good money after bad every time the ground gets soft.

Common Mistakes to Avoid

The biggest mistake I see—and I’ve made it myself more than once—is treating a track like a permanent fixture rather than a living thing. People think if they throw a bit of cheap, dusty hardcore down during a dry spell, the job is done. But if you aren’t looking at water runoff management, you’re just building a future riverbed. I’ve watched men spend thousands on fancy machinery only to have it sink to the axles because they ignored the drainage. If the water doesn’t have a clear path to leave the track, it’ll find its way into your subsoil, and once you’ve got that level of soil compaction, you might as well be driving on concrete for all the grip you’ll get.

Another one is skimping on the right materials. I’ve seen lads try to save a few quid by using whatever rubbish was lying about the yard, but different farm road gravel types do very different things. If you use stone that’s too fine, it’ll just wash away with the first heavy rain, leaving you with nothing but a muddy trench and a broken suspension. Don’t be cheap when it comes to the foundation; it’s better to spend the money on decent aggregate now than to pay for it twice when the track disappears into the muck next winter.

Final Thoughts

At the end of the day, you aren’t just fixing a path; you’re protecting your ability to move stock and gear when the weather turns foul. I’ve seen too many men treat a track like an afterthought, only to realize they’ve spent a fortune on diesel and broken suspension because they ignored a bit of water runoff management. If the water isn’t moving where you want it to, it’s going to move your road instead.

Don’t go out and buy the most expensive farm road gravel types just because a salesman tells you they’re “engineered” for heavy loads. Most of that is marketing fluff. What you need is a solid foundation and a bit of common sense regarding drainage. If you get the basics right—the drainage, the compaction, and the slope—you won’t be fighting the land every time a tractor needs to get to the far field. It’s about protecting your margins by not letting the ground swallow your equipment. Get it right once, do it properly, and then get back to the business of actually making a living.

Five Ways to Stop Your Tracks From Eating Your Profits

  • Stop chasing the mud with more diesel; if you’re constantly driving around a soft patch to avoid a bog, you’re burning money and compacting the ground so badly it’ll never drain again. Fix the drainage or move the track.
  • Don’t wait for a tractor axle to snap before you look at your stone. A bit of hardcore spread when the ground is firm is a cheap insurance policy; waiting until you’re stuck up to the door in a spring deluge is just expensive madness.
  • Watch your runoff. If your track is acting like a river every time we get a decent soaking, you aren’t maintaining a road, you’re building a canal that’s washing your good topsoil straight into the neighbor’s ditch.
  • Keep an eye on the edges. I’ve seen too many men focus on the middle of the track while the sides are crumbling away into nothing; once those edges go, the whole width narrows and you’ll find yourself scraping your mirrors on every pass.
  • Check the culverts before the rain does. A blocked pipe is a small thing to fix in July, but in November, it’s the difference between a working track and a pond that’s turned your field access into a liability.

The Bottom Line on Tracks

Stop looking at track maintenance as a luxury; if you aren’t spending a bit on stone and drainage now, you’ll be paying triple in broken suspension and wasted diesel when the winter sets in.

It isn’t just about the surface; if you don’t respect the ground and the way water moves across it, you’re just layering expensive gravel on top of a bog that’ll swallow it whole by February.

Don’t fall for the shiny new kit trap—a well-maintained, simple track is worth more to your cash flow than a fancy piece of machinery that ends up rusting in the shed because it was too much trouble to use properly.

The Bottom Line on Your Tracks

At the end of the day, a farm track isn’t just a bit of dirt you drive over; it’s a piece of infrastructure that either supports your operation or slowly drains your bank account. If you’ve listened to a word I’ve said, you’ll know that keeping on top of drainage, choosing the right hardcore, and not waiting for a tractor to sink up to its axles before you act is the difference between a working farm and a money pit. Don’t get distracted by fancy machinery that promises to fix everything in an afternoon. It always comes back to the basics: manage your water, watch your surface, and respect your margins. If you treat your tracks like an afterthought, they will eventually become your most expensive problem.

I’ve spent forty years watching men try to outrun a bad track with more diesel and bigger tyres, only to end up with a broken differential and a mounting pile of repair bills. It’s easy to look at a bit of standing water and think it’ll dry out by Tuesday, but nature doesn’t care about your schedule. Take the time to do it right the first time, even when the weather is against you and the paperwork is piling up. A well-maintained track is a quiet part of a successful farm—you won’t notice it working, but you’ll certainly feel the sting if it fails you when the weather turns and the cattle need moving.

Frequently Asked Questions

When is the right time to bring in the stone to avoid just pushing it straight into the muck and wasting the money?

If you wait until the ground is a soup of slurry and rain, you’re just throwing money into a hole. You’ll spend half your budget just trying to find where the stone went, only to have it disappear into the muck by next Tuesday. You bring the stone in when the ground is firm enough to carry the weight, but before the heavy weather sets in. Aim for that window when the grass is drying out—not when you’re fighting a losing battle against the mud.

How do I know if I'm overspending on hardcore for a track that's only going to be used by a single quad bike and a Land Rover?

You’re overspending if you’re treating a farm track like a driveway in a housing estate. If it’s just a quad and a Defender, you don’t need a thick layer of expensive, crushed granite to keep it pretty. You need a solid base and enough stone to stop the wheels from churning the soil into a slurry. If you’re buying more than a few loads of coarse, chunky hardcore to bridge the wet spots, you’re just throwing cash into a hole.

If I've got a particularly wet patch that refuses to drain no matter what I do, is it better to fix it or just reroute the track entirely?

Look, if you’re fighting a permanent bog, you’ve already lost. I’ve spent too many afternoons throwing hardcore into a hole only to watch the rain wash it straight through to the subsoil. If it’s a natural hollow and the rainfall is heavy, stop throwing good money after bad. Reroute the track. It’ll cost you a bit of time and a bit of diesel now, but it beats the endless cycle of broken axles and wasted stone.

How drainage affects productivity on wet ground.

Wet Ground Costs You Two Months a Year

I remember standing in the lower field back in ’94, watching a brand-new, top-of-the-line slurry tanker sink up to its axles in what looked like solid ground just a week prior. I’d spent a small fortune on a “soil health” consultant who promised a miracle cure involving expensive organic additives, but all I had to show for it was a lost afternoon and a staggering repair bill. People love to talk about nutrient management and high-spec genetics, but they consistently miss the point of how drainage affects productivity on a real, working farm. If your soil can’t breathe because it’s holding onto a month’s worth of rain, all the expensive fertilizer in the world is just going to wash into the ditch while your margins disappear.

I’m not here to sell you a subscription to a glossy magazine or a piece of kit that’ll be gathering dust in the shed by November. I want to talk about the hard reality of what happens when your ground stays heavy and your livestock start losing condition. I’ll be laying out exactly how to spot a failing system before it costs you a season, focusing on the real numbers that matter to your bank balance.

Table of Contents

Wet Paddock Empty Pockets How Drainage Affects Productivity

Wet Paddock Empty Pockets How Drainage Affects Productivity

I’ve spent forty years watching men chase the latest breed of heifer while their best grazing land turns into a soup of silt and diesel. You can have the finest genetics in the county, but if your ground stays sodden through May, those animals are just expensive heaters for the mud. When you’re managing field water saturation poorly, you aren’t just dealing with a bit of damp; you’re watching the grass die from the bottom up. Without proper air in the soil, the roots can’t breathe, and once that happens, you’re essentially growing nothing but a very expensive bog.

The real sting, though, is in the drainage infrastructure ROI. I remember investing in a new set of tiles on the lower ten hectares back in ’94. At the time, the salesman made it sound like a luxury, but seeing the difference in how the sward held up during a wet spring made the cost look like pocket change. If you ignore the water, you lose the grass; if you lose the grass, you lose the margin. It’s a simple, brutal calculation that most people try to overcomplicate with spreadsheets instead of just looking at the ground.

Drowning Your Profits Managing Field Water Saturation and Root Rot

Drowning Your Profits Managing Field Water Saturation and Root Rot

You can have the best genetics in the county, but if those roots are sitting in a soup of stagnant water, you’re just subsidising the weeds. When the ground stays sodden for weeks on end, you aren’t just dealing with a bit of a damp field; you are actively preventing root rot in agriculture by failing to let the soil breathe. Once that oxygen is gone, the root systems start to die back, and a cow won’t graze a patch of grass that’s turned to grey mush. You end up with a field that looks green from a distance but offers nothing but empty calories to the herd.

I’ve seen too many lads invest in fancy new breeding stock while ignoring the fact that their managing field water saturation is a complete shambles. If you can’t get the water out, you can’t get the grass up. It’s a simple equation: no air in the soil means no growth, and no growth means you’re buying in expensive feed to make up the difference. That is where the real money disappears—not in the price of the heifer, but in the drainage infrastructure ROI you neglected five years ago.

The Invisible Thief Soil Aeration and Crop Yield Losses

The Invisible Thief Soil Aeration and Crop Yield Losses

You can have the best seed in the country and the most expensive fertilizer money can buy, but if your soil is packed tight like a wet brick, you’re just throwing cash into a hole. Most folk look at a waterlogged field and see a mess; I see a lack of oxygen. Plants need to breathe just as much as we do, and when you’re managing field water saturation poorly, those tiny air pockets in the soil disappear. Without that air, the roots essentially suffocate in the dark. It’s a slow, quiet death that you won’t notice until the grass looks thin or the clover fails to take.

This is where the real sting of soil aeration and crop yield losses hits your bottom line. You might not see a sudden die-off, but you’ll see a stunted, sickly pasture that never quite reaches its potential. It’s a thief that works in the shadows, stealing the vigor out of your sward before it even hits the surface. If you haven’t invested in the right drainage infrastructure, you aren’t just growing grass; you’re growing a deficit that will show up in your bank balance come calving season.

Subsurface Drainage Systems Efficiency Avoiding the Expensive Mistake

Now, here is where most men lose their shirts. I’ve seen plenty of lads go out and spend a fortune on the fanciest plastic piping and heavy machinery, thinking they can simply outrun a heavy winter. They install a system based on a map and a salesman’s promise, only to find the water is still sitting where it shouldn’t be come March. The truth is, subsurface drainage systems efficiency isn’t about how much pipe you bury; it’s about whether that pipe actually connects to a way out. If your outlets are blocked or your gradients are off by a fraction, you haven’t bought a solution—you’ve just bought an expensive way to line the bottom of your fields with plastic.

You have to look at the drainage infrastructure ROI through a long lens. If you don’t get the layout right the first time, you aren’t just losing the cost of the materials; you’re losing the years of growth you’ll miss while trying to fix it. I’d rather spend three extra days surveying the ground and checking the natural fall of the land than spend three years wondering why my margins are thinner than a newborn lamb.

Measuring Drainage Infrastructure Roi Before the Kit Sits Idle

I’ve seen too many men walk into a dealership with a chequebook and a dream, thinking a new set of tiles or a fancy pump will solve a decade of bad management. Before you commit to a massive outlay, you need to stop looking at the brochure and start looking at your ledger. Calculating your drainage infrastructure ROI isn’t about how much the kit costs; it’s about how many more days your cattle can stay on the hill in November without turning the field into a slurry pit. If the investment doesn’t translate into more grazing days or a measurable improvement in the weight of your weaners, you haven’t bought an asset—you’ve just bought a very expensive piece of iron to sit in the shed.

You have to be clinical about it. I want to know if the investment is actually improving soil aeration and crop yield in your permanent pasture, or if you’re just moving water from one problem area to another. If you can’t point to a specific field where the grass is actually staying green and firm through a wet spell, then you’re guessing. And in this business, guessing is a luxury we can’t afford.

Five Ways to Stop Your Profits From Sinking Into the Mud

  • Watch the grass, not the gadget. Before you go ordering a new drainage system based on a brochure, walk your worst field after a heavy rain. If the water is sitting on top, you’ve got a compaction problem; if it’s soaking in and never leaving, you’ve got a subsoil problem. You can’t fix what you haven’t actually looked at.
  • Don’t let lameness become your biggest overhead. A wet paddock isn’t just a loss of grass; it’s a breeding ground for foot rot and scald. I’ve seen more money lost to vet bills and culled ewes because of soft ground than I ever have to actual disease. Keep the feet dry, or the bank account will go dry shortly after.
  • Check your outlets before the season hits. There is no sense in spending thousands on subsoil pipes if the final ditch is choked with silt or weeds. I’ve seen men buy the most expensive kit in the county only to find it useless because they neglected a ten-foot stretch of ditch at the bottom of the hill.
  • Mind the timing of your heavy gear. If you’re driving a tractor over ground that’s even slightly too soft, you aren’t just making ruts; you’re crushing the very soil structure you’re trying to save. You’ll spend the next three years trying to grow grass through a layer of compacted concrete you made yourself.
  • Run the numbers on the long game. Drainage isn’t a one-off purchase like a new feeder; it’s a long-term play on your land’s value and your annual margins. If a drainage project doesn’t translate into more days on grass or better weaning percentages, it’s just an expensive way to move water from one part of your farm to another.

The Bottom Line on Water and Wealth

Stop looking at drainage as a luxury for “good years”; it’s the difference between a field that pays for its own upkeep and one that just eats your diesel and breaks your back.

If you can’t walk a paddock in November without feeling like you’re treading through a soup, you’ve already lost the battle for your grass—and your margins.

Don’t let a salesman convince you a fancy new system is a magic wand; if you haven’t checked your soil type and your rainfall patterns first, you’re just buying an expensive way to bury pipes in the wrong place.

The Bottom Line

At the end of the day, you can buy all the fancy supplements and high-spec feed you like, but if your ground is a sponge, you’re just throwing money into a hole. We’ve looked at how saturation kills your roots, how poor aeration chokes your yield, and why a poorly installed sub-surface system is just an expensive way to move mud around. It all circles back to the same truth: your profit is tied directly to how well that water moves through your soil. If you aren’t managing your drainage, you aren’t managing your farm; you’re just waiting for the weather to decide if you can afford to stay in business this year.

I’ve spent forty years watching men go bust because they focused on the price of the calf instead of the quality of the paddock that raised it. Don’t get distracted by the shiny new kit or the latest marketing brochures promising a miracle cure. Focus on the fundamentals—the grass, the feet, and the flow of water. If you get the ground right, the rest of the business has a fighting chance to stand on its own two feet. It isn’t glamorous work, and it certainly won’t make for a good photo in a magazine, but getting your drainage right is the most honest investment you will ever make in this life.

Frequently Asked Questions

How do I know if I’m actually dealing with a drainage problem or if it’s just a particularly wet season that’ll pass?

Look, if you’re waiting for the sun to bake the problem away, you’re already losing money. A wet season is a calendar event; a drainage problem is a structural failure. If you see the same patches of poached ground every spring, or if your grass stays dormant while the neighbor’s is pushing, that’s not weather—that’s your soil’s inability to breathe. If the water lingers long after the rain stops, your pockets are already leaking.

Is it worth spending the money on deep subsoil drainage now, or am I better off just managing the surface water with better grazing rotations?

If you’re asking that, you’re likely trying to avoid a massive bill. Look, grazing rotations are fine for managing the surface, but they won’t fix a heavy clay that stays sodden until July. If your ground is holding water like a sponge, no amount of moving sheep around will bring the grass back or save your soil structure. If the subsoil is dead, your rotations are just moving the problem from one bog to another.

At what point does the cost of fixing the ground actually outweigh the value of the extra grass I'll get out of it?

You look at the cost of the pipe and the diesel, then you look at the margin on a lamb or a calf. If you’re spending five grand to squeeze an extra ten percent of grass out of a bit of marginal hill ground that’ll never carry a heavy cow anyway, you’re just rearranging the deck chairs on the Titanic. If the ground won’t hold a decent stocking rate without turning into a slurry, fix it. If it’s just a bit soft in March, leave it be.

How hedgerows should be managed via rotation.

Cutting Hedges on Rotation Instead of Annually

I’ve spent enough time watching “consultants” in clean wellies point at a map and tell me how hedgerows should be managed to satisfy some new environmental scheme, but they never seem to account for the actual weather or the way a hungry ewe looks at a gap in the hawthorn. They’ll talk to you about biodiversity metrics and carbon sequestration until you’re blue in the face, but they won’t tell you how a poorly cut hedge becomes a breeding ground for parasites or a way for your best stock to wander straight into the neighbor’s rye. If you’re looking for a lecture on theoretical ecology, go find a university textbook; if you want to know why your boundaries are failing you, listen to someone who has actually had to fix them.

I’m not here to sell you a fancy management plan or a piece of machinery that’ll be rusting in the shed by November. I’m going to tell you how to maintain your boundaries so they actually protect your margins and keep your livestock where they belong. We’ll look at the real cost of neglect, the timing that actually works with the seasons, and why some of the most expensive advice out there is nothing more than expensive guesswork.

Table of Contents

Understanding How Hedgerows Should Be Managed

Understanding How Hedgerows Should Be Managed.

Now, you’ll hear plenty of talk about biodiversity in agricultural hedges from people who’ve never had to pull a stray ewe out of a bramble thicket at five in the morning. Don’t get me wrong, having a bit of life in the margins is fine—it’s good for the pollinators and keeps the soil from washing into the bottom field—but a hedge isn’t a wilderness; it’s a boundary. If you treat it like a nature reserve, you’ll end up with a gap large enough for a heifer to walk through, and then you’re looking at a very expensive evening of chasing stock through the neighbor’s wheat.

The real trick is finding that balance between a functional barrier and a living thing. I’ve found that hedgerow maintenance timing is where most people trip up. If you go in too early in the spring, you’re destroying the very nesting sites everyone says they want to protect. If you wait too long, the wood gets leggy and brittle, and you’re better off using traditional hedge laying techniques to get it back to a tight, useful state. You want a hedge that’s thick enough to stop a sheep but managed well enough that it doesn’t become a graveyard for your expensive machinery.

Key Things to Know

Key Things to Know: Hedgerow Maintenance Timing

First, stop looking at your hedges as just a fence that happens to be green. If you’re treating them like a utility, you’re doing it wrong. You need to understand that hedgerow maintenance timing isn’t something you pick from a calendar just because the sun is out; it’s about what’s happening in the soil and what’s nesting in the branches. If you go in with the flails at the wrong time, you aren’t “tidying up,” you’re stripping away the very cover that keeps your livestock from getting stressed and keeps the local ecosystem from collapsing.

I’ve seen too many lads rush the job in early spring to look “neat” for the neighbors, only to realize they’ve just wiped out the entire season’s worth of biodiversity in agricultural hedges. You’ll find that the birds leave, the beneficial insects vanish, and suddenly you’re dealing with pests that a healthy hedge would have kept in check. It’s a balance. You want a boundary that holds, yes, but you also want a boundary that works for you. If you manage it with a bit of foresight, the hedge becomes an asset; if you rush it, it’s just another thing you’ve broken.

Practical Tips and Steps

Practical Tips and Steps for hedge maintenance.

Now, if you’re going to get stuck in, don’t just go out there with a flail because the weather looks fine and you’ve got a gap in the diary. You need to respect the hedgerow maintenance timing if you want anything other than a line of useless sticks. If you cut too early in the spring, you’re stripping away the nesting sites and the very thing that keeps the insects moving through your fields. I’ve seen too many lads scalp a hedge in March only to wonder why their crops are struggling with pests later in the year. You want to wait until the birds have moved on and the sap isn’t running like a tap.

If you have the time and the patience—and I don’t mean the kind of patience you find in a brochure—look into traditional hedge laying techniques. It’s more work, certainly, but a well-laid hedge is a living wall that stays thick and stock-proof for years, rather than a row of gaps waiting for a heifer to find them. It’s about building something that lasts, not just clearing a way for a tractor to pass through.

Common Mistakes to Avoid

The biggest mistake I see—and I’ve made it myself when I was younger and in a hurry—is treating a hedge like a roadside curb. People think you just wait until it’s a tangled mess and then go in with a flail to flatten it. That’s not management; that’s just destruction. If you go in too heavy or at the wrong time, you aren’t just cutting back wood, you’re stripping the structure that holds your field together. You end up with a “leggy” hedge that’s nothing but bare sticks at the bottom, providing zero shelter for your stock and even less for the wildlife.

Another trap is ignoring the impact of hedge management on pollinators and the birds that actually keep your pests in check. I’ve seen lads blast through a boundary in late spring because they wanted the field looking “tidy,” only to realize they’ve just wiped out the entire nesting season. You have to get your hedgerow maintenance timing right, or you’re just paying for diesel to do damage. A hedge is a living asset, not a nuisance to be cleared; treat it like a piece of machinery that needs regular, precise tuning, or it’ll eventually break down on you.

Final Thoughts

At the end of the day, a hedge isn’t a decorative feature for a garden centre catalogue; it’s a working boundary that either holds your stock or lets them wander. I’ve seen too many lads treat it like an afterthought, only to find themselves chasing cattle through a gap that wasn’t there two seasons ago. If you get your hedgerow maintenance timing right, you aren’t just saving yourself the headache of repairs; you’re protecting the very infrastructure of the farm.

Don’t get caught up in the latest green-washing trends, either. While everyone is talking about the impact of hedge management on pollinators, remember that a healthy, thick hedge serves your bottom line first by providing shelter and windbreaks. If you can manage to balance your practical needs with a bit of sensible hedgerow conservation practices, you’ll find the land takes care of itself. It’s about working with the seasons, not trying to outrun them. Keep your eyes on the ground, keep your boundaries tight, and don’t let the easy way out cost you a herd.

Five ways to keep your hedges from becoming a liability

  • Stop the “once every five years” madness. If you wait too long to lay or trim, you aren’t managing a hedge; you’re managing a line of spindly sticks that won’t hold a sheep to save their lives. Keep a regular rhythm so you aren’t fighting a losing battle against woody, unmanageable growth.
  • Watch the base of the hedge as closely as you watch your ewes. If you let the bottom go bare and woody, you’ve lost your shelter and your security. A hedge that doesn’t grow thick at the ground level is just a fence that lets the wind through and the livestock out.
  • Don’t be too precious about the “wild” look if it means losing control. There’s a fine line between a good bit of biodiversity and a mess that swallows your gate and makes it impossible to get the tractor through without a headache. Manage for the birds, but don’t let them manage you.
  • Check your species mix before you start cutting. If you’ve got a hedge that’s nothing but hawthorn and it’s starting to look thin, you’re one bad season away from a gap. A bit of hazel or blackthorn adds the kind of structural integrity that keeps a boundary solid when the weather turns foul.
  • Mind the timing like your margins depend on it—because they do. Cutting at the wrong time of year is a quick way to ruin nesting sites or, worse, leave your stock without any cover just when the frost starts biting. If you can’t look at the calendar and the weather forecast together, don’t pick up the shears.

The bottom line on your boundaries

A hedge isn’t just a bit of scenery for the neighbors; if it’s thin, gappy, or poorly managed, it’s a leak in your fence line that’ll eventually cost you a lost animal and a lot of wasted time.

Stop looking for a magic tool to fix a bad hedge; the best management is consistent, seasonal work that respects the growth cycle rather than just hacking away whenever you feel like it.

Don’t get distracted by the fancy environmental grants if the hedge itself is rubbish—focus on making the boundary stock-proof and functional first, or you’re just subsidizing a mess.

The Long View from the Gate

At the end of the day, managing your hedges isn’t about ticking a box for some environmental scheme or making the farm look tidy for the neighbors. It’s about the practicalities of keeping your stock where they belong and ensuring your boundaries don’t become a liability that costs you more in repairs and lost animals than it’s worth. If you get the cutting cycle right, keep an eye on the thickness, and don’t let the gaps get wide enough for a heifer to squeeze through, you’ve done the heavy lifting. It comes down to consistent, sensible maintenance rather than waiting for a boundary to fail and then scrambling to fix it when the weather is at its worst.

I’ve seen plenty of men spend a fortune on fancy new fencing only to let their hedges rot into nothingness, and I’ve seen the opposite—people who treat their hedges like they’re part of the herd itself. A well-managed hedge is a bit like a good suckler cow; it requires a steady hand and a bit of patience, but it pays dividends in security and longevity. Don’t get distracted by the latest shiny piece of kit or the newest subsidy paperwork. Just look at your ground, watch how the wind hits it, and manage your boundaries with the same common sense you apply to your grass. That’s how you keep a farm running for the next generation.

Frequently Asked Questions

If I cut these hedges back too hard to keep the stock in, am I just inviting a decade of nothing but brambles and hawthorn nothingness?

You’re likely inviting exactly that. If you hack them back to the old wood, you’re not just “tidying up”—you’re killing the regenerative capacity of the hedge. You’ll end up with a line of dead, brittle sticks that won’t hold a sheep to save your life, and a thicket of brambles that’ll make your life a misery come spring. Cut it back, sure, but leave enough life in the stem to grow back.

At what point does a "natural" hedge stop being a boundary and start becoming a liability for my sheep during a wet spring?

It stops being a boundary the moment it starts holding water instead of sheep. If your hedge is so thick and overgrown that it’s creating a damp, stagnant microclimate at the base, you’re just building a nursery for foot rot. In a wet spring, a “natural” hedge that prevents airflow is a liability. If the ground under that hedge stays sodden long after the rest of the field has dried, you’re looking at a massive vet bill.

How much is it actually worth to me in terms of stock protection versus the cost of the diesel and the time spent doing the work?

It’s a simple bit of maths, really. You have to weigh the diesel and the hours in the tractor against the price of a single heifer slipping through a gap or a ewe getting stuck in a bramble thicket. If a hedge is thin, you aren’t just losing privacy; you’re losing stock. I’ve seen more money lost to “escaped” livestock and broken fences than I ever spent on a good flail. If the hedge works, it pays for itself in peace of mind.

How weed control works in grassland.

Docks Come Back Because the Sward Is Open

I’ve lost count of how many times I’ve seen a young lad walk into the mart with a shiny new sprayer and a stack of glossy brochures, convinced that a bit of chemistry is a magic wand. They think they can just spray their way out of a problem, but they haven’t a clue about how weed control works in grassland when the soil is heavy and the rain hasn’t let up for a fortnight. I learned that the hard way back in ’94, wasting a small fortune on expensive herbicides that did nothing but sit on the surface of the leaves because I hadn’t bothered to check the actual condition of the ground first.

I’m not here to sell you a specific brand or a miracle cure that’ll leave your bank balance looking as thin as a winter lamb. What I’m going to do is tell you what actually happens when that spray hits the leaf and why most of the “expert” advice you read is just a way to move stock. We’ll look at the hard numbers, the timing of the seasons, and why understanding your pasture is more important than any bottle you can buy.

Table of Contents

Understanding How Weed Control Works in Grassland

Understanding How Weed Control Works in Grassland

Now, before you go grabbing a sprayer and hoping for the best, you need to understand that weeds don’t just appear; they’re symptoms of a field that’s lost its balance. Most folks think of weed control as a simple matter of spraying something on a plant to kill it, but it’s more about competition. If your grass is vigorous and covers the ground well, there’s no room for the opportunists to move in. This is why grazing management for weed suppression is often more effective than any chemical you can buy in a plastic jug. If you let the stock overgraze the good stuff, you’re essentially rolling out the red carpet for the docks and thistles.

When you do decide to intervene, you have to be smart about your choice of tools. You’ll often hear talk about selective vs non-selective weed killers, and that’s where a lot of the expensive mistakes happen. A non-selective spray is a blunt instrument—it’ll kill the weed, but it’ll take your best rye-grass down with it, leaving you with nothing but bare soil and more room for the weeds to return next season. You want something that targets the specific nuisance without stripping the life out of your forage.

Key Things to Know

Key Things to Know: Weed Killer Types

First, you need to understand the difference between selective vs non-selective weed killers. If you go out there and spray everything in sight with a broad-spectrum chemical, you aren’t managing a pasture; you’re just resetting the clock on a dead field. You’ll kill the weeds, sure, but you’ll also kill the very grass that pays the bills. I’ve seen enough men ruin a good sward because they wanted a quick fix, only to find themselves staring at a patch of bare earth that invites more trouble than it solves.

Then there is the matter of timing. You can have the most expensive chemical in the shed, but if you aren’t looking at the lifecycle of the plant, you’re just wasting money. For instance, if you aren’t serious about preventing thistle regrowth in fields, you’re better off not botherng at all. You have to hit them when they are actually growing, not when they’ve already gone to seed and are ready to colonise the next three hectares. It’s about working with the season, not trying to fight it with a spray tank and a prayer.

Practical Tips and Steps

Practical Tips and Steps for weed suppression.

First, stop looking at the sprayer and start looking at the calendar. You can have the most expensive chemical in the shed, but if you spray when the weeds are already bolting or when the grass is too stressed by a dry spell, you’re just paying for expensive water. I’ve learned the hard way that timing is everything; you want to hit them when they’re actively growing but before they’ve dropped a thousand seeds into your soil. If you’re trying to tackle a field heavy with dock or thistle, focus on grazing management for weed suppression rather than just relying on a canister. Keeping the sward at the right height can often starve the smaller weeds of light before they even get a foothold.

When you do finally pull the trigger, be smart about your choice between selective vs non-selective weed killers. Using a non-selective spray on a good ley is like using a sledgehammer to crack a nut—you’ll kill the weed, but you’ll leave a bare patch that’ll be filled with nothing but rushes by next spring. I’d rather spend a bit more on a selective product that leaves my clover and ryegrass intact than spend the next three years trying to re-seed a graveyard.

Common Mistakes to Avoid

The biggest mistake I see—and I’ve certainly made it myself—is treating herbicide like a magic wand rather than a tool. People see a patch of thistle and think a quick spray will solve the problem forever. It won’t. If you aren’t looking at your grazing management for weed suppression, you’re just playing a losing game of whack-a-mole. If the ground is too poached or the stock isn’t hitting the right areas, those weeds will be back before the next lambing season. You can’t just spray your way out of poor husbandry.

Another trap is getting caught up in the “newest” thing without checking the basics. I’ve seen lads spend a fortune on fancy equipment only to realize they’ve chosen the wrong selective vs non-selective weed killers for the specific ground they’re standing on. If you use a non-selective killer on a field that needs a bit of diversity to hold its structure, you’ve just turned your pasture into a dirt patch. It’s about timing and the specific plant, not just hitting everything in sight with a chemical cocktail.

Final Thoughts

At the end of the day, you have to stop looking at weed control as a chore to tick off a list and start seeing it as a way of protecting your margins. I’ve spent enough years watching a patch of thistle or dock take over a good bit of acre to know that if you don’t stay on top of it, the ground will eventually own you, not the other way around. Whether you are leaning on grazing management for weed suppression or deciding when to bring the sprayer out, it always comes back to the same thing: timing and observation.

Don’t get caught up in the latest marketing hype about some miracle product that promises to fix everything overnight. Most of that is just expensive water in a fancy bottle. If you get your head around the difference between selective vs non-selective weed killers and you actually watch what’s happening on your own soil, you’ll save more than you spend. It isn’t about having the perfect field; it’s about making sure the grass is doing the work and the weeds aren’t doing the stealing.

Five ways to stop your pasture from becoming a botanical museum

  • Don’t spray just because the calendar says so; look at the ground and the weather first. If you’re spraying into a dry spell or right before a heavy soak, you’re just paying a chemist to waste their product on a field that won’t take it.
  • Stop treating the symptoms and start looking at the cause. If you’ve got docks everywhere, it’s usually because your soil is compacted or your stocking rate is wrong—you can drench that field with all the herbicide in the country, but if the ground is a hard pan, those weeds will be back before the next lambing.
  • Timing is everything, and “eventually” is a word that costs you money. You want to hit those weeds when they’re actually growing and competing with the grass, not when they’ve already gone to seed and turned your best hectare into a patch of nothing.
  • Beware the “magic bullet” sales pitch. I’ve seen enough lads buy a specialized spray for a specific weed only to find it doesn’t touch the stuff that’s actually choking the sward. Know exactly what you’re fighting before you open the drum.
  • Watch your margins on the chemicals. It’s easy to get caught up in wanting a “perfect” field, but if the cost of the spray and the diesel to run the sprayer eats more than the extra grass will ever return, you’re just working hard to go broke.

The bottom line on weeds

Stop looking at weed control as a way to make your fields look pretty; look at it as protecting your forage quality so you aren’t paying for expensive concentrates just because your grass isn’t doing its job.

Timing is everything, and if you miss the window when a weed is actually vulnerable, you’re just spraying money into the wind and waiting another year to try again.

Don’t get blinded by the latest chemical on the market—if it doesn’t work on your specific ground and your specific weed problem, it’s just another piece of expensive kit sitting in the shed.

The Bottom Line

At the end of the day, weed control isn’t about following a fancy chemical schedule or buying the most expensive spray the salesman can pull out of his briefcase. It’s about knowing your ground, watching the weather, and understanding that a thistle or a dock is just a thief stealing the nutrients meant for your grass. If you get the timing wrong, or if you ignore the signs until the field looks like a jungle, you aren’t just losing forage quality—you are losing hard cash from your bank account. Keep your eyes on the soil, keep your timing sharp, and remember that consistency beats a sudden burst of effort every single time.

Farming is a long game, and it’s one played in seasons, not in single afternoons. You’ll have years where the rain makes everything difficult and years where the weeds seem to win despite your best efforts, but that’s just the nature of the beast. Don’t get discouraged by a bad patch; instead, use it as a lesson to refine how you read your fields. If you focus on the fundamentals—the grass, the feet, and the cash flow—you’ll find that a well-managed pasture is the most reliable asset you own. It’s not about being perfect; it’s about staying ahead of the curve so that when the market turns, you’re the one with the best stock and the strongest margins.

Frequently Asked Questions

If I spray for broadleaf weeds now, am I going to kill off the clover I've spent years trying to establish?

If you’re using a standard broadleaf herbicide, then yes, you’re likely tossing your clover straight into the muck. Clover isn’t a weed; it’s free nitrogen and high-quality protein, but most sprays don’t know the difference between a thistle and a white clover leaf. Before you touch the trigger, you’d better check the label for “selectivity.” If it doesn’t explicitly say it’s safe for legumes, you’re essentially paying to kill your own forage.

At what point does a few thistles actually become a financial problem, or am I just chasing ghosts in the field?

If you’re counting individual thistles, you’re chasing ghosts. I don’t care about a few strays; I care about the patch. If you see them moving from isolated plants into clusters that actually crowd out your clover or rye, you’ve got a problem. Once they start competing for the nutrients and the light, you aren’t just looking at a nuisance—you’re looking at a measurable drop in your dry matter per hectare. That’s when the math stops working.

Is it worth the diesel and the chemical cost to treat a patchy field, or am I better off just reseeding the whole lot?

It depends entirely on what’s under those patches. If it’s a bit of thistle or dock that’s just taken hold, a targeted spray is cheaper than a whole new seed lot. But if the ground is tired and the grass is thinning out because the structure is gone, you’re just throwing money at a sinking ship. Don’t spray a field that’s already lost the battle; you’re just paying to fertilize weeds.

How to choose grass species for ground.

Choosing a Mixture for the Ground You Have

I’ve lost more money to fancy seed catalogues than I have to bad weather, and I’ll be damned if I’m going to let you do the same. Every spring, some lad in a clean waistcoat turns up with a brochure full of “high-spec” mixes, promising you the world if you just buy into their specific blend of clover and perennial ryegrass. They make it sound like a science project, but they never ask you about your soil type or how much rain actually hits your hills in November. If you’re looking for a textbook manual on how to choose grass species, you’ve come to the wrong place; I’m not interested in what the salesman says works, I’m interested in what actually survives a wet February without turning into a patch of mud and weeds.

I’m not here to sell you a dream or a bag of expensive seed. My aim is to show you how to look at your own ground and pick a sward that actually puts weight on a calf without breaking your bank balance. We’re going to talk about real margins—the kind that account for your specific drainage and your local rainfall—so you can stop throwing cash into a hole in the ground and start growing something that actually pays its way.

Table of Contents

Understanding How to Choose Grass Species

Understanding How to Choose Grass Species.

Before you even look at a seed catalogue, you need to look at your own feet. I’ve seen too many lads spend a fortune on “premium” mixes only to find they’ve planted something that thrives in a greenhouse but dies the moment a real Scottish wind blows or the ground gets a bit heavy. You have to start with soil type and grass compatibility; if you’re trying to force high-spec ryegrass into heavy, wet clay without a proper drainage plan, you aren’t farming, you’re just subsidising the weeds.

You also need to stop thinking about what the grass does in June and start thinking about what it does in the gaps. A fancy sward might look lush in the spring, but if it has no drought tolerance in grasses when the July sun actually decides to show up, your forage quality assessment is going to be a disaster come autumn. I don’t care how much protein the brochure promises; if the seasonal growth patterns don’t line up with when your cows are actually hungry, that seed is nothing more than expensive compost.

Key Things to Know

Key Things to Know: Soil Compatibility.

Before you even look at a seed catalogue, you need to stop thinking about what the brochure says and start looking at what your land actually does. I’ve seen too many lads go out and buy the most expensive perennial ryegrass mix on the market, only to find it’s useless because they didn’t account for soil type and grass compatibility. If you’ve got heavy, wet clay and you’re trying to force a species that demands well-drained ground, you aren’t farming; you’re just subsidising the weeds. You have to know your ground better than the man selling you the bag.

Then there is the matter of when the grass actually shows up. A flashy mix might look great in a June photograph, but if it lacks drought tolerance in grasses, you’ll be staring at a dust bowl come August while your suckler cows are looking thinner than a ghost. You need a sward that handles the seasonal growth patterns of this part of the country—something that keeps pushing when the weather turns fickle. If the grass doesn’t have the backbone to survive a dry spell or a soaked spring, it’s nothing more than expensive compost.

Practical Tips and Steps

Practical Tips and Steps for soil matching.

First, stop looking at the seed catalogue and start looking at your own fields. Before you sign anything, you need to get a handle on your soil type and grass compatibility. I’ve seen men spend a fortune on high-spec ryegrass only to watch it choke out on heavy, wet clay within two seasons. If your ground stays sodden from November to March, you need species that won’t drown, not the ones that promise the highest theoretical protein. You have to match the plant to the dirt you actually have, not the dirt you wish you had.

Once you’ve settled on a mix, you need to plan for the gaps. Don’t just chase the spring flush; that’s where most people trip up. You need to account for seasonal growth patterns so you aren’t staring at bare earth in the late summer when the heat hits. I always tell the youngsters: if your mix doesn’t have something with decent drought tolerance to carry you through a dry spell, you’re just setting yourself up for a massive forage bill in August. It’s about managing the lean times, not just the feast.

Common Mistakes to Avoid

The biggest mistake I see is people buying a seed mix based on a glossy brochure rather than looking at their own muck. You’ll see lads spending a fortune on high-spec perennial ryegrass only to find out it has zero drought tolerance in grasses when July hits and the ground turns to concrete. If your field doesn’t hold moisture, don’t try to force a species that needs a constant soak; you’re just paying for a fancy way to watch your profit evaporate.

Another trap is ignoring the marriage between your dirt and your seed. You can have the best nutrition on paper, but if you haven’t factored in soil type and grass compatibility, you’re fighting a losing battle from day one. I’ve seen enough men try to plant heavy-feeding species on thin, acidic ground just because the neighbor’s field looked lush. It doesn’t matter how much fertilizer you throw at it; if the foundation is wrong, you’re just throwing money into a hole in the ground. Stick to what the ground wants to grow, not what the salesman wants to sell.

Final Thoughts

At the end of the day, you can spend all the time in the world staring at seed catalogues, but the ground doesn’t care about a glossy brochure. It only cares about what it can actually support. Before you commit a single penny to a new mix, look at your hills, check your drainage, and remember that soil type and grass compatibility will dictate your profit far more than any fancy nutritional label. If you plant something that can’t handle your specific wet spells or your summer dry patches, you aren’t farming; you’re just gambling with your overheads.

I’ve learned the hard way that a perfect sward on paper is useless if it doesn’t match your actual seasonal growth patterns. You need grass that fills the gaps when the weather turns temperamental, not just something that looks lush for three weeks in May. Don’t get blinded by the promise of high yields if that forage lacks the backbone to survive a dry July. Keep your eyes on the drought tolerance in grasses and your feet on the actual soil. If the grass doesn’t work for your land, it won’t work for your bank balance.

Five Things the Seed Merchant Won't Tell You

  • Stop looking at the nutritional label and start looking at your soil. If you’ve got heavy, wet clay and you’re trying to push a high-spec ryegrass mix that needs perfect drainage, you aren’t growing feed; you’re growing a very expensive swamp.
  • Learn to value the “filler” species. Everyone wants the flashy, high-energy stuff, but a bit of clover or even some hardy meadow grass provides the structural diversity that keeps the sward from collapsing under a heavy herd when the weather turns foul.
  • Test your ground before you spend a penny on seed. I’ve seen men buy the most expensive perennial mixes in the country only to find out their pH was so low the whole lot turned to thatch within six months. It’s cheaper to lime the field than to re-seed it.
  • Think about the “bite” for your specific stock. A grass that looks lush and beautiful in a brochure might be too fine for a hungry suckler cow to actually get her head into. If they can’t graze it effectively, that nitrogen you paid for is just being wasted on leaf area they can’t use.
  • Don’t buy for the best year; buy for the worst one. If your mix only performs when the sun is shining and the rainfall is perfect, you’ll be broke by August. You need a mix that can survive a dry spell and still hold its ground when the autumn rains move in.

The Bottom Line on Your Sward

Stop buying seed based on a glossy brochure; if the mix doesn’t suit your specific soil type and the rainfall you actually get—not the rainfall the salesman expects—you’re just burying money in the muck.

A fancy, high-spec sward is useless if it can’t handle the trampling of a hungry herd; prioritize grass that has the grit to stand up to your cattle and still provide real nutrition.

Don’t get distracted by the “newest” species; stick to what works for your ground and your cash flow, because a simple, resilient field will always outlast an expensive, temperamental one.

The Bottom Line on Your Sward

At the end of the day, choosing your grass isn’t about reading the glossy brochures or chasing the latest high-spec cultivar that promises the world. It comes down to the reality of your acres: the drainage in your low fields, the acidity in your hill ground, and the specific hunger of your livestock. You can’t ignore the soil type just to chase a higher protein percentage on a spreadsheet. If you pick a species that thrives in a laboratory but dies the moment a heavy rain hits your clay, you aren’t farming; you’re just gambling with your margins. Keep your eyes on the ground, match your seed to your actual conditions, and remember that consistency beats a flashy one-season wonder every single time.

I’ve spent forty years watching men go bust trying to force a field to grow something it simply wasn’t meant to produce. It’s an expensive way to learn a lesson that the land has been trying to teach you for free. Don’t be afraid to keep it simple and build a sward that is resilient enough to survive the bad years, because the bad years are the only ones that truly matter. If you get the grass right, the cattle will follow, and the cash flow will actually stay in your pocket instead of leaking out through the seed drill. Focus on what works for your specific patch of earth, and you’ll find you’re farming for the long haul, not just for the next sale.

Frequently Asked Questions

If I’m looking at a mix of perennial ryegrass and clover, how much am I actually going to save on nitrogen when the weather turns wet and the soil gets heavy?

You have to look at the ground first. If you’re sitting on heavy, wet clay, that clover isn’t going to work nearly as hard as the brochures claim. In a washout, the nitrogen fixation slows to a crawl because the roots are gasping for air. You might see a saving, but don’t count your pennies too early; if the soil is waterlogged, you’ll end up chasing that nitrogen deficit with a spreader anyway just to keep the ryegrass from turning to mush.

Is it worth paying the premium for those high-spec forage varieties, or am I better off sticking to the standard seed and just managing the grazing more tightly?

Look, I’ve seen plenty of men go broke trying to grow a botanical garden. If you’ve got the drainage and the soil to back it up, a high-spec variety can pay for itself in weight gain. But if your ground is heavy or your weather is temperamental, that expensive seed is just a fancy way to lose money. I’d rather have a standard sward that actually grows in a wet May than a “super-grass” that dies the moment the clouds close in. Tight management beats a premium label every single time.

When you’re looking at a field that’s been nothing but poached ground for three years, is there any point in trying to re-seed with fancy species, or am I just throwing money at a lost cause?

If you’ve got three years of poaching, you don’t have a grass problem; you’ve got a drainage and structure problem. Throwing expensive, high-spec seed onto a soup of compacted mud is just a way of making the bank account lighter. You’ll spend a fortune on seed that won’t even establish before the next heavy rain washes it into the hedge. Fix the ground first—drainage, aeration, or better management—or you’re just burying cash.

Deciding how to reseed a pasture.

Deciding Whether a Field Is Worth Reseeding

Most people will tell you that reseeding is all about the seed rate or finding the fanciest clover mix on the catalogue. They’re wrong. If you don’t look at the drainage and the soil structure first, you aren’t actually improving your land; you’re just throwing money into a hole and hoping for the best. I learned that the hard way back in ’94 when I spent a small fortune on high-spec rye-grass, only to watch it wash away in a single wet spring because I hadn’t properly assessed the ground. Learning how to reseed a pasture isn’t a chemistry experiment or a way to show off your equipment; it’s a calculated gamble on your soil’s ability to actually hold onto what you give it.

In this guide, I’m going to skip the marketing fluff and tell you how we actually do it on a working suckler farm. We’ll talk about timing the weather, prepping the ground without destroying the biology, and which expensive bits of kit are actually worth the diesel. My goal is to show you how to get the maximum tonnage per hectare without turning your bank balance into a cautionary tale.

Table of Contents

Guide Overview

Total Time: 1-2 days (depending on acreage)
Estimated Cost: $100-$500 per acre
Difficulty: Intermediate

Tools & Supplies

  • Soil Test Kit for checking pH and nutrient levels
  • Spreader (Broadcast or Drop) for even seed distribution
  • Cultivator or Broadfork to prepare the seedbed
  • Pasture Seed Mix tailored to local climate and soil
  • Fertilizer (NPK) based on soil test results
  • Lime (if soil is acidic)

Step-by-Step Instructions

  • 1. First, you have to look at the ground, and I don’t mean a quick glance from the bonnet of the quad. You need to walk the field when it’s been raining for three days straight to see where the actual drainage issues are. If you’re just throwing seed over a patch of heavy, waterlogged clay without addressing why it’s wet, you aren’t reseeding; you’re just planting expensive rot. Fix your drains or move your target area, otherwise, you’re just throwing cash into a bog.
  • 2. Once you know where the ground is actually capable of holding life, you need to clear the slate. This isn’t a job for a light scrape; you need to get the old, tired perennial ryegrass and those stubborn thistles out of the way. I’ve seen lads try to save a few quid by just harrowing the surface, but all they do is bury the weeds deeper into the soil. You want a clean seedbed, which usually means a decent plough or a disc to turn over the old mess so the new seed has a fighting chance.
  • 3. Soil testing is the part most people skip because it feels like a chore, but it’s the only way to know if you’re wasting money on fertilizer. Don’t listen to the bloke in the sales van telling you that you need a specific brand of NPK; get a proper lab analysis done. If your pH is sitting too low, all the expensive lime and nitrogen in the world won’t do a damn thing because the plants can’t physically take it up. It’s about building a foundation, not just throwing chemicals at a problem.
  • 4. Now comes the part where you actually commit the capital: choosing the seed. My advice is to stop looking at the “value” per bag and start looking at the cost per hectare of usable grazing. I’ve bought cheap seed before that looked fine in the bag but had a germination rate that would make a stone weep. Buy a mix that actually suits your specific ground and your livestock—if you’re running sucklers, you don’t need a fancy forage mix meant for dairy cows; you need tough, reliable grass that can handle a bit of a beating.
  • 5. Timing is everything, and if you miss your window, you might as well go back to the pub. You want to get that seed in when the soil temperature is rising but before the summer drought hits and turns your field into a dust bowl. If you’re too late and the ground is baked hard, the seed will just sit on the surface and get eaten by birds or washed away in the first autumn gale. Aim for that sweet spot where the moisture and warmth align.
  • 6. When it comes to the actual sowing, don’t be tempted to go too deep. I’ve seen many a young man try to bury his seed like he’s planting potatoes, but if that seed is more than an inch down, it’ll run out of energy before it ever sees the light of day. You want it shallow, firm, and well-contacted with the soil. A good drill is worth its weight in gold here, because if the depth is inconsistent, your field will come up in patches, and you’ll be chasing weeds in those gaps for the next three years.
  • 7. Finally, you have to manage the aftermath, which means keeping the animals off it. This is the hardest part for most, because you’ll see that fresh green growth and want to turn the herd on it immediately. Don’t do it. If you let them graze it before the root systems are established, they’ll pull the young plants straight out of the ground, and you’ll have spent a fortune on a field of bare dirt. Give it time to get its feet under it; patience is often the cheapest input you have.

Understanding How to Reseed a Pasture

Understanding How to Reseed a Pasture ground.

Before you even think about opening a bag of seed, you need to look at what you’re actually working with. Most people jump straight to the order forms, but if your ground is nothing but poached clay and thistle, you’re just burying money in a graveyard. Real soil preparation for pasture isn’t about fancy machinery; it’s about understanding whether your ground can actually breathe. I’ve seen men spend a fortune on high-grade clover mixes only to watch it fail because they tried to sow it into ground that was still holding water like a sponge from a wet February.

You also have to get your head around the timing. There is no single “perfect” window, but there is certainly a wrong one. If you miss the window for the best time of year to reseed, you’ll spend the whole summer fighting weeds that are faster than your new grass. It’s a race against the clock. You aren’t just planting grass; you are trying to establish a foundation that can handle a cow’s weight without turning into a mud bath by autumn. If you don’t get the base right, the rest is just expensive scenery.

Key Things to Know

Key Things to Know: Reseeding timing.

Before you even think about opening a bag of seed, you need to look at your calendar and your weather gauge. Most people ask me about the best time of year to reseed, but they forget to ask if the ground can actually take it. If you try to do this on ground that’s sodden and heavy, you aren’t renovating; you’re just compacting the soil and making a mess that’ll take three years to fix. I’ve seen enough men ruin a good field by trying to be clever in a window that was too wet, turning a productive acre into a graveyard of expensive, unsprouted seed.

Then there is the matter of what you’re actually putting in the ground. I’ve seen plenty of lads get caught up in fancy brochures, but forage seed selection isn’t about what looks good on a spec sheet; it’s about what survives your specific hills and your specific rainfall. If you pick a variety that thrives in a sheltered valley and try to force it onto a wind-swept acre, you’re essentially throwing cash directly into the dirt. You have to match the seed to the ground you actually have, not the ground you wish you had.

Five Ways to Stop Throwing Money at the Ground

  • Stop looking at the seed catalogue and start looking at the drainage. I’ve seen men spend a fortune on high-spec perennial ryegrass only to watch it rot in a waterlogged hollow because they couldn’t be bothered to check the ground’s ability to take it. If the water isn’t moving, the seed isn’t growing; it’s just expensive compost.
  • Timing isn’t a suggestion, it’s your margin. If you’re out there reseeding when the ground is too dry, you’re just waiting for a drought to kill your investment. If it’s too wet, you’re dragging a heavy machine over soil that’ll compact like concrete, and once you’ve killed the soil structure, no amount of fertilizer is going to bring it back.
  • Don’t get blinded by the “newest” varieties. The sales reps will tell you a specific blend will change your life, but they aren’t the ones paying the bill when it fails to establish in a wet March. Stick to what works for your specific soil type and your specific rainfall. I’ve learned more from my own failed trials than I ever did from a glossy brochure.
  • Watch your weed pressure like a hawk before you even turn the tractor on. If you try to sow fresh seed into a field choked with rushes or docks, you aren’t starting a pasture; you’re just feeding the weeds. You need to clear the deck first, or you’ll be fighting a losing battle from day one.
  • Seed depth is the difference between a field and a graveyard. Sow it too deep and the seedling exhausts itself before it sees the light; sow it too shallow and the birds will have a feast on your capital. It’s a fine line, and if you don’t get the drill settings right, you’re essentially just scattering money for the crows.

Three Things to Remember Before You Reach for the Sower

Don’t start a single thing until you’ve looked at your drainage and your rainfall; if the ground stays sodden, you aren’t reseeding, you’re just burying money in a bog.

Watch your timing like a hawk, because if you miss the window between the grass dying back and the weather turning, you’ll spend the next three years staring at weeds instead of forage.

Remember that every penny spent on seed and fertiliser is a debt you’re taking on against next year’s calf crop, so if the math doesn’t work on paper, it won’t work in the field.

The Bottom Line on Your Grass

The Bottom Line on Your Grass.

At the end of the day, reseeding isn’t about following a fancy manual or buying the most expensive seed mix on the market; it’s about timing your moves with the weather and the soil. If you ignore the drainage or rush the job during a dry spell, you aren’t just losing a bit of growth—you are essentially throwing cash directly into the dirt. You’ve got to get the ground preparation right, ensure your seed-to-soil contact is solid, and most importantly, have the patience to let the biology do its work without constant interference. If you get the fundamentals of the grass right, the rest of the farm tends to follow suit.

I’ve seen plenty of men go broke chasing the latest high-tech forage breakthroughs while their primary acreage was nothing but weeds and poached ground. Don’t fall into that trap. A well-managed pasture is the most reliable bank account a livestock farmer has, and it pays dividends in better weaning weights and lower feed bills. It takes work, and it takes a bit of grit when the rain won’t stop or the timing feels off, but when you see those new shoots coming up thick and green, you’ll know you’ve made a sound investment. Stick to the basics, watch your margins, and let the grass do the heavy lifting.

Frequently Asked Questions

If I've got a heavy clay patch that stays sodden until June, am I just throwing money into a bog if I try to reseed it now?

If that clay is still a bog in June, then yes, you’re essentially just paying for expensive compost. You can throw the best seed in the world at it, but if the roots can’t breathe, they’ll rot before they ever take hold. Don’t fight the ground. Wait for a dry spell, improve the drainage first, or accept that patch is for grazing, not for profit. If the feet can’t stay dry, the money won’t either.

How much of a difference does it actually make to the bottom line to use a high-spec clover mix versus just sticking with a standard ryegrass?

It’s a question of whether you want to pay for the seed now or pay for the fertilizer later. A high-spec clover mix isn’t a luxury; it’s a nitrogen factory. If your ground holds moisture and you aren’t working a desert, that clover will fix nitrogen right where the grass needs it. You’ll spend more at the merchant’s desk this spring, but you’ll save a hell of a lot on the spreader come autumn.

At what point does it become cheaper to just let the weeds run wild and accept the lower grazing value than to pay for the diesel and seed to fix it?

It’s a math problem, not a sentiment one. You pull the trigger on reseeding when the cost of the seed, diesel, and your own time is less than the annual loss in carcass weight or milk yield from those weeds. If you’re looking at a patch of thistle that’s only costing you a few head of sheep a bit of extra chewing, leave it. But if the weeds are choking out the grass and killing your margins, you fix it.

How clover fixes nitrogen in soil.

Clover Works if You Stop Killing It

I spent half my life listening to salesmen in clean wellies explain that the only way to get decent grass growth was to keep the fertilizer spreader running until the bank called. They make it sound like a complex chemistry experiment, but most of that talk is just a way to justify a higher invoice. The truth about how clover fixes nitrogen isn’t found in a glossy brochure; it’s found in the soil under your boots. If you aren’t letting those little white flowers do the heavy lifting for your sward, you are essentially throwing money at fertilizer bags that should have stayed in your bank account.

I’m not here to give you a lecture on biology or a sales pitch for a new seed mix. I want to talk about what actually happens when you get the clover-to-grass ratio right in your field. I’ll show you the real-world impact on your margins, the mistakes I made when I tried to over-manage it, and why understanding the ground matters more than any chemical formula. We’re going to look at the hard numbers so you can stop feeding the fertilizer company and start feeding your livestock.

Table of Contents

Understanding How Clover Fixes Nitrogen

Understanding How Clover Fixes Nitrogen nodules.

Now, I’m not a biology professor, but you don’t last forty years in a suckler herd without understanding the mechanics of what’s happening under your boots. It isn’t magic; it’s a partnership. Down in the soil, you’ve got a bit of a deal going on between the clover and certain Rhizobium bacteria. These tiny things live inside the little lumps you’ll see on the roots—what the textbooks call root nodules—and they do the one job we can’t do ourselves: they grab nitrogen from the air and turn it into something a plant can actually use.

It’s a tidy little system, really. While the rest of your grass is hungry and looking for a feed, the clover is busy with this atmospheric nitrogen conversion, essentially pulling free nutrients out of thin air. When that clover dies back or gets grazed, it leaves that nitrogen behind in the soil for the next crop. If you aren’t letting that legume nitrogen cycle do the heavy lifting in your sward, you’re essentially throwing money at fertilizer bags that should have stayed in your bank account.

Key Things to Know

Key Things to Know: Rhizobium bacteria symbiosis.

Now, if you’re going to rely on this rather than a spreader, you need to understand that it isn’t magic; it’s a partnership. It all boils down to the Rhizobium bacteria symbiosis happening underground. Those little bumps you see on the roots—the nodules—are where the real work is done. The clover provides the sugar, and in exchange, the bacteria handle the heavy lifting of atmospheric nitrogen conversion. If your soil is too acidic or too compacted, those nodules won’t develop, and you’ll be left with a field of clover that looks fine but isn’t doing a lick of work for your grass.

You also have to keep an eye on the timing. It’s not enough to just throw seed down and hope for the best. To see a real soil fertility improvement, you need to manage how that nitrogen actually gets into the sward. If you let the clover get too woody or if it gets outcompeted by aggressive rye-grass, the cycle breaks. I’ve seen plenty of lads lose out because they treated clover like a decorative plant rather than a living nitrogen factory that needs the right conditions to actually pay its way.

Practical Tips and Steps

Practical Tips and Steps for legume nitrogen.

Now, don’t go thinking you can just scatter a bag of seed on a bare field and expect a miracle. If you want the legume nitrogen cycle to actually work for you, you have to treat it like an investment, not a gamble. Start by checking your soil pH; if it’s too acidic, that clover won’t do a lick of work, and you’ll be left with nothing but expensive weeds. You need to ensure the Rhizobium bacteria symbiosis takes hold, which means getting your inoculant right at sowing time. If those little microbes aren’t in the ground to shake hands with the roots, you’re just growing a fancy salad, not a fertilizer factory.

Once it’s established, the real trick is managing your grazing or your cut. If you graze it too hard or scalp it too early, you’ll kill the very plant that’s supposed to be doing the heavy lifting. You want to encourage those root nodules function to stay active by keeping a bit of leaf area on the plant. It’s about finding that balance where the clover feeds the grass without disappearing into the background. It’s not magic, it’s just biology—and if you manage it right, it’s money staying in your pocket.

Common Mistakes to Avoid

The biggest mistake I see is treating clover like it’s some kind of magic wand you just sprinkle on a dead field and forget about. People think they can just throw a handful of seed into a heavy ryegrass sward and wait for the bank to balance itself. It doesn’t work that way. If your grass is too thick, that clover seed won’t even touch the soil, let alone establish the Rhizobium bacteria symbiosis it needs to actually do its job. You can’t bypass the groundwork; if you don’t give it a window to get established, you’re just throwing expensive seed into the wind.

Another blunder is neglecting the soil chemistry before you even bother with the drill. If your pH is off, that clover will sit there looking pathetic, and you won’t get any meaningful atmospheric nitrogen conversion to show for it. I’ve seen plenty of lads try to save a few quid on lime, only to find their clover isn’t fixing a damn thing. You have to manage the environment if you want the biology to work for you, otherwise, you’re just paying for fancy weeds.

Final Thoughts

At the end of the day, don’t go looking for a magic wand in a bag of NPK. If you’ve done the work to get the clover established and you’ve managed the grazing so it doesn’t just disappear into the soil as thatch, you’re playing a different game entirely. You aren’t just growing grass; you are managing a legume nitrogen cycle that works while you’re sleeping. It’s about moving away from being a slave to the fertilizer salesman and moving toward a system that actually builds something in the ground rather than just stripping it bare.

I’ve seen too many lads try to skip the hard part—the establishment and the management—and then wonder why their soil looks like dust by July. You have to respect the Rhizobium bacteria symbiosis happening under the surface. It isn’t instant, and it isn’t easy, but once that cycle is humming, your margins will start to look a lot healthier. Stop chasing the quick fix and start focusing on building real soil fertility that lasts longer than a single season. It’s better for the cows, better for the ground, and most importantly, it’s better for your bank balance.

Five ways to stop wasting money on nitrogen bags

  • Watch your phosphorus levels first. If your soil is starved of P, that clover isn’t going to bother fixing a single scrap of nitrogen, and you’ll be left staring at a patch of nothing while the fertilizer bill mounts.
  • Don’t go overboard with the N-fertilizer. If you keep feeding the grass nitrogen, it’ll grow tall and thick and shade out the clover entirely, effectively strangling your free nitrogen source right out of the ground.
  • Mind the grazing pressure. You can’t just let the sheep turn it into a dust bowl; if they’re eating the clover heads off before they can set seed, you’re losing the ability to replenish that nitrogen naturally next season.
  • Check your lime levels. Clover likes a bit of a buffer, and if your soil is too acidic, the nitrogen fixation process slows to a crawl, meaning you’re paying for the seed but getting none of the biological benefits.
  • Get the right mix for your ground. I’ve seen lads try to throw white clover into heavy, wet clay where it just sits and rots; you have to match the species to the actual drainage of your field, or you’re just throwing money into a bog.

The Bottom Line on Clover

Stop looking at clover as a “green improvement” and start seeing it as a nitrogen factory that pays you in avoided fertilizer bills.

You can’t just throw seed at a problem; if your ground is compacted or your drainage is rubbish, that clover won’t establish, and you’ll be out a few hundred quid for nothing.

The real profit isn’t in the nitrogen alone, it’s in the extra weight you put on a calf because the grass is actually worth eating.

The Bottom Line on Clover

At the end of the day, clover isn’t some magic trick or a way to get out of doing the hard work; it’s just a smarter way to manage your inputs. We’ve talked about the biology of how it pulls nitrogen from the air, but don’t let the science distract you from the math. If you get your sward right, manage your grazing so you aren’t scalping the clover, and keep an eye on those seed rates, you are effectively growing your own fertilizer. It comes down to a simple equation: less money spent on urea bags means more money left in the account when the mart prices inevitably dip. It is about protecting your margins by letting the biology do the heavy lifting that you’ve been paying a chemical company to do for decades.

I’ve spent forty years watching trends come and go, and I can tell you that the most successful farmers aren’t the ones with the biggest machinery or the newest gadgets; they are the ones who understand their ground. Transitioning to a clover-heavy system takes patience, and you might lose a bit of sleep while the soil adjusts, but it is a long-term play for your land’s health and your own solvency. Don’t try to chase a perfect field overnight. Just start small, watch your grass, and remember that a farm is a living thing, not a factory. Get the nitrogen right through the soil, and the rest of the pieces usually fall into place.

Frequently Asked Questions

If I mix clover into my existing ley, am I going to lose the grass I’ve already paid for?

If you’re just throwing seed onto a thick, established sward, then yes, you’re essentially flushing money down the drain. The clover won’t get the light it needs, and it’ll sit there dormant while your grass chokes it out. You can’t just “mix” it; you have to make room. Whether that’s a light harrowing or a proper renovation, you need seed-to-soil contact. Don’t expect a free lunch—you have to invest in the ground first.

How much can I actually cut back on my urea bags if the clover is doing its job properly?

If you’ve got a decent stand of white clover and you aren’t trampling it into the mud, you should be looking at a 30% to 50% reduction in your urea spend. But don’t go cutting the bags by half just because the field looks green. You need to watch the grass growth and the soil testing. If you cut the nitrogen too early before the clover is established, you’ll just end up with a patch of bare ground and a very empty wallet.

What happens to that nitrogen credit when the clover dies off or gets outcompeted by coarser grasses?

That’s the million-pound question, isn’t it? When the clover dies or gets smothered by rye, you don’t just lose the nitrogen—you lose the momentum. The nitrogen it “fixed” is still there in the soil, but once the clover’s gone, the tap is turned off. You’re left staring at a patch of coarse grass that’s hungry and a bank balance that’s lighter because you’re back to buying bags of urea to keep the head up.

Tips on how to reduce fertiliser cost.

Cutting Fertiliser Without Cutting Yield

I remember standing in the yard back in ’94, watching a young lad from the local co-op explain why we needed a new, high-analysis spread to “unlock” our soil potential. He was talking in fancy percentages, but I was looking at the bank balance and the sheer amount of nitrogen we were essentially burning for warmth. Most of the advice you get today on how to reduce fertiliser cost is just a thinly veiled sales pitch for more expensive bags of chemical magic. They want you to believe the grass won’t grow unless you’re feeding the soil like it’s a prize-winning show pony, but they never mention that you’re just subsidising the manufacturer with your margins.

I’m not here to sell you a new brand of pellets or a shiny piece of tech that’ll be rusting in the shed by Christmas. What I’m going to do is talk about what actually works when you’re staring at a rainy field and a mounting bill. We’ll look at the real math of grazing management, the importance of what’s already in your ground, and how to stop throwing cash at the soil to fix a management problem.

Table of Contents

Stop Throwing Cash at the Soil How to Reduce Fertiliser Cost

Stop Throwing Cash at the Soil How to Reduce Fertiliser Cost

The biggest mistake I see is treating a field like a leaky bucket that just needs more liquid poured in. If your soil structure is rubbish and your drainage is non-existent, you aren’t feeding the grass; you’re just watching your money wash through the subsoil during the first heavy autumn rain. Before you even look at a bag of NPK, you need to get a proper handle on your soil nutrient management. I’ve seen men spend thousands on nitrogen when their pH was so low the plants couldn’t even process it. It’s a fool’s errand.

You have to stop looking for a magic pellet and start looking at the biology. I’ve moved more toward integrating organic soil amendments and managing clover levels rather than relying on the spreader to do all the heavy lifting. It takes more patience, and it certainly isn’t as fast as a chemical hit, but it builds a base that doesn’t disappear the moment the weather turns. If you aren’t managing the life in the ground, you’re just subsidizing the chemical companies with your hard-earned cash.

The Hidden Cost of Guesswork in Your Soil Nutrient Management

The Hidden Cost of Guesswork in Your Soil Nutrient Management

I’ve seen too many lads walk out to the field with a spreader and a “gut feeling,” convinced they know exactly what that acre needs because the grass looks a bit thin in the corner. That’s not farming; that’s gambling with your margin. When you skip proper soil nutrient management in favor of a broad-brush approach, you aren’t just wasting money—you’re actively damaging the ground. You end up over-applying in some spots where the nutrients just leach away into the watercourse, while other areas stay hungry, stunted, and useless for grazing.

The truth is, modern precision agriculture techniques aren’t some fancy buzzword for people with more money than sense; they are about knowing exactly where your deficiency lies before you open a single bag. I learned the hard way that treating a field as one single unit is the fastest way to burn through your cash flow. If you aren’t testing your soil to a granular level, you are essentially subsidizing the chemical companies with money that should have gone toward your next heifer or a bit of much-needed kit for the shed.

Precision Agriculture Techniques Stop Overpaying for Empty Results

Precision Agriculture Techniques Stop Overpaying for Empty Results

I’ve seen enough lads buy a fancy GPS-guided spreader thinking it’s a magic wand that solves a bad management plan. It won’t. You can have the most expensive machinery in the county, but if you’re still applying nitrogen based on what your neighbour did or what a glossy brochure suggested, you’re just spreading money into the wind. True precision agriculture techniques aren’t about the shiny tech; they are about knowing exactly where the deficiency is before you ever crack a bag.

If you want to stop the bleeding, you have to treat your fields like individual units rather than one big, homogenous block. I spent years treating the whole 180 hectares the same way, only to realise I was over-applying on the heavy ground and starving the well-drained slopes. Integrating soil nutrient management with variable rate application—even if it’s just manual adjustments based on decent zone mapping—is the only way to stop the waste. It’s about matching the input to the actual need of the grass, not just hitting the ground with a standard rate and hoping for the best.

Using Nitrogen Fixation Methods to Build Grass for Free

If you’re looking to cut your dependency on the bag, you need to stop thinking about what you can buy and start looking at what you can grow. I spent far too many years trying to outrun a poor sward by pouring more urea on it, only to find I was chasing a moving target. The real way to handle nitrogen fixation methods isn’t through some fancy laboratory concoction; it’s about getting your clover levels right. If your leys are nothing but ryegrass, you aren’t farming; you’re just renting nitrogen from a manufacturer at a premium.

A good, deep-rooted white clover isn’t just a filler; it’s a biological factory working on your dime while you sleep. I’ve found that if you manage your grazing to ensure the clover isn’t being grazed down to the nub every single week, it starts to pay for itself. It’s one of those sustainable farming practices that actually makes sense for the bank balance, not just the environment. You’re essentially building a nitrogen reserve in the soil that stays there, rather than washing away in the first heavy autumn rain.

Why Organic Soil Amendments Outperform Expensive Chemical Fixes

I’ve spent too many years watching men in clean overalls try to sell me a bag of granules that promises the moon but leaves the ground as hard as a billiard table. The problem with relying solely on those quick-fix chemical hits is that they’re like a shot of whiskey; they give you a momentary buzz, but they don’t build any real strength. You might see a flush of green, but you aren’t actually building anything in the long term. If you want to move away from being a glorified delivery driver for the chemical companies, you have to look at organic soil amendments that actually do the heavy lifting.

Whether it’s well-rotted manure or a decent compost, these materials aren’t just about adding N-P-K; they are about fixing the structure of the ground itself. I’ve found that a field with decent organic matter holds water through a dry spell and stays breathable when the heavens open. It’s about improving the biology of the soil so it can actually hold onto what you give it, rather than letting half your investment wash straight down the drain into the nearest stream.

Five Ways to Stop the Bleeding Before the Next Spate

  • Watch the weather, not the calendar. I’ve seen too many men spread nitrogen on a Tuesday just because the book says it’s time, only to watch a heavy rain wash half their investment straight into the ditch by Wednesday morning. If the ground is sodden or the clouds are heavy, keep the spreader in the shed.
  • Get your eyes back in your head. You can buy all the soil testing kits in the world, but if you aren’t walking the fields and noticing where the ryegrass is thinning or where the clover is struggling, you’re flying blind. A bit of observational walking costs nothing and tells you more than a spreadsheet ever will.
  • Stop treating every acre like it’s the same. Treating a wet, heavy corner of a field the same way you treat a well-drained hill is just a fast way to waste money. Target your inputs where the grass actually has the capacity to use them, rather than spreading it thin and useless across the whole lot.
  • Fix your drainage before you fix your chemistry. You can throw all the lime and nitrogen you want at a field, but if the water isn’t moving, the roots aren’t breathing. A field that sits wet is a field that won’t take up what you’re paying for, no matter how much you spread.
  • Respect the clover. If you’ve managed to get a decent amount of white clover established, stop trying to outsmart it with expensive nitrogen. That clover is working for free, fixing air into the soil while you’re busy looking for a bag of chemical to do the job. Let it do its work.

The Bottom Line on Your Fertilizer Bill

Stop treating fertilizer like a magic wand; if your grazing management is a mess and your soil is compacted, you’re just pouring expensive nitrogen into a sieve.

Get your soil testing right and stick to it, because guessing your nutrient requirements is the fastest way to turn your hard-earned cash into wasted runoff.

Invest in the biological health of your ground through clover and organic matter, because the most profitable grass is the stuff you didn’t have to buy in a bag.

The Bottom Line

At the end of the day, reducing your fertiliser bill isn’t about finding a magic product or a new chemical cocktail; it’s about getting back to the basics of how a field actually works. We’ve talked about why guessing is a fast way to bleed cash, why nitrogen fixation can do the heavy lifting for you, and why that expensive bag of NPK is often just a band-aid on a deeper soil problem. If you aren’t looking at your soil tests, managing your grazing rotation, and understanding the actual biology of your ground, you aren’t farming—you’re just subsidising the chemical companies. It all comes down to managing what you have rather than trying to buy your way out of a poor system.

I’ve spent forty years watching men and women try to outrun a bad season by throwing more inputs at a problem, and I can tell you from experience that the grass doesn’t care how much you spent to grow it; it only cares if the conditions are right. Don’t get caught up in the marketing hype or the latest shiny gadget that promises a miracle. Focus on the soil, watch the weather, and keep a sharp eye on your margins. If you can master the relationship between your grass and your cash flow, you’ll find that true profitability isn’t found in a spreader, but in the discipline of knowing exactly what your land needs and nothing more.

Frequently Asked Questions

If I cut back on the nitrogen now, am I going to lose my spring grass surge and end up paying more for silage later?

You’re asking the right question, but you’re looking at it through a narrow lens. If you starve the ground now, you’ll absolutely miss that spring surge, and you’ll be chasing it with expensive concentrates or bought-in forage come July. But don’t just cut blindly. Look at your soil test and your weather forecast. If the ground is wet and the nitrogen is just going to leach out, you’re wasting money. Aim for balance, not a deficit.

Most of these organic amendments take years to show results; how do I keep the cash flow steady while I wait for the soil to actually respond?

You’re asking the right question. You can’t eat “soil health” in February when the bank wants its interest. The trick isn’t choosing between chemical and organic; it’s about the bridge. Use a measured, targeted dose of N to keep the grass growing now, but use that as a tactical strike rather than a blanket spray. You’re buying time, not a permanent fix. Manage the immediate hunger of the crop while the organic matter builds the engine underneath.

I've got a mix of heavy clay and some decent well-drained ground—is it even worth the bother of testing every single field, or am I just wasting more money on paperwork?

If you think you can eyeball a clay field and a well-drained slope and come to the same conclusion, you’re already losing money. That clay is going to hold onto nutrients differently and drain like a sieve compared to your good ground. Testing every field isn’t paperwork; it’s an insurance policy against over-applying where it won’t sink in and under-applying where it’s needed. Don’t guess. Guessing is just a slow way to go broke.