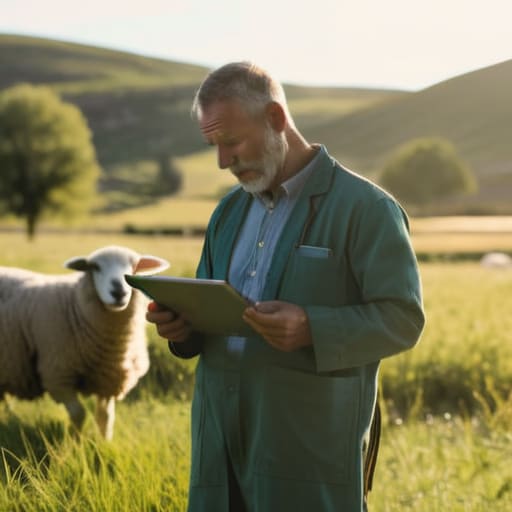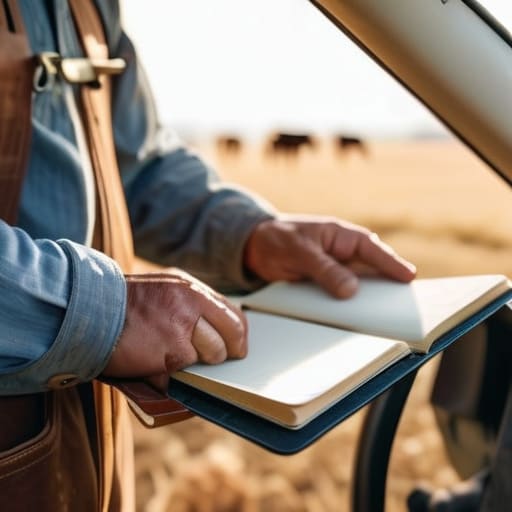
Understanding how withdrawal periods work.

Withdrawal Periods and the Records That Prove Them

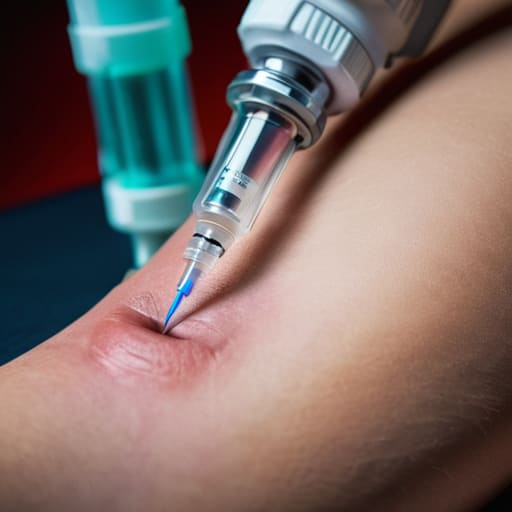
I remember standing in the yard back in ’98, watching a vet explain a new injectable like it was some kind of miracle cure, while I was staring at a notebook full of dates I couldn’t make sense of. Most of the lads in the trade will try to tell you that understanding how withdrawal periods work is just a matter of reading the fine print on a bottle, but they’re selling you a simplified version of a very messy reality. In practice, it isn’t about following a neat little line on a label; it’s about the gap between when that needle hits the skin and when that animal actually becomes cash in your pocket without the inspector shutting your gate.

I’m not here to give you a lecture on pharmaceutical science or recite the manufacturer’s brochure back to you. What I want to do is strip away the jargon and talk about the actual math of it—the way a single miscalculated day can turn a profitable sale into a total write-off. I’ll show you how to manage your treatment schedules so you aren’t constantly choosing between a healthy animal and a healthy bank balance, because at the end of the day, a mistake in your timing is just another way to lose money you’ve already worked too hard to earn.

Table of Contents

Understanding How Withdrawal Periods Work

Understanding How Withdrawal Periods Work in livestock.

Now, don’t go thinking this is just some bit of paperwork to keep the inspector happy. At its simplest, it’s the time it takes for a drug to clear out of the animal’s system so you aren’t sending a carcass to market loaded with chemicals. Every time you inject a calf or treat a ewe, you’re starting a clock. That clock doesn’t care if you’re in a rush to hit a high price at the mart; it only cares about the chemical residue limits set by the authorities.

The math isn’t always straightforward, either. You’ve got to look at the specific product label—and I mean actually read the fine print, not just glance at it while you’re halfway through a pen—to find the correct withdrawal period calculation. If you’re treating a cow for a respiratory issue, that period might be different depending on whether you’re looking at the milk or the meat. If you miss the mark, you aren’t just failing a bit of industry standard compliance; you’re risking a failed trace residue analysis that can shut your whole operation down faster than a drought.

Key Things to Know

Key Things to Know: Drug Withdrawal Periods

First off, don’t go thinking a withdrawal period is just a suggestion or a bit of paperwork to tick off for the vet. It’s about the math of how long a drug stays in the system before it drops below the chemical residue limits set by the authorities. If you’re treating a cow for a respiratory issue, that clock doesn’t start when the needle hits the skin; it starts when the last dose is administered. You have to account for the specific animal, the specific drug, and the specific way that animal processes it. If you guess wrong, you aren’t just breaking a rule; you’re gambling with your reputation.

I’ve seen lads try to get clever and shave a day or two off the schedule to get a calf to market sooner. That’s a fool’s errand. The inspectors don’t care about your tight margins or the price of diesel; they care about trace residue analysis. If a sample comes back positive, you won’t just be facing a fine; you’ll be facing a total loss on the whole lot. It’s better to lose a few days of growth than to lose the trust of your buyer and the stability of your bank balance in one go.

Practical Tips and Steps

Practical Tips and Steps for herd management.

If you’re waiting until the day the truck arrives to check your dates, you’ve already lost. I’ve seen lads try to scramble through a notebook, guessing at a withdrawal period calculation because they can’t find the original label. Don’t be that man. My rule is simple: the moment a needle touches an animal, that date goes on the gate or the ear tag in permanent ink. If you’re managing a large herd, you can’t rely on memory; you need a system that doesn’t depend on you being a genius on a Tuesday morning when the weather’s turned.

Keep your records clean enough that even a stranger could walk in and know exactly which animal is “off-limits.” It isn’t just about being a good neighbor; it’s about avoiding a trace residue analysis that finds something it shouldn’t. When the lab results come back positive, the inspector won’t care about your excuses or your “almost” systems. They only care about industry standard compliance, and once you’ve lost that trust, you’ll find that the cost of regaining it is far higher than the price of a decent set of permanent markers and a bit of discipline.

Common Mistakes to Avoid

The biggest mistake I see is treating the label on the bottle like a suggestion rather than a law. People get lazy, especially when they’re working a long day in the muck and just want to get the job done. They think, “It’s only a few hours over, what’s the harm?” But you aren’t just fighting the clock; you’re fighting chemical residue limits that the inspectors don’t take lightly. If you’re cutting corners on your withdrawal period calculation because you’re behind schedule, you aren’t being efficient—you’re being reckless with your livelihood.

Another one that’ll catch you out is assuming one treatment covers the whole lot. I’ve seen lads treat a single cow for a foot issue and then forget that the rest of the mob might have been in contact or shared the same trough. If you don’t have a tight system for safety monitoring protocols, you’re basically playing Russian roulette with a trace residue analysis. One failed test at the mart doesn’t just mean a rejected animal; it means the inspector starts looking at every single thing you’ve done for the last six months. That’s a headache that no amount of “saved time” is worth.

Final Thoughts

At the end of the day, you can have the finest genetics in the county and the best grass in the parish, but if you can’t get your animals to market cleanly, none of it matters. I’ve seen men lose sleep over a bad heifer or a late spring, but those are things you can plan for. You can’t plan for a failed trace residue analysis that turns your entire year’s profit into a legal headache. It isn’t just about following the rules to keep the inspector happy; it’s about protecting the reputation you’ve spent decades building.

Don’t treat these timings like a suggestion or a bit of paperwork to be rushed through when the cattle trailer is idling. Precision is cheaper than a fine. If you stay on top of your records and respect the math, you won’t be caught out by shifting regulatory compliance requirements when you least expect it. Keep your head down, keep your records straight, and for heaven’s sake, don’t let a bit of laziness in the medicine cabinet be the thing that breaks your cash flow.

Five Ways to Keep Your Meds from Ruining Your Margin

  • Don’t trust your memory when the weather turns foul. If you’re halfway through a treatment during a heavy spell of rain or a particularly busy lambing week, write the withdrawal date on the animal’s ear tag or a piece of tape on the gate. If you’re guessing, you’re gambling.
  • Treat the label as the law, not a suggestion. I’ve seen lads think they can shave two days off a period because the animal “looks fine,” but a rejected batch at the mart doesn’t care about your intuition—it just cares about the chemistry, and it’ll cost you the lot.
  • Keep your records in one place, not scattered across three different notebooks and a phone app. When the inspector is standing in your yard, you don’t want to be hunting through a kitchen drawer; you want a single, clear paper trail that shows you weren’t cutting corners.
  • Watch your stock rotation like a hawk. If you’ve got a group of cattle on a long withdrawal, make sure they aren’t being mixed with the ones headed for sale next week. A single mistake in a mixed pen can turn a profitable sale into a massive, expensive headache.
  • Check the box every single time. Manufacturers change formulations and labels more often than they should, and a drug that had a five-day period last year might have seven this year. Don’t rely on what you used last season; read the actual bottle in your hand.

The Bottom Line

A withdrawal period isn’t just a line in a vet’s notebook; it’s a countdown to when you can actually turn a profit on that animal without risking a total wipeout at the mart.

Don’t trust your memory when the farm gets busy—write the date on the ear tag or the gate, because a single mistake in a batch of beef will cost you far more than the medicine ever did.

If you find yourself tempted to cut corners to meet a deadline, remember that the inspector doesn’t care about your cash flow, and a rejected carcass is a debt you can’t easily outrun.

The Bottom Line on the Ledger

At the end of the day, managing withdrawal periods isn’t about memorising a thick manual or being a stickler for the rules just to please the inspector. It’s about understanding that every single dose of medicine is a potential financial liability if you don’t respect the clock. You have to track the date, the animal, and the specific product with the same precision you use to track your grass growth or your calving dates. If you get sloppy with the paperwork or try to shave a day off to make a sale, you aren’t just risking a fine; you are risking the entire reputation of your herd and the cash flow that keeps the lights on.

I’ve seen plenty of lads try to cut corners when the market looks good, thinking they can outsmart the system. They can’t. The system always wins, and usually, it wins by taking the profit out of your pocket. Farming is hard enough without manufacturing your own disasters through simple negligence. Treat your withdrawal periods with the same respect you give your best breeding ewes, and you’ll find that consistency is your best insurance policy. Stick to the numbers, watch the calendar, and keep your business clean; it’s the only way to ensure you’re still standing when the next hard season rolls around.

Frequently Asked Questions

If I’ve got a cow that’s gone off her feed and I’m forced to use a treatment, how do I keep track of which animal is which when the whole herd is mixed back together in the field?

You don’t rely on memory; memory is for things that don’t cost money. You use a different coloured ear tag or a spray paint mark on the rump—something that won’t wash off in a week of rain. But the real way is a dedicated treatment log, even if it’s just a grease pencil on a whiteboard in the shed. If you can’t see that cow from fifty yards away, you’re gambling with your bank balance.

What happens to my margins if a vet recommends a drug that has a withdrawal period longer than my usual sale date—is it worth the extra feed cost to hold her back?

It’s a math problem, plain and simple. You have to weigh the cost of the extra feed and the lost market window against the price of the animal. If that heifer is a top-end replacement, you hold her; she’s worth the extra oats. But if she’s just another sale animal, and that withdrawal period pushes her right past the peak price window, you’re just feeding a loss. Don’t let sentimentality eat your margin.

If I’m using a product that’s technically legal but the label is a bit vague on the specifics for suckler cattle, do I play it safe and extend the period, or is that just wasting money on extra grass?

If the label is vague, you play it safe. I’ve seen men try to squeeze a few extra days of grazing out of a cow to save a bit of cost, only to have a vet or an inspector pull the rug out from under them. A rejected animal is a total loss; a few extra days of grass is just a minor overhead. If you can’t be certain, extend the period. Don’t gamble your margins on a bit of guesswork.

How to store and handle medicines safely.

Fridge Temperature Ruins More Vaccines Than Anything

I remember standing in a damp corner of the old stone shed back in ’94, staring at a row of expensive, half-empty vials that had turned into nothing more than colored water because I’d left them next to a drafty door. I’d spent a month’s profit on those treatments, only to realize that knowing how to buy the right stuff is useless if you don’t understand how to store and handle medicines properly. Most of the lads I know will spend a fortune on the latest injectable, only to leave it sitting on a muddy dashboard or tucked in a bucket of freezing water, effectively throwing their hard-earned cash straight into the muck.

I’m not here to sell you on some fancy, high-tech cooling system that’ll break down by Christmas and cost you more than it saves. I’m going to tell you what actually works when you’re working in the rain, in the dark, and on a tight margin. We’ll talk about the practical realities of keeping your stock potent, the mistakes that turn a quick treatment into a wasted expense, and how to manage your supplies so they actually do the job you paid for.

Table of Contents

Understanding How to Store and Handle Medicines

Understanding How to Store and Handle Medicines

Now, before you go buying up every bottle of wormer and antibiotic the salesman swears by, you need to look at where you’re actually putting them. I’ve seen too many lads leave a crate of expensive vaccines in the back of a Land Rover or tucked in a corner of a damp, drafty shed. That’s a fast way to turn a high-quality product into expensive, useless water. Most of what you’re using requires proper temperature sensitive drug storage; if that cold chain breaks, you aren’t just wasting money, you’re potentially putting ineffective chemicals into your stock.

It isn’t just about the heat, either. You need a system that doesn’t rely on memory or a scrap of paper stuck to a door. I keep my kit in a dedicated, dry cupboard, clearly labelled and away from anything that might leak. You also have to be disciplined about checking medication expiration dates every single season. There is no point in reaching for a bottle during a crisis only to find it’s been dead since the previous autumn. If it’s past its date, bin it—properly—and don’t treat it like a gamble.

Key Things to Know

Key Things to Know: Temperature Sensitive Storage

First, you need to stop treating your medicine chest like a junk drawer in the back of the shed. If you’ve got vaccines or anything that requires temperature sensitive drug storage, don’t just shove them in a corner and hope for the best. I’ve seen enough ruined batches to know that a summer heatwave in a poorly ventilated tack room will turn a three-figure investment into expensive colored water before you’ve even finished your tea. If it says keep it cold, keep it cold—and keep a log of it.

Second, keep a sharp eye on the dates. I’m not talking about some theoretical shelf life; I’m talking about checking medication expiration dates before you’re standing in a muddy field at 5:00 AM with a sick calf and a bottle of something that’s gone dead. It’s a waste of time and a waste of money. Finally, keep the stuff locked away. Between curious dogs and young hands helping out around the farm, you need to be serious about preventing accidental ingestion. If it isn’t secured, it isn’t managed.

Practical Tips and Steps

Practical Tips and Steps for drug storage.

Start by getting a dedicated, lockable cabinet in the farm office or a dry, cool corner of the shed—somewhere far from the reach of the dogs and the kids. I’ve seen too many lads leave a bottle of wormer on a workbench only for a curious terrier to knock it over, and you’re looking at a vet bill that’ll make your eyes water. If you’re dealing with vaccines, you need a proper fridge that isn’t shared with the family’s milk; temperature sensitive drug storage isn’t a suggestion, it’s the difference between a working dose and a bottle of expensive, useless water.

Keep a simple logbook next to the cabinet. Every time you pull a bottle out, note the date. It sounds like extra work when you’re busy, but checking medication expiration dates before you head out to a field can save you from a wasted afternoon and a failed treatment. When a bottle finally runs dry or the stuff goes cloudy, don’t just chuck it in the general rubbish. Follow the proper medication disposal guidelines to keep the chemicals out of the soil and the groundwater; we’ve got to live on this land, after all.

Common Mistakes to Avoid

The biggest mistake I see is treating a medicine cabinet like a junk drawer. I’ve seen lads leave half a bottle of expensive antibiotics sitting on a workbench in a shed that hits forty degrees in July. If you aren’t mindful of temperature sensitive drug storage, you aren’t really storing anything; you’re just watching your profit evaporate. A drug that’s been baked in a hot tractor cab or left in a damp corner won’t hit the mark when a cow is actually flagging, and you’ll have wasted the money twice over.

Then there’s the habit of “saving it for next time.” I’ve lost count of the times I’ve gone to reach for a bottle only to find it’s been sitting there since the last three winters. You have to be disciplined about checking medication expiration dates every single season. Using dead stock is a fool’s errand that leads to under-dosing and resistance. And for heaven’s sake, keep the needles and the vials away from the kids or anyone else who shouldn’t be poking around the farm office. It’s not just about the cost; it’s about not making a mess you can’t clean up.

Final Thoughts

At the end of the day, keeping a tidy medicine cabinet isn’t about being a perfectionist; it’s about making sure that when a cow is flagging or a lamb is struggling, the stuff you reach for actually does what it’s supposed to do. I’ve seen too many men lose a good animal because they were using a bottle of something that had sat in a damp corner for three years, half-dead from the heat. It’s a waste of money and a waste of time. Take five minutes once a month to go through your stock and start checking medication expiration dates properly. If it’s past its prime, bin it.

Don’t let the paperwork pile up, either. If you’re serious about safe medication management at home, you need to treat your veterinary cupboard with the same respect you give your fuel tank or your seed stores. It’s easy to get caught up in the rush of lambing or calving, but if you don’t stay on top of your temperature sensitive drug storage, you’re essentially throwing cash into the muck. Keep it simple, keep it dry, and for heaven’s sake, keep it organized.

Five ways you're likely flushing your medicine budget down the drain

  • Stop treating your medicine cabinet like a tool shed; if you’re leaving vials on a damp stone floor or next to the diesel cans, you aren’t just risking the potency, you’re inviting contamination that’ll make the whole batch useless.
  • Get a proper fridge for your vaccines and don’t just rely on the temperature in the farm office; if you haven’t checked the thermometer lately, you might be injecting expensive, dead liquid into your stock without even knowing it.
  • Keep your records as tight as your breeding books, because if you can’t tell me exactly when a bottle expires or which batch a cow got, you’re playing a dangerous game with both your margins and your compliance.
  • Watch your hands and your equipment; using the same dirty syringe for three different animals because you’re in a hurry is a shortcut to spreading something far more expensive than a new needle.
  • Stop buying in bulk just because the salesman offered a “deal” on a pallet of something you only need once a year; if it sits in the corner gathering dust and losing its shelf life, you didn’t save money, you just wasted it.

The bottom line on your medicine cabinet

If you’re leaving your expensive vaccines in the back of a warm tractor or a damp corner of the shed, you aren’t just being careless—you’re literally throwing money into the muck.

Don’t buy into the hype of every new bottle on the shelf; stick to what works for your specific ground and weather, and keep a tight eye on the expiry dates so you aren’t using dead chemicals on live stock.

Proper storage isn’t about being tidy; it’s about making sure that when a cow goes down at 2:00 AM, the medicine you reach for actually does the job instead of just adding to your vet bill.

The Bottom Line on the Medicine Chest

At the end of the day, managing your medicines isn’t about following a fancy manual or ticking boxes for an auditor; it’s about ensuring that when a cow is down or a lamb is struggling, the stuff you reach for actually works. If you’ve been leaving your vials in a damp corner of the shed or letting them bake in the cab of the quad, you aren’t just risking the animal’s health, you are throwing hard-earned cash directly into the muck. Keep them cool, keep them dry, and for heaven’s sake, keep a proper eye on those expiry dates. It sounds basic, but it’s the difference between a quick fix and a wasted afternoon of chasing a calf that won’t respond to dead medicine.

I’ve spent forty years learning that the smallest details usually carry the heaviest price tags. You can spend all your time worrying about the price of feed or the latest subsidy shift, but if you can’t get the fundamentals of stock health and hygiene right, the margins will never behave. Don’t let the small, preventable leaks in your budget sink the whole ship. Treat your medicine cabinet with the same respect you treat your breeding records, and you’ll find that protecting your margins starts long before you ever head out to the field.

Frequently Asked Questions

If the power goes out during a week of heavy rain, how am I supposed to keep the fridge temps steady without spending a fortune on a backup generator?

If the power’s gone and the rain’s coming down, don’t go rushing out to buy a generator you’ll only use twice a year. First, keep that fridge shut; every time you peek, you’re bleeding cold. If you’ve got a decent stock of frozen goods, they’ll act as your ice blocks for a day or two. Otherwise, a simple, small petrol generator is cheaper than losing a month’s worth of expensive vaccines to a warm shed.

Is there a point where a half-used bottle of something is more trouble than it's worth, or am I just being tight if I throw it out?

It’s not being tight; it’s being sensible. If you’ve got a half-used bottle of something that’s been sitting in a damp corner or near a heater for six months, it’s probably just expensive water at this stage. I’ve seen plenty of lads try to save a few quid only to find the medicine has lost its teeth when the animal actually needs it. If the efficacy is gone, you’re just wasting time and making the animal suffer. Toss it.

When I'm out in the middle of a field with a sick calf, how do I keep the stuff I'm using from getting ruined by the weather before I get back to the yard?

You don’t go running out there with a loose bottle and a prayer. Get yourself a proper, sturdy, insulated medic bag—not one of those flimsy ones that falls apart after a month. Keep your needles and vials tucked in there, away from the direct sun and the mud. If you’re out in a downpour, keep the bag zipped tight. It’s not just about the medicine working; it’s about not wasting fifty quid on a ruined dose because you were too rushed to be sensible.

Learning how to give an injection correctly.

Injection Sites, Routes and Why It Matters

I remember standing in a muddy yard back in ’94, watching a vet trainee try to explain the “biochemical nuances” of subcutaneous delivery while a heifer was actively trying to take his arm off. He had all the fancy diagrams, but he hadn’t a clue about the sheer physics of a struggling animal or the cost of the wasted vials sitting in the dirt. Most of the manuals out there make it sound like you’re performing surgery in a sterile theatre, but they don’t tell you that if you don’t understand the basics of how to give an injection correctly, you’re just burning money and bruising livestock.

I’m not here to sell you a high-tech syringe or a course on molecular biology. I’m going to tell you how to handle the needle, where to aim so you don’t hit bone or muscle unnecessarily, and how to keep your composure when the beast decides to move. We’ll skip the fluff and focus on the hard numbers: how to minimize waste, avoid abscesses, and ensure that every cent of medicine actually does the job it was bought for.

Table of Contents

Understanding How to Give an Injection Correctly

Understanding How to Give an Injection Correctly

Before you even pick up the syringe, you need to know exactly what you’re putting into the beast and where it’s meant to go. There is no “one size fits all” here. If you’re looking at a subcutaneous vs intramuscular injection decision, don’t just guess because you’re in a hurry to get back to the tractor. A subcutaneous shot goes under the skin, usually in a loose fold, whereas an intramuscular jab goes straight into the heavy muscle. If you put a drug meant for the muscle into the fat, or vice versa, you aren’t just wasting money on the medicine—you’re likely looking at an abscess that’ll cost you more in vet fees than the dose was worth.

You also need to have a handle on your common injection site locations so you aren’t hacking around blindly. I’ve seen too many lads try to jab a cow in the hindquarters only to hit a bone or a nerve, which is a quick way to get a hoof in your ribs. Once you’ve picked the spot, make sure you aren’t just reusing a dirty needle from the last animal; sterilizing injection equipment isn’t just for show, it’s the difference between a quick treatment and a week of watching a calf go downhill from a preventable infection.

Key Things to Know

Key Things to Know: Injection Techniques.

Before you even reach for the syringe, you need to know exactly what you’re putting into the beast and where it’s meant to go. There is no point in being precise with your aim if you’ve confused subcutaneous vs intramuscular injection techniques; if you’re aiming for the muscle but only hit the loose skin, that expensive medicine is going nowhere near the bloodstream, and you’ve effectively just thrown money into the mud. I’ve seen too many lads try to save five minutes by skipping the mental checklist, only to find they’ve wasted half a bottle of vitamins because they didn’t understand the depth required.

Then there is the matter of the kit itself. I don’t care how busy you are during calving; sterilizing injection equipment and checking your needles is non-negotiable. A blunt or dirty needle isn’t just a matter of bad practice—it’s an invitation for abscesses and a veterinary bill you didn’t budget for. You aren’t just moving fluid from a vial to an animal; you are managing a gateway into their system, and if you treat it like a casual chore, the ground will eventually pay for it.

Practical Tips and Steps

Practical Tips and Steps for calf injections.

First, stop rushing. I’ve seen enough lads try to pin a calf while half the herd is watching, only to end up with a needle in their own thumb or a bruised animal. Before you even pick up the syringe, you need to decide on your route: are you looking at a subcutaneous vs intramuscular injection? If you get that wrong, you aren’t just wasting the drug; you’re potentially causing an abscess or ensuring the medicine never actually hits the bloodstream. Check your vials, check your needles, and for heaven’s sake, make sure you aren’t using a needle that’s been sitting in a dirty bucket since last season.

When you actually go to do it, pick your spot and stick to it. Whether you’re aiming for the neck or the hindquarters, consistency is what keeps your records clean. I’m a big believer in preventing infection during injections by keeping the area clean—not that I expect you to scrub the cow with soap, but don’t go jabbing into a patch of thick, matted filth if you can help it. Keep your movements steady. If you’re fumbling, you’re losing money.

Common Mistakes to Avoid

The biggest mistake I see—and I’ve certainly made it myself when I was younger and in a hurry—is treating every dose like it’s all the same. There is a massive difference between a subcutaneous vs intramuscular injection, and if you get them mixed up, you aren’t just wasting money; you’re potentially making the animal sick or ensuring the medicine never actually works. If the vet says it goes under the skin and you hammer it into the muscle, you’ve just thrown a good bit of cash into the muck.

Then there’s the habit of being “a bit loose” with cleanliness. I’ve seen lads skip the small stuff, thinking a quick wipe is enough, but preventing infection during injections isn’t about being precious; it’s about the bottom line. If you’re pulling a needle out of a dirty hide and then moving straight to the next beast without a second thought, you’re inviting abscesses and vet bills. It’s not about being a scientist; it’s about not creating more work for yourself three weeks down the line when that animal starts looking poorly.

Final Thoughts

At the end of the day, a syringe in your hand doesn’t make you a vet, and it certainly doesn’t make you an expert. It just makes you someone responsible for the animal’s welfare and your own bottom line. If you’re rushing through a batch of treatments just to get back to the tea, you’re likely to miss the subtle difference between a subcutaneous vs intramuscular injection, and that’s a mistake that costs you in wasted medicine and uneven results. Take the time to do it right the first time; it’s much cheaper than trying to fix a botched job later.

Don’t get complacent with your kit, either. I’ve seen too many lads treat a needle like a common nail, forgetting that preventing infection during injections is just as important as the drug itself. Keep your equipment clean, watch your sites, and for heaven’s sake, keep an eye on the animal’s reaction. If you treat the process with a bit of respect, the livestock will generally return the favour. It isn’t glamorous, but it’s how you keep a farm running without throwing money down the drain.

Five Ways to Stop Throwing Money Down the Drain

  • Check the bottle every single time. I don’t care if you bought it yesterday; if you grab a bottle of something meant for sheep and try to use it on a heifer, you aren’t just wasting the medicine, you’re wasting the animal and your time.
  • Watch your needle gauge. Using a needle that’s too thin for a thick-skinned beast is a recipe for a struggle, and using one too large is just asking for unnecessary abscesses and a beast that won’t stand still for you next time.
  • Don’t be a hero with the restraint. If you haven’t got the animal secured properly in the crush or the race, you’re going to miss, you’re going to prick yourself, or you’re going to end up with a bent needle and a very expensive vet bill to fix the mess.
  • Keep the site clean, but don’t overthink it. You don’t need a surgical suite, but if you’re injecting into a patch of mud or a heavy manure pile, you’re inviting an infection that’ll cost you more in antibiotics than the original dose was worth.
  • Aim for the muscle, not the fat. If you’re just injecting into the subcutaneous layer when the instruction says intramuscular, you’re not getting the full effect, and you’ll be wondering why the animal isn’t responding while you’re staring at a mounting pile of wasted cash.

The Bottom Line on Getting It Right

Stop treating the medicine like it’s free; if you’re jabbing blindly or using the wrong gauge, you’re literally flushing your profit margin down the drain.

It isn’t just about the needle—if you haven’t checked the animal’s temperament and the cleanliness of the site, you’re just asking for a bruised beast or a missed dose.

Precision beats speed every time; a botched injection leads to abscesses or wasted stock, and neither of those helps when the vet bill arrives.

The Bottom Line on the Needle

At the end of the day, getting an injection right isn’t about following a fancy manual; it’s about respect for the beast and respect for your own wallet. If you’re rushing the job, ignoring the site, or using a needle that’s seen better days, you aren’t just risking a bit of abscess or a missed dose—you are throwing money straight into the muck. You have to remember that every time you pull that trigger, you are making a decision that affects the animal’s welfare and your eventual profit margin. Keep your kit clean, keep your aim steady, and for heaven’s sake, don’t treat the procedure like a chore you can breeze through while thinking about something else.

I’ve spent more years than I care to admit watching people try to cut corners in the yard, and it never ends well. Farming is a business of small margins and hard lessons, and a botched treatment is a lesson you don’t need to pay for twice. If you take the time to do it properly now, you’ll find you spend far less time chasing complications later. It’s about building a system where you can trust your hands and your stock. Do it right, do it with a bit of care, and the numbers in your books will eventually reflect the effort you put in when nobody was watching.

Frequently Asked Questions

When the ground is a quagmire and the beasts are fighting you, is it better to risk a botched shot or just wait for a drier day?

If you’re standing in six inches of muck, wrestling a heifer that’s more interested in your shin than the needle, you’ve already lost. A botched shot is just money poured into a puddle, and a bruised beast is a beast that won’t perform. If it isn’t an emergency—something that’ll kill them by morning—wait for the ground to firm up. I’d rather lose a day of work than lose a calf to a bad injection or a broken leg.

How much of a difference does it actually make to the bottom line if I'm using a slightly duller needle on a larger animal?

It makes a massive difference, though not in the way the salesman tells you. A dull needle isn’t just about the animal’s comfort; it’s about the mess. You’ll end up bruising tissue, causing more inflammation, and—most importantly—you’ll likely lose a portion of the dose to leakage or abscesses. If you’re wasting expensive medicine and then spending more on vet bills to fix the resulting infection, you’re burning cash for no reason.

At what point does the cost of the wasted medicine and the stress on the animal outweigh the benefit of trying to treat a beast that's clearly beyond help?

You pull the trigger the moment the math stops working. If you’re standing there with a half-empty bottle of expensive antibiotics, staring at a beast that’s lost its spark and won’t stand on its own, you aren’t being “thorough”—you’re being sentimental, and sentimentality is a luxury a suckler herd can’t afford. Once the recovery cost exceeds the carcass value or the replacement price, you stop treating and start making the hard call.

How to assess hydration in the field.

Assessing Dehydration in the Field

I’ve seen enough glossy brochures and “expert” webinars to last me three lifetimes, most of them filled with nonsense about high-tech sensors and automated monitoring systems that cost more than a decent heifer. They want you to believe that knowing how to assess hydration requires a digital readout or a fancy probe, but they’re usually the same people who wouldn’t know a dry trough from a hole in the ground. If you’re waiting for a computer to tell you your stock is flagging, you’ve already lost the battle. In my experience, by the time a sensor starts beeping, you’re already looking at a drain on your margins that no amount of tech can fix.

I’m not here to sell you a subscription or a piece of kit that’ll end up gathering dust in the shed next spring. What I want to do is show you how to use your own eyes and a bit of common sense to spot the signs before the vet—or the butcher—becomes your only option. We’ll talk about the real indicators, from the way a cow carries herself to the state of the ground around the water, because at the end of the day, it’s about protecting your cash flow.

Table of Contents

Understanding How to Assess Hydration

Understanding How to Assess Hydration via gums.

You can stand in the middle of a field and watch a cow drink all day, but that won’t tell you if she’s actually recovering. If you want to know what’s happening inside the animal, you have to get your hands dirty. I always start with a simple capillary refill test—press your thumb against the gum and see how long it takes for the pink to return. If it lingers, she’s struggling. It’s a quick bit of business that tells you more than any fancy sensor ever could.

Next, I look at the skin. You aren’t looking for a lecture on biology here; you’re looking for checking skin elasticity to see if the animal is holding onto what she needs. If you pinch the skin on the neck and it stays tented like a piece of old leather, you’ve moved past a simple thirst issue. At that stage, you aren’t just looking at a dry mouth; you’re looking at signs of severe dehydration that will likely end with a vet bill you didn’t budget for. Don’t wait for the animal to stop moving before you start paying attention.

Key Things to Know

Key Things to Know: Capillary refill test.

You can spend half a day staring at a trough, but if you aren’t looking at the animal itself, you’re missing the point. I’ve seen plenty of lads walk past a cow that looked “fine” only to find her down in the dirt two days later because she’d been slipping for a week. The first thing you need to master is the capillary refill test. It’s a simple thing—press your thumb against the gum and see how long it takes for the pink to return. If it’s taking more than a couple of seconds, that animal is struggling, and you’re already losing the battle.

Don’t ignore the small things, either. I always tell my daughter to keep an eye on the dung and the output; a urine color chart isn’t just for fancy labs, it’s a practical way to see if they’re actually processing what they’re drinking. If the urine is dark and the skin doesn’t snap back when you’re checking skin elasticity on the neck, you aren’t just looking at a thirsty animal—you’re looking at a massive drain on your margins.

Practical Tips and Steps

Practical Tips and Steps for checking skin.

Now, you can sit in the yard with a clipboard and a textbook, but if you want to know what’s actually happening in the field, you have to get your hands dirty. Start with the simplest thing: the skin. I don’t care what the vet says about fancy sensors; get up to a cow, pinch the skin on the side of her neck, and see how fast it snaps back. Checking skin elasticity is the quickest way to tell if she’s running on empty or if she’s got enough reserves to weather a dry spell. If it stays in a tent shape for a few seconds, she’s in trouble.

If you’re looking at a calf that’s acting lethargic, don’t just guess. Use a capillary refill test by pressing on the gums; if the color doesn’t return instantly, you’re looking at a serious problem. While you’re at it, keep an eye on the dung heaps. I know it’s not the most pleasant job, but a quick look at the consistency and color tells you more about their internal state than any expensive supplement ever will. If the urine looks dark and concentrated, you aren’t just dealing with thirst; you’re watching your profit margins dry up.

Common Mistakes to Avoid

The biggest mistake I see is people waiting until a cow looks “off” before they start looking for dehydration symptoms and signs. By the time a heifer is drooping her ears or looking lethargic, you aren’t “assessing” anymore; you’re just performing an autopsy on your profit margins. If you’re only looking at the animal and not the trough, you’re missing the point. I’ve seen men spend a fortune on fancy supplements while the actual water source was fouled with muck or sitting in a stagnant puddle that no animal would touch.

Another blunder is relying on a single metric. You can’t just glance at a cow and decide she’s fine. I’ve known lads who thought they were experts because they could spot a dry nose, but they completely ignored checking skin elasticity or the way the animal was moving. If you aren’t performing a quick capillary refill test or paying attention to the consistency of the dung, you’re guessing. And for heaven’s sake, stop assuming that if they’re drinking, they’re fine. If the ground is baked hard and the mineral levels in your soil are shot, they might be drinking plenty but still failing to maintain a proper electrolyte balance.

Final Thoughts

At the end of the day, you can run all the tests in the world, but none of them matter if you aren’t looking at the state of your infrastructure. I’ve seen men spend a fortune on fancy supplements only to lose a heifer because a single trough was blocked by slurry or sitting in a boggy patch of ground that no one bothered to drain. If you aren’t checking your water quality and the access to it, you’re just managing a decline rather than running a business.

Don’t get caught out by the subtle stuff. By the time you’re seeing obvious signs of severe dehydration, you’re already fighting an uphill battle against a dropping margin. Learn to trust your eyes—use a quick capillary refill test on a calf if you have to, but more importantly, learn the rhythm of your herd. If the cows aren’t moving toward the water when they should be, something is wrong. Keep your eyes on the grass, your feet in the mud, and your money in the bank.

Five things to look for before the vet bill arrives

  • Stop looking at the animal and start looking at the trough. If the ground around the water point is a baked-hard crust or a soup of filth, you aren’t dealing with a thirst problem, you’re dealing with a management problem that’s going to cost you in weight gain.
  • Get your hands on the skin. If you pinch the hide behind the shoulder and it stays in a little tent for more than a second, that cow is already well past the point of being ‘a bit thirsty’ and is heading straight for a serious loss.
  • Watch the eyes, not just the ears. A dehydrated animal has a sunken, dull look to the eyes that no amount of good pasture can fix once it’s set in. If they look hollow, they’re losing the battle.
  • Check the consistency of the dung. It sounds a bit crude, but a dry, hard cake in the dung pat tells you more about your herd’s water intake than any expensive sensor ever will.
  • Listen to the movement. A thirsty animal isn’t just slow; they’re heavy-footed. If the herd is lagging behind the usual pace when moving to a fresh break, they’re likely struggling with the internal plumbing.

The bottom line on hydration

Stop looking at the cow in isolation; if your troughs are fouled or your ground is so poached that they can’t reach the water, no amount of “monitoring” will save your margins.

Dehydration isn’t just a health issue, it’s a leak in your cash flow—a thirsty cow is a cow that isn’t converting grass into weight, and that’s money you’ll never see again.

Don’t trust the fancy tech or the salesman’s promise; the best way to spot a problem is to walk the fields, check the water quality yourself, and watch how the animals actually move when they’re thirsty.

The Bottom Line

At the end of the day, assessing hydration isn’t about reading a fancy sensor or waiting for a cow to look half-dead in the eye. It’s about the basics: checking the skin tension, watching how they move, and—most importantly—making sure the water itself isn’t a mess of silt and algae. If you aren’t looking at the state of the trough and the ground around it, you aren’t really managing hydration; you’re just hoping for the best. You can spend all the money in the world on supplements, but if your stock is struggling to pull enough clean water through a dirty system, you are simply throwing money down the drain one thirsty head at a time.

Farming has always been a game of margins, and hydration is one of those quiet ones that can bleed you dry before you even notice the leak. I’ve spent forty years learning that the most expensive mistakes aren’t the big ones everyone talks about; they are the small, daily oversights that eat away at your profit. Don’t get distracted by the shiny new kit or the latest marketing fluff. Stick to the ground, watch your animals, and keep your eyes on the actual numbers. If you get the water right, the rest of the system usually finds its feet.

Frequently Asked Questions

If the trough is full and clean, but the cattle are still looking dull and not drinking, is it a hydration issue or something more serious like a mineral deficiency or a gut bug?

If the water is clean and the trough is full, stop looking at the bucket and start looking at the animal. If they aren’t drinking, they aren’t just thirsty; they’re likely unwell. A gut bug or a heavy mineral deficiency will kill the appetite before it kills the thirst. You’ll see it in the eyes and the way they carry themselves. Check the dung and the temperature. If they won’t drink, the problem isn’t the water—it’s the engine.

How much of a difference does it actually make to the bottom line if I'm catching dehydration a day late versus catching it the moment it starts?

A day late isn’t just a delay; it’s a leak in your bank account. If you catch it early, you’re looking at a bit of extra mineral lick or a quick check on the trough. If you wait twenty-four hours, you’re paying for vet call-outs, lost weight in a heifer, or a calf that won’t thrive. In this business, you don’t lose money in big chunks; you lose it in those twenty-four-hour windows of neglect.

When the ground is baked hard and the water is running low, is it better to try and force more frequent small drinks or just wait for a heavy rain to reset the system?

You can’t wait for the heavens to open; by the time that rain hits, your weaning calves will be too far gone to salvage. If the ground is baked and troughs are low, you don’t “force” drinks, but you do manage the supply. Keep the water you have clean and accessible. Small, frequent refills are better than letting a trough go stagnant or bone-dry. If the water’s failing, your margins are too.

Guide on how to take a temperature.

Normal Temperature Ranges Worth Memorising

I remember standing in a freezing calving shed back in ’94, staring at a heifer that looked “off” but wasn’t quite down, while some vet’s trainee tried to explain the nuances of digital infrared sensors. He was talking about technology, but I was looking at a cow that was losing value by the minute because we weren’t sure if she was actually sick or just shivering. Most of the glossy brochures you’ll find online make it sound like a science experiment, but when you’re standing in the muck at four in the morning, you don’t need a lecture on thermal imaging; you need to know exactly how to take a temperature that actually tells you something useful before the fever turns into a massive loss.

I’m not here to sell you a fancy new gadget that’ll end up gathering dust in the corner of the shed next to the broken hedge trimmers. I’m going to show you the practical, grit-under-the-fingernails way to get an accurate reading using the kit you already have. We’ll talk about the right way to handle the animal, the common mistakes that lead to false readings, and how to use that number to decide whether you’re calling the vet or just giving them a bit of extra hay.

Table of Contents

Understanding How to Take a Temperature

Understanding How to Take a Temperature.

Now, before you go poking around, you need to understand what you’re actually looking for. You aren’t checking a child for a sniffle; you’re looking for the difference between a cow that’s slightly off and one that’s going to drop dead in the middle of a wet Tuesday. You’ll see some fellas trying to use those new-fangled infrared guns, but in my experience, a digital thermometer is the only thing worth the price of the batteries when you’re dealing with a thick-skinned heifer. Infrared might give you a quick reading on the surface, but it won’t tell you what’s happening deep in the gut where the real trouble starts.

You have to be precise about how to read a thermometer once you’ve actually done the work. If you’re looking at a reading and wondering if it’s just a bit of natural variation, remember that livestock aren’t like people; their internal heat is a much more rigid indicator of a brewing infection. Don’t get distracted by the weather or the time of day. If that number is climbing, it’s not just a bit of a heat spike—it’s a signal that you’ve got a problem that’s going to cost you money if you don’t move fast.

Key Things to Know

Key Things to Know: Reading thermometers.

First thing you need to understand is that a thermometer is only as good as the man holding it. I’ve seen lads walk into a pen with a fancy new piece of kit, thinking it’ll do the thinking for them, but if you don’t know what a normal reading looks like for a heifer versus a ewe, you’re just playing with numbers. You’ll find yourself staring at a screen, wondering how to read a thermometer when the animal is already halfway out the gate. Don’t let that be you.

You also need to decide on your gear before the weather turns or the animals get restless. Some of the newer crowd swear by a digital thermometer vs infrared setups, thinking the laser point is the magic fix. In a barn, an infrared gun might give you a quick idea of surface heat, but if you want the truth of what’s happening inside the animal, you’re going to have to get your hands dirty with a standard probe. It’s not as glamorous, but it’s the only way to be sure you aren’t chasing a ghost or missing a genuine infection that’ll cost you a calf by morning.

Practical Tips and Steps

Practical Tips and Steps for livestock thermometers.

First thing’s first: get your kit sorted before you even head into the shed. I’ve seen too many lads wander into a pen with nothing but a prayer, only to find they’ve forgotten the thermometer or it’s gone missing in a pile of straw. If you’re choosing between a digital thermometer vs infrared, don’t let the fancy marketing fool you. An infrared gun is fine for a quick glance if you’re chasing a herd, but if you want to know if that heifer is actually heading for a serious infection, you need a proper digital probe. You need the hard number, not a guess.

When you’re actually doing the work, don’t be shy about the method. For livestock, we aren’t doing oral temperature measurement steps like you’d see in a nursery; you need to go rectal, and you need to do it properly. Clean the probe, get it in, and hold it steady. If you’re rushing it, you’ll get a reading that’s all over the shop, and misreading the numbers is just as bad as not taking them at all. Wait for the beep, write it down immediately, and don’t trust your memory when the rest of the herd is trying to kick your shins.

Common Mistakes to Avoid

The biggest mistake I see—and I’ve done it myself when the light was failing and the wind was up—is relying on a quick glance or a “feeling” rather than a proper reading. People tend to grab an infrared gun and think they’ve done the job, but there is a massive difference between a surface reading and what is actually happening inside the animal. If you’re using a digital thermometer vs infrared, remember that the laser only tells you about the skin. If a cow is shivering or standing in a draft, that reading is about as useful as a chocolate teapot. You need to know the core temperature to know if you’re dealing with a genuine infection or just a beast that’s been standing in a wet trough.

Another blunder is ignoring the timing. If you take a reading right after a heavy bout of exercise or during a sudden shift in weather, you’ll see body temperature fluctuations that don’t actually mean the animal is sick. You’ll end up chasing your tail with antibiotics you don’t need, wasting money that should have stayed in the bank. Don’t be in such a rush to get back to the quad; wait for the animal to settle, or you’re just guessing.

Final Thoughts

At the end of the day, a thermometer is just a bit of plastic and metal, but if you use it wrong, it’s a waste of your time and your money. I’ve seen enough people try to eyeball a sick animal, waiting for it to look “off” before they bother reaching for the kit. By then, you aren’t just looking at a fever; you’re looking at a drain on your cash flow that’s already started. Whether you’re debating digital thermometer vs infrared for your daily rounds, just remember that the most expensive reading is the one you didn’t take when you should have.

Don’t get caught out by body temperature fluctuations caused by a heavy rain or a long walk from the far field, either. If you don’t account for the environment, you’ll be chasing ghosts and treating animals that aren’t actually sick. Get the measurement right, trust the numbers over your gut feeling, and keep your eyes on the margin. It’s better to spend five minutes doing it properly now than five hours trying to fix a problem that should have been caught at the gate.

Five Things I’ve Learned the Hard Way About the Thermometer

  • Don’t trust a reading taken in the middle of a freezing gale; if you’re checking a calf in the field, get them into a bit of shelter first or the ambient chill will give you a reading that’s nothing but a lie.
  • Stop using the cheap, plastic ones that feel like a toy; if you’re going to be shoving a thermometer up a cow’s backside three times a day, buy the heavy-duty kit that won’t snap and leave you cleaning up a mess you didn’t plan for.
  • Keep a clean notebook in the shed, not just a scrap of paper in your pocket; if you don’t write down the temperature alongside the date and the animal’s ID, you’re just guessing, and guessing is how you lose a heifer.
  • Always check the thermometer against a known baseline before you start; I’ve seen men swear a beast was dying only to realise they’d been reading a faulty piece of kit that hadn’t been calibrated since the nineties.
  • Don’t be a hero and try to do it while the animal is agitated; if they’re kicking and you’re struggling, you’ll get a wrong reading and probably a bruised rib, and neither of those helps your bottom line.

The Bottom Line on Fever

Don’t treat a thermometer like a suggestion; if you’re guessing whether a cow is running hot or just had a long walk, you’ve already lost the battle against the vet’s bill.

Get the reading early and get it right—waiting until the animal is visibly flagging usually means you’re looking at a massive loss rather than a simple fix.

Keep your kit clean and your numbers recorded, because a temperature reading is useless if you can’t compare it to how that same animal was behaving last Tuesday.

The Bottom Line on Fever

At the end of the day, taking a temperature isn’t some fancy veterinary science project; it’s a basic bit of husbandry that keeps you from being blindsided. If you’ve learned anything from this, let it be that a digital thermometer is the cheapest insurance policy you’ll ever buy, provided you actually use it. Don’t just glance at a cow and decide she “looks a bit off”—get the reading, record it, and compare it to what you know is normal for your specific herd. Whether it’s a sudden spike in a calf or a slow creep in a ewe, catching it early means you’re dealing with a simple course of treatment rather than watching your margins vanish into a vet’s bill for a terminal animal.

I’ve seen plenty of lads come through these gates with the latest gadgets and the most expensive supplements, but they still lose animals because they couldn’t be bothered to check the basics. Farming isn’t about the high-tech bells and whistles; it’s about the quiet, disciplined work you do when nobody is watching. If you get the fundamentals of health monitoring right, the rest of the business tends to follow suit. Keep your eyes on the animals, keep your thermometer clean, and remember that a few minutes of effort in the pen today can save you a massive headache in the ledger tomorrow.

Frequently Asked Questions

Is there a difference in what I should be looking for if I'm checking a calf versus a mature cow?

Aye, there’s a world of difference. With a calf, you’re looking for a sudden spike; they can go from fine to crashing before you’ve finished your tea. A small rise in a calf is a red flag. With a mature cow, you’re looking for a slow creep or a drop, often linked to something like metritis or a problem after calving. Don’t treat them the same—a calf’s fever is an emergency; a cow’s is a management problem.

How often should I actually be running these checks, or am I just wasting time if they look alright to the eye?

If they look alright to the eye, you’re halfway there, but don’t let a shiny coat fool you. I’ve seen a heifer look perfectly fine one morning and be a total loss by tea time because a fever was brewing under the surface. You shouldn’t be sticking thermometers in every animal every day—that’s a waste of time and your sanity. Check the ones that look “off,” but keep a scheduled eye on the whole lot during high-stress periods like weaning or calving.

If I get a reading that looks a bit high but the animal is still eating, do I call the vet immediately or just wait and see?

If she’s still eating and the eye is bright, don’t go ringing the vet just to hear the cost of the call-out fee. But don’t just sit on your hands, either. Check the ground—is she standing in a wet patch or is the weather turning? I’ll keep a close eye on her for six hours, re-check the temp, and watch her movement. If that appetite drops even a fraction, call them. A hungry cow is a profitable cow; a cow that stops eating is a leaking tap on your cash flow.

How to spot a sick animal early.

The Animal Standing Apart Is Telling You Something

I’ve spent more money than I care to admit on fancy diagnostic kits and digital monitoring systems that promised to revolutionize the way we work. Most of that expensive kit is currently gathering dust in the shed, and frankly, it’s a waste of good cash flow. The truth is, you don’t need a sensor to tell you something is wrong; you need to actually look at what’s in front of you. Learning how to spot a sick animal early isn’t about reading a manual or waiting for a flashing red light on a smartphone; it’s about knowing the difference between a cow that’s just having a quiet afternoon and one that’s quietly bleeding you dry.

I’m not here to sell you a subscription or a new piece of hardware. I want to talk about the subtle shifts in a heifer’s gait, the way a ewe stands away from the rest, and that specific, heavy silence in a pen that tells you trouble is brewing. I’ll tell you what I’ve learned from forty years of watching the weather, the grass, and the livestock, focusing on the practical signs that actually matter when you’re out in the field. We’re going to talk about what keeps your margins intact and what keeps you from losing a calf before you even realize it’s in trouble.

Table of Contents

Understanding How to Spot a Sick Animal Early

Understanding How to Spot a Sick Animal Early

You don’t need a degree in pathology to see when something is off; you just need to actually look at the animals instead of looking at your phone. Most of the time, the trouble shows up in the animal body language changes long before the temperature spikes. A cow that isn’t head-up, or a ewe that’s lagging behind the rest of the flock when they move to water, is telling you she’s struggling. If they aren’t standing with that usual presence, they’re already costing you.

I’ve learned the hard way that you have to watch the rhythm of the field. Look for the subtle changes in appetite and thirst—if a good eater suddenly leaves a patch of clover untouched, or if they’re drinking twice what they usually do, something is brewing internally. It’s rarely a sudden collapse; it’s usually a slow slide. By the time you see a beast truly down in the mud, you’ve already lost the battle with your margins. You want to catch the decline while it’s still just a nuisance, not a catastrophe.

Key Things to Know

Key Things to Know: Sheep health changes.

You don’t need a degree in pathology to know when something is wrong; you just need to pay attention to the rhythm of the yard. Most of the time, the first clue isn’t a fever or a cough, but a shift in the usual routine. I always tell my daughter to watch for changes in appetite and thirst first. If a ewe that usually clears a trough in five minutes is suddenly picking at the grass or, worse, standing there staring at it, you’ve already lost the morning. It’s rarely a sudden collapse; it’s a slow drift away from what’s normal.

Then there are the subtle animal body language changes that people tend to overlook because they’re too busy with the tractor. An animal that’s slightly more isolated, or perhaps a cow that isn’t carrying her head quite as high as she was yesterday, is telling you a story. You might think it’s just the weather, but if you see an abnormal stool or urine pattern alongside that slight drop in spirit, you aren’t looking at a moody animal—you’re looking at a mounting bill.

Practical Tips and Steps

Practical Tips and Steps for livestock monitoring.

You can’t manage what you don’t measure, and you certainly can’t manage what you don’t see. I don’t care how much you’ve spent on fancy sensors or automated feeding systems; if you aren’t walking the pens, you’re flying blind. Start with a simple physical examination checklist every single morning. It shouldn’t take more than a few minutes per head, but you need to be looking for more than just “is it standing up.” Look at the eyes, the way the ears are set, and the depth of the breath. If a cow is standing apart from the rest of the herd, she’s already telling you something is wrong.

Keep a sharp eye on the water trough and the feed bunk. One of the first veterinary warning signs I ever learned to trust wasn’t a fever, but a sudden shift in how they interact with their resources. If you see changes in appetite and thirst—even a slight dip—don’t write it off as “just a dry spell.” A cow that stops scavenging for grass or ignores a fresh bale is a cow that is costing you money. By the time they actually go down, the profit margin on that animal has already evaporated.

Common Mistakes to Avoid

The biggest mistake I see is waiting for the “event”—that moment when a cow is flat on her side or a lamb is clearly dying. By then, you aren’t managing a farm; you’re managing a funeral, and funerals are expensive. People tend to look for the spectacular, like a fever or a limp, but they miss the quiet stuff. If you aren’t watching for subtle animal body language changes, like a ewe standing slightly apart from the flock or a cow that’s stopped grooming herself, you’re missing the window where a cheap fix becomes a total loss.

Another trap is trusting your gut over the actual data. I’ve seen many a lad walk through a field, decide everything “looks fine,” and head back to the yard, only to find three dead calves the next morning. You have to look for the specifics: changes in appetite and thirst or even just a slightly different way they’re chewing the cud. Don’t just glance; you need a mental physical examination checklist that you run through every single time you walk the perimeter. If you’re just looking for what’s broken, you’ll always be too late.

Final Thoughts

At the end of the day, you aren’t looking for a medical degree; you’re looking for a deviation from the norm. If you spend enough time in the yard, you’ll start to notice the small things—the way a heifer stands slightly apart from the rest, or those subtle animal body language changes that tell you something is off before the thermometer even moves. Don’t go looking for a crisis; just look for the absence of the usual. If the rhythm of the field feels broken, it usually is.

I’ve learned the hard way that by the time an animal is truly “sick” in the way most people think, your margins have already taken a hit. Whether it’s a sudden shift in changes in appetite and thirst or a cow that’s just looking a bit too quiet in the corner, those are your real indicators. Stop worrying about the fancy diagnostic tools for a moment and just watch the stock. If you can catch the problem while it’s still just a nuisance, you might actually keep your cash flow intact.

Five things I look for before I even reach for the gate latch

  • Watch the way they move through the gate. It’s rarely a sudden limp; it’s usually a subtle shift in weight or a slight hesitation when they turn a corner. If a cow isn’t moving with the same rhythm as the rest of the herd, she’s already costing you money.
  • Don’t just look at the animal; look at the trough. If the water is still full or the feed hasn’t been touched by the usual suspects, you don’t need a vet to tell you something is wrong. A lack of appetite is the first crack in your margins.
  • Pay attention to the “odd one out” in the group. Animals are creatures of habit, and they like to stick together. If you see one standing off by itself, away from the shade or the social group, she’s likely trying to hide the fact that she’s struggling.
  • Check the ears and the eyes. I’ve seen too many people look for a fever when they should have been looking for drooping ears or a dull, glazed look in the eye. By the time the eyes look truly vacant, you’re usually looking at a lost cause or a very expensive vet bill.
  • Listen to the silence. A healthy herd has a certain level of ambient noise—the sound of chewing, the occasional grunt. If a section of the field goes unnaturally quiet, or if you start hearing a new kind of cough or a heavy breath, get your boots on and get out there.

The Bottom Line on Early Detection

If you’re waiting for a cow to lie down and refuse to get up, you’ve already lost the battle and a chunk of your margin; the real work is in noticing the subtle shift in how she carries herself or how she lingers at the feeder.

Trust your eyes and your routine over any fancy sensor or gadget; a piece of kit that pings your phone is useless if you haven’t spent enough time in the field to know what “normal” actually looks like for your specific stock.

Treat every missed sign of sickness as a direct hit to your cash flow, because by the time a disease becomes obvious to the naked eye, the cost of the vet, the lost weight, and the potential cull has already been tallied.

The Bottom Line

At the end of the day, catching a sick animal early isn’t about having the fanciest thermometer or the most expensive vet on speed dial; it’s about actually knowing your stock. If you aren’t out there seeing how they move through the gate or noticing that one ewe lagging behind the rest of the flock, you’re essentially flying blind. You have to watch the subtle shifts—the way they hold their head, the way they interact with the grass, and the way they stand when they think no one is looking. If you ignore those small, quiet signals, you aren’t just risking the animal’s welfare; you are inviting a hole in your cash flow that no amount of clever bookkeeping can plug.

Farming isn’t a job where you can hide behind a spreadsheet and expect the livestock to take care of themselves. It’s a hard, seasonal grind that demands you be present, even when the weather is foul and the margins are thin. But there is a quiet sort of satisfaction in knowing your herd so well that you spot a problem before it becomes a crisis. Don’t get distracted by the shiny new gadgets or the latest marketing promises; stick to the basics of observation and intuition. If you keep your eyes on the ground and your hands on the animals, you’ll find that the most valuable tool on this farm has always been your own damn eyes.

Frequently Asked Questions

When do I draw the line between a cow just having a quiet day and one that’s actually going to cost me a calf?

You draw the line when the “quietness” stops being about the weather and starts being about the feed. A cow can sit in the shade all afternoon if it’s been a dry spell, and I won’t tell you otherwise. But if she’s sitting out of the wind, head low, and hasn’t touched her ration, she’s not resting—she’s retreating. If you see her lagging behind the rest of the herd during a move, that’s your signal. Don’t wait for the fever; by then, you’re already looking at a vet bill and a wasted calf.

Is it worth the time to pull a sheep out of the flock for a closer look if it’s only slightly off, or am I just wasting diesel and daylight?

If you’re asking if it’s a waste of diesel, you’ve already lost the argument. A sheep that’s “slightly off” is a sheep that’s currently eating your profit. I’ve seen too many lads walk past a dull ewe because the weather was turning, only to find a carcass in the bottom field two days later. Pull her out. If it’s nothing, you’ve lost twenty minutes; if it’s something, you’ve saved the rest of the flock and your margin.

How do I tell the difference between an animal that's genuinely sick and one that’s just reacting to a sudden change in the ground or a wet spell?

You look at the eyes and the gait. If it’s just a wet spell, they’ll be a bit lethargic or perhaps a bit more “tucked up” when they stand, but they’ll still find the feed when you show up. A truly sick animal has a look in its eye that doesn’t clear up when the sun hits the field. If they aren’t lifting their head to watch you approach, you aren’t looking at a weather problem; you’re looking at a loss.