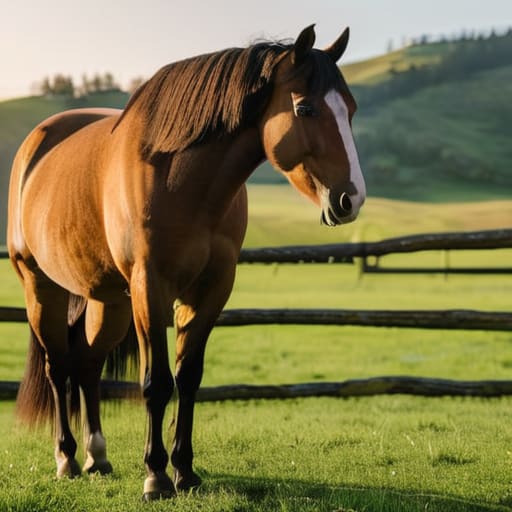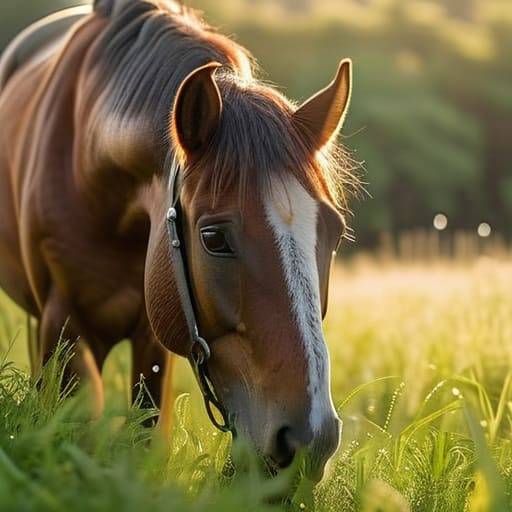
Learning how to care for horses on a farm.

Horses Are Not Livestock and Do Not Graze Like Them

I’ve spent forty years watching people throw money at problems that don’t exist, usually because some lad in a shiny tractor drove past with a brochure for a “revolutionary” supplement. If you think learning how to care for horses on a farm is about finding the right brand of vitamin-enriched grain or buying the latest gadget from a catalogue, you’ve already lost the plot. Most of that expensive kit ends up sitting in the corner of the shed, gathering dust and mocking your bank balance. The truth is, if you aren’t looking at the quality of your soil and the state of your drainage first, you aren’t managing animals; you’re just subsidizing a vet’s new holiday home.

I’m not here to sell you a dream or a subscription service. I’m going to tell you what actually keeps a horse standing on its own four feet when the weather turns foul and the margins get thin. We’ll talk about the real cost of pasture management, why a solid footing matters more than any fancy feed, and how to stop the small, daily leaks in your cash flow before they sink you. This is about the practical, unglamorous reality of keeping livestock healthy without going broke in the process.

Table of Contents

Understanding How to Care for Horses on a Farm

Understanding How to Care for Horses on a Farm.

Now, if you’re planning to keep horses alongside the livestock, you have to understand that they aren’t just “big sheep” with higher egos. They require a different kind of attention, especially when it comes to pasture management for horses. You can’t just turn them out on the same ground where the cattle have been grazing for six months and expect them to thrive. The parasite load alone will have your vet bills climbing faster than the price of diesel, and if you aren’t diligent with your equine parasite control, you’re essentially throwing money into a hole in the ground.

It isn’t just about the grass, either; it’s about the consistency of what goes into them. I’ve seen many a well-meaning person try to follow some fancy, expensive diet plan, only to realize that a solid, predictable approach to equine nutrition and feeding schedules is what actually keeps the ribs from showing. You need to watch the condition of the animal daily—not just once a week when you feel like it. If you aren’t looking for those subtle horse health monitoring signs before a problem becomes a crisis, you’re already behind the eight ball.

Key Things to Know

Key Things to Know: Pasture Management.

First, let’s get one thing straight: you can’t manage a horse if you don’t understand the ground it stands on. I’ve seen plenty of lads buy the most expensive grain on the market only to wonder why their animals look hollow. If your pasture management for horses is non-existent, you aren’t feeding them; you’re just gambling with their gut health. You have to look at the sward, the drainage, and the seasonal shift in nutrients. A horse isn’t a pet you keep in a vacuum; it’s a biological machine that relies on the quality of the grass and the consistency of the feed.

Then there is the matter of the feet. People get obsessed with fancy supplements and pedigree breeding, but they forget that a horse is only as profitable—or as healthy—as its foundation. If you aren’t rigorous with your horse hoof care routines, you’ll be spending your spring profits on farrier bills and vet calls rather than seeing them in your bank account. It isn’t about the latest gadget; it’s about watching the small things before they become expensive disasters. If you miss the subtle signs of a change in gait or a dip in appetite, you’ve already lost the battle.

Practical Tips and Steps

Practical Tips and Steps for pasture management.

First things first: stop looking at your horse as a pet and start looking at it as a biological machine that runs on what you put in the ground. If your pasture management for horses is a shambles, no amount of expensive grain in a bucket is going to fix the underlying deficit. You have to watch the grass like a hawk; if the sward is getting leggy or the quality drops, you’re just feeding them fiber and hope. I’ve seen too many folks spend a fortune on supplements while their animals are essentially grazing on nothing but stems and dust.

Then there is the matter of the feet. You can have the finest bloodlines in the county, but if you aren’t disciplined with your horse hoof care routines, you’re just waiting for a vet bill that’ll make your eyes water. It isn’t just about the farrier coming round; it’s about how they move across your specific ground when it’s soaked in November. If the footing is poor, the cost of lameness will eat your margins faster than a bad year in the cattle market. Watch the gait, watch the soil, and watch your bank balance.

Common Mistakes to Avoid

The biggest mistake I see—and I’ve seen it in my own yard—is treating a horse like a piece of machinery you just fuel up and expect to run. People get so caught up in buying the most expensive supplements that they completely neglect basic pasture management for horses. You can throw all the fancy feed in the world at a horse, but if the ground is poached to the clay or the grass is nothing but weeds and grit, you’re just burning money. A horse isn’t a tractor; it lives off the land, and if the land is poor, the animal will show it in its condition long before you see it in your bank balance.

Then there’s the trap of the “set and forget” mentality. I’ve watched young lads skip their horse hoof care routines because the weather was too fine or they were too busy with other jobs. They think a trim once a year is enough until a horse goes lame, and suddenly you’re paying triple for a vet to tell you what you should have seen three months ago. It’s the same with parasite control; don’t just follow a calendar because a salesman told you to. Watch the animal, watch the ground, and don’t let complacency become your most expensive overhead.

Final Thoughts

At the end of the day, you can buy the most expensive pedigree in the yard, but if you haven’t got the basics sorted, you’re just subsidizing a hobby rather than running a farm. I’ve seen plenty of people get caught up in the shiny bits—the fancy supplements or the latest gadgetry—while their pasture management for horses is a complete shambles. If the ground is poached and the nutrition is inconsistent, no amount of expensive feed will fix the underlying problem. It always comes back to the same thing: you have to watch the grass, the feet, and the bank balance.

Don’t get distracted by the marketing fluff. Focus on a solid horse hoof care routine and keep a sharp eye on your margins. If you spend all your time worrying about things that don’t impact the bottom line, you’ll find yourself working harder for less. Keep your records straight, watch for the small changes in how they carry themselves, and remember that the simplest systems are usually the ones that actually work when the weather turns foul. Everything else is just noise.

Five Things That’ll Either Save Your Margin or Sink Your Season

  • Watch the ground, not just the grass. A horse on a lush field looks a fine sight, but if that ground is turning into a bog because you haven’t managed your rotation, you aren’t growing feed—you’re growing lameness. You can’t feed a horse that’s gone stone-dead lame because you were too stingy with the fencing to move them to fresh ground.
  • Stop buying the shiny new gadget every time a catalogue lands on the mat. I’ve seen more “revolutionary” automatic feeders and grooming kits gathering dust in sheds than I care to count. If it doesn’t directly improve the animal’s health or shave a measurable amount off your daily labor, it’s just an expensive way to clutter up the yard.
  • Treat your farrier like a business partner, not a service provider. If you’re only calling him when a horse is limping, you’ve already lost the battle. Regular, preventative maintenance is a fixed cost you can plan for; emergency corrective work is a variable cost that will bite you right when the cash flow is tightest.
  • Learn the difference between a “cheap” horse and a “profitable” one. A horse with a low purchase price can become the most expensive animal on your land if it has poor teeth, bad feet, or a temperament that keeps you out in the yard at 2:00 AM. I’d rather pay a premium for a sound animal with a clean record than spend five years trying to fix a mistake.
  • Keep your eyes on the muck, literally. Most of the big problems—respiratory issues, parasites, or foot rot—start in the bedding. If you’re trying to save a few quid by stretching the time between mucking out, you’re just trading a small saving today for a massive vet bill next month. It’s basic math, and it rarely works in your favor.

The Bottom Line

Stop looking at the flashy equipment in the brochures and start looking at your pasture and your feet; if the ground is poor and the hooves are soft, no amount of expensive supplements will save your margin.

Treat lameness like a thief in the night—it doesn’t just hurt the animal, it bleeds your cash flow dry through vet bills and lost performance before you’ve even realized the damage is done.

Don’t buy into the marketing hype that promises a quick fix; farming is a game of long-term observation, and if a piece of kit doesn’t solve a problem you’ve seen with your own eyes three seasons in a row, it belongs in the shop, not your shed.

The Bottom Line

At the end of the day, caring for horses on a working farm isn’t about having the fanciest stable block or the most expensive supplements you saw in a glossy catalogue. It’s about the fundamentals that most people overlook until they’re staring at a vet’s invoice they can’t afford. If you keep your eye on the quality of the ground they stand on, stay ahead of the lameness before it starts, and don’t let your feed costs spiral out of control, you’ve already won half the battle. It comes down to watching the grass, checking the feet, and making sure your cash flow stays as healthy as the animals themselves.

Farming—whether you’re running a suckler herd or a yard of horses—is a long game played against the weather and the markets. You will make mistakes; I certainly have, and most of them involved buying a piece of kit that looked clever on paper but sat gathering dust in the shed by November. Don’t let the fear of a bad season stop you from doing the work, but don’t let pride stop you from learning the hard way. If you treat your livestock with practical respect and keep a sharp eye on the margins, you’ll find that the rewards are measured in much more than just pounds and pence.

Frequently Asked Questions

How do I stop the horses from turning my best grazing into a mud bath the moment the weather turns?

You can’t fight the rain, but you can stop being a martyr for a patch of ground that’s gone. If that field is turning to soup, get them off it. Period. I’ve seen men lose a fortune trying to “manage” a poached paddock when they should have just moved the stock to the hardstanding or a sacrificial acre. Rotate them, use sacrificial areas, and for heaven’s sake, stop treating a mud bath like a grazing opportunity.

At what point does the cost of specialized feed stop being an investment and start being a drain on the farm's actual working capital?

It stops being an investment the moment you’re feeding for a result you can’t see in the ledger. If you’re buying expensive concentrates to chase a bit of extra shine or a marginally better coat, you’re just subsidizing the feed merchant’s next holiday. You calculate the cost per animal against the actual market value of the gain. If that math doesn’t square by the time the check clears, you aren’t investing; you’re just bleeding cash.

If I'm running a mixed farm, how do I manage the risk of disease moving between my livestock and the horses without spending a fortune on biosecurity?

You don’t need a fancy decontamination shower to keep the rot at bay. It’s about the basics: boots, gates, and common sense. If you’re moving from the cattle yard to the stables, change your boots or at least use a dedicated footbath that actually has fresh disinfectant in it. Don’t share feed buckets or hay between species, and for heaven’s sake, keep the livestock movement away from the horse paddocks. It’s about discipline, not expensive kit.

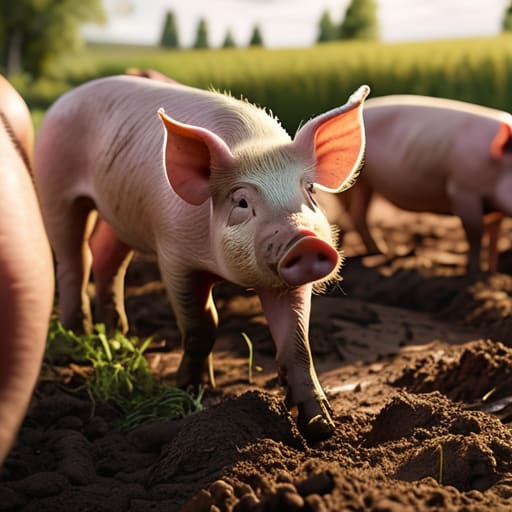
Tips on how to keep pigs outdoors.

Outdoor Pigs and What They Do to Ground

I spent half a fortune ten years back on a “state-of-the-art” automated feeder and a designer mobile shelter because a brochure told me it was the gold standard for welfare. Two months later, I was standing knee-deep in a slurry-filled crater, watching my profit margin sink into a bog while the expensive kit sat uselessly in the muck. Most of the advice you read online about how to keep pigs outdoors is written by people who have never had to clean a pen in a driving rain or balance a ledger after a wet winter. They talk about “enrichment” and “natural behaviors” as if those things pay the bills, but they forget to mention that if you haven’t sorted your drainage, you aren’t farming pigs—you’re just managing a swamp.

I’m not here to sell you a lifestyle or a piece of kit you’ll regret buying by November. I want to talk about the reality of the ground under your feet, the actual cost of feed when it gets damp, and the unseen expenses that turn a simple outdoor setup into a financial sinkhole. I’ll tell you exactly what works when the weather turns foul and which “essential” gadgets are nothing more than expensive scrap metal.

Table of Contents

Understanding How to Keep Pigs Outdoors

Understanding How to Keep Pigs Outdoors.

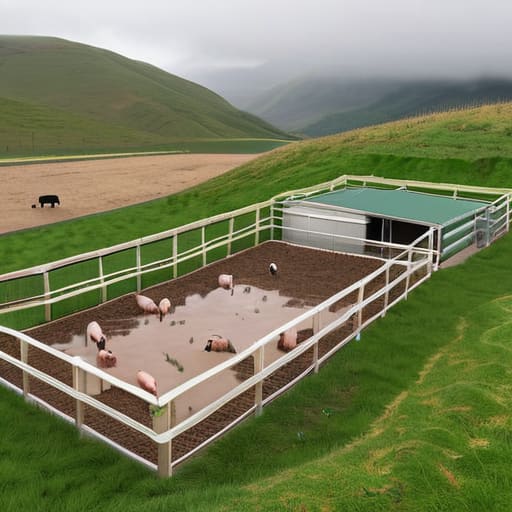
Before you go buying a dozen piglets and a fancy mobile feeder, you need to look at your map and your weather station. People talk about pig enclosure design like it’s a matter of aesthetics, but for me, it’s a matter of drainage and topography. If you put them in a hollow where the water sits after a heavy rain, you aren’t farming; you’re just managing a glorified mud bath. You have to account for the fact that a pig’s natural instinct is to dig, and if you don’t have a plan for protecting pasture from rooting, you’ll find yourself looking at a patch of bare earth that looks more like a construction site than a farm by mid-summer.

It isn’t just about giving them space to roam; it’s about the cost of the ground beneath them. If you don’t manage the rotation, you’ll be losing more in soil recovery and fence repairs than you’ll ever make back in pork. Effective outdoor pig welfare means understanding that a pig is essentially a high-powered earthmover. If your plan doesn’t include a way to rotate them before they turn your best grazing into a dust bowl or a bog, you’re just inviting a headache that no amount of expensive feed can fix.

Key Things to Know

Key Things to Know: pig enclosure design.

First off, don’t go thinking a bit of wire and a gate is all you need. If you don’t get the pig enclosure design right from the start, you aren’t farming; you’re just managing a mud pit. You have to look at the slope of the land and where the water sits when the clouds break. If you put them in a hollow, you’ll be fighting a losing battle against rot and heavy feet before the first month is out.

The biggest mistake I see—and I’ve made it myself—is underestimating how quickly they can turn a decent field into a wasteland. You aren’t just keeping animals; you are managing swine soil erosion. If you leave them in one spot too long, they’ll root right down to the subsoil, and once that happens, you aren’t getting your grass back for years. It’s about rotation and knowing when to move them. If you aren’t thinking about protecting pasture from rooting, you’re essentially just paying to destroy your own ground.

Practical Tips and Steps

Practical Tips and Steps for pig enclosures.

First, stop thinking about where you want the pigs to be and start looking at where the water goes when it pours. If you put your pens in a hollow, you aren’t farming; you’re just managing a glorified bog. Proper pig enclosure design begins with the slope. You need a bit of a gradient to shed the rain, otherwise, you’ll spend your entire spring fighting a losing battle against deep mud and foot rot. I’ve seen many a young lad buy a beautiful, expensive mobile unit only to realize it’s useless once the ground turns to soup.

Second, you have to be ruthless about rotation. If you leave them in one paddock until they’ve turned it into a dust bowl or a swamp, you’ve failed. Managing swine soil erosion isn’t some fancy environmental goal; it’s basic common sense to keep your land productive. Move them frequently and use sacrificial areas—hard standing or heavily reinforced ground—for the heavy weather. If you don’t focus on protecting pasture from rooting in the wrong spots, you’ll find yourself staring at a field of bare dirt and a massive repair bill come autumn.

Common Mistakes to Avoid

The biggest mistake I see is people treating a pig enclosure like a garden project rather than a piece of working infrastructure. They pick a spot because it looks pleasant in the spring, only to find themselves staring at a soup of mud by November. If you haven’t accounted for the drainage, you aren’t farming; you’re just managing a swamp. You can spend a fortune on the best-looking pigs in the county, but if your pig shelter requirements don’t include a dry, raised area that stays out of the muck, you’ll spend every penny of your profit on vet bills for respiratory issues and foot rot.

Another one that bites is the “set it and forget it” mentality regarding the land. People underestimate how quickly a small group can turn a decent paddock into a dust bowl or a bog. If you aren’t actively managing swine soil erosion through rotational movement or heavy mulching, you’re essentially paying to destroy your own asset. I’ve seen men lose an entire season’s worth of margin because they thought they could just let the pigs roam a fixed acre and hope for the best. It doesn’t work that way. You either manage the ground, or the ground will eventually manage your bank balance.

Final Thoughts

At the end of the day, you have to stop looking at pigs as just an entry on a spreadsheet and start looking at the ground they stand on. If you ignore the reality of protecting pasture from rooting, you aren’t farming; you’re just managing a slow-motion construction site of mud and wasted potential. I’ve seen plenty of lads go into this thinking they can just turn them out and let nature take its course, only to find themselves staring at a patch of dirt that won’t grow a blade of grass for three years.

Don’t get distracted by the glossy brochures promising easy fixes. Good outdoor pig welfare isn’t found in a fancy gadget, but in the discipline of rotation and knowing when to pull them back. It’s about the hard math of whether the weight they put on is worth the damage they do to your soil. If you get the ground right and the shelter sorted, the rest usually follows. If you don’t, you’ll spend more time fixing fences and draining bogs than you will actually making a profit.

Five things I’ve learned from watching pigs turn a paddock into a swamp

  • Stop looking at the pig and start looking at the drainage; if you haven’t checked the slope of the ground and how much rain hit the valley last November, you aren’t ready to turn them out, because once that soil turns to a slurry, you’re just subsidising a mud bath that’ll rot their feet faster than you can write the check.
  • Don’t go buying the most expensive, high-tech automated feeder on the market only to find it gets clogged with grit and muck within a week; get something heavy, simple, and easy to clean, because if a piece of kit requires a degree in engineering to fix when it’s freezing in January, it’s just expensive scrap metal.
  • Watch your margins on the feed, because if you’re letting them forage but still supplementing with expensive bagged stuff, you’re likely losing money on the gap between what they’re actually eating and what you’re paying for; if the grass isn’t doing the heavy lifting, the math rarely works out in your favour.
  • Shelter isn’t a luxury, it’s a necessity for the bottom line; a pig that’s shivering or soaked to the bone isn’t converting feed into weight, it’s burning it all just to stay alive, so don’t skimp on a solid windbreak or a sturdy hut just to save a few quid upfront.
  • Keep a close eye on the perimeter fencing, because a pig’s only real job is to find the one weak spot in your investment and push right through it; if you’re too stingy with the wire or the posts, you’ll spend more time chasing them through the hedgerow than you will actually managing the herd.

The Bottom Line on Outdoor Pigs

Don’t get blinded by the ‘natural’ label and forget the ground; if you haven’t planned for the drainage and the muck, you’ll spend your entire profit margin on vet bills for hoof rot and mud-caked lungs.

Stop buying gadgets that promise a quick fix for management; if the infrastructure isn’t solid and the fencing isn’t right, that expensive new feeder will just be an expensive anchor in a bog by November.

Watch your cash flow as closely as you watch the pigs; outdoor systems have different rhythms and higher risks, so if you haven’t budgeted for the extra labour and the inevitable weather-related setbacks, you’re just gambling, not farming.

The Bottom Line on Outdoor Pigs

If you take nothing else from this, remember that keeping pigs outdoors isn’t about buying the most expensive automated feeder or the trendiest shelter on the market; it’s about the ground beneath their feet. You can have the best genetics in the county, but if you haven’t managed your drainage or accounted for how quickly a wet autumn turns a paddock into a soup, you aren’t farming, you’re just managing a mud pit. Watch your margins on the feed, keep a sharp eye on the hoof health, and for heaven’s sake, don’t overcomplicate the infrastructure until you’ve seen how the weather actually treats your site. At the end of the day, success is found in the basics: good grass, dry feet, and a budget that doesn’t bleed out through a leaky trough.

There will always be someone in a glossy magazine telling you there’s a new shortcut or a piece of kit that will do the thinking for you. Ignore them. Farming is a slow game of observation and patience, and outdoor pigs are no different. It takes a bit of grit to get the setup right, and you’ll likely make a mistake or two before the system settles, but there is a particular satisfaction in seeing a herd thrive in a way that feels natural. Stick to what you can measure, trust your own eyes over a salesman’s brochure, and remember that the most profitable farm is usually the one that respects the landscape instead of trying to fight it.

Frequently Asked Questions

How do I stop the pigs from turning my best grazing into a permanent bog by mid-winter?

If you’ve let them turn your best field into a soup, you’ve already lost the battle. You can’t fix a bog with hope; you fix it with rotation and hard boundaries. Move them to the sacrificial ground—the corner of the field with the worst drainage—and fence off the good stuff. If you don’t, you’re just paying to destroy your soil structure. Buy a decent mobile feeder, too; if they’re rooting for scraps, they’re rooting for mud.

Is it actually worth the extra cost of heavy-duty mobile fencing, or am I just paying for something that'll rot in the shed?

Look, I’ve spent enough seasons watching cheap netting sag into the mud like a wet rag to tell you this: if you’re buying the light stuff just to save a few quid today, you’re paying for it twice tomorrow. If the ground is wet and the pigs are hungry, they’ll find the weak spot in a heartbeat. Buy the heavy-duty stuff. It’s a bitter pill for the cash flow now, but it won’t be sitting in the shed rusting by next March.

How do I figure out if the cost of extra feed and vet bills for outdoor pigs is actually going to be offset by the lower overheads?

Stop looking at the feed bill in isolation; that’s a trap. You need to look at the margin per pig, not just the cost per bag. Sit down with your books and tally the extra feed and the vet calls against what you’re saving on housing, heating, and intensive labor. If your “lower overheads” are being eaten up by a muddy field and a vet treating foot rot, you aren’t farming; you’re just subsidizing a hobby.

How to keep poultry on a small scale.

Small Flock Poultry: Predators First

If you’ve spent more than ten minutes scrolling through those glossy lifestyle blogs, you’ve likely been told that learning how to keep poultry on a small scale is all about choosing the prettiest coop and buying organic, artisanal grain. It’s a lie designed to separate a person from their hard-earned cash. I’ve seen enough “hobbyist” setups turn into expensive, muddy disasters because someone spent three hundred pounds on a designer nesting box but forgot to check if their ground could actually drain after a week of rain. Most of that advice is written by people who have never had to clean out a coop in a freezing downpour or balance a feed bill against a shrinking margin.

I’m not here to sell you a dream or a piece of kit that’ll just sit in the shed collecting dust by next spring. What I’ll give you is the truth about what it actually takes to keep birds healthy and, more importantly, economically viable. We’re going to talk about the real pillars: the quality of your ground, the cost of the feed versus the yield, and why preventing a single bout of disease is worth more than any fancy gadget you can find online.

Table of Contents

Understanding How to Keep Poultry on a Small Scale

Understanding How to Keep Poultry on a Small Scale.

Now, before you go ordering a dozen fancy breeds from a catalogue, you need to look at what you’ve actually got to work with. People talk about raising poultry in limited space as if it’s just a matter of putting a few birds in a wooden box and calling it a day. It isn’t. If you don’t have enough room for them to move without stepping in their own filth, you aren’t farming; you’re just managing a disease incubator. I’ve seen plenty of folks buy a massive, overpriced coop only to realize they haven’t accounted for the drainage or the windbreak needed to keep the birds from freezing or getting soaked.

The reality of small flock management tips usually boils down to one thing: your ability to keep up with the mess. You can have the best feed in the world, but if your backyard chicken coop setup is sitting in a boggy corner of the garden, those birds will be down with coccidiosis before the first month is out. You have to balance the desire for more birds against the hard reality of your available square footage and your daily labor. If you can’t manage the waste, don’t bother with the birds.

Key Things to Know

Key Things to Know: Choosing chicken coops.

First off, don’t let the glossy catalogs fool you. You’ll see plenty of people online showing off a fancy, cedar-clad backyard chicken coop setup that looks more like a garden ornament than a working unit. If you’re serious about raising poultry in limited space, you need to stop looking at the aesthetics and start looking at the drain on your wallet. A coop that’s too small leads to stress and disease, but a coop that’s too big is just more surface area for heat to escape and more expensive kit to clean.

Then there is the matter of what they actually eat. Most beginners treat small scale poultry nutrition like a buffet, buying every bag of “premium” organic grain they see on the shelf. I’ve seen more money wasted on overpriced feed than on actual infrastructure. You have to balance the cost of that feed against the price of the eggs or meat you’re actually getting out of it. If your feed bill is higher than your market return, you aren’t farming; you’re just subsidizing a hobby for your birds.

Practical Tips and Steps

Practical Tips and Steps for chicken coops.

First, let’s talk about your backyard chicken coop setup. Most people spend a fortune on fancy, multi-story houses that look grand in a catalogue but end up being a nightmare to clean. If you can’t scrape the floor and manage the muck without breaking your back, you won’t do it, and that’s when you run into trouble. Keep it simple: solid footing, easy access for yourself, and enough ventilation so they aren’t breathing in their own dampness. A wet coop is a shortcut to respiratory issues, and I’ve seen enough birds go to waste because someone thought aesthetics mattered more than airflow.

When it comes to protecting backyard birds from predators, don’t skimp on the hardware cloth. Using that flimsy chicken wire is a mistake I’ve seen plenty of youngsters make; it keeps the chickens in, but it won’t keep a fox out. You need something substantial that can actually take a hit. Once you’ve got the perimeter sorted, focus on the ground. If you’re raising poultry in limited space, you’ll find the ground turns to a slurry faster than you think. Invest in some deep litter or a decent drainage plan, otherwise, you’ll be chasing mud and disease all season long.

Common Mistakes to Avoid

The biggest mistake I see is people getting blinded by the “cute” factor and buying a fancy, pre-fabricated backyard chicken coop setup from a garden centre. They see a polished little wooden house with a window and think they’re farmers. They aren’t. Most of those kits are built for aesthetics, not for the reality of a bird’s biology. If you don’t have proper ventilation, you aren’t raising poultry; you’re just managing a damp, ammonia-filled box that’ll rot the lungs out of your birds before the first winter hits. You can spend a fortune on the housing, but if the airflow is rubbish, you’re just subsidising the vet’s next holiday.

Then there’s the feed. People think they can cut corners with kitchen scraps or cheap, generic grain to save a few pence. That’s a fool’s errand. Small scale poultry nutrition isn’t a luxury; it’s the engine room of your margins. If you skimp on the protein and calcium, you’ll end up with soft-shelled eggs and birds too weak to fight off a common infection. I’ve seen more money lost to poor nutrition and the subsequent vet bills than I ever lost to a bad market year. Don’t try to be clever with the feed; just buy what works and keep your eyes on the birds.

Final Thoughts

Look, if you’re heading out to the shop to buy a pre-fabricated, shiny coop because the brochure says it’s “foolproof,” stop yourself right there. Most of that kit is built for looks, not for the reality of a wet Tuesday in November. At the end of the day, raising poultry in limited space isn’t about how much gear you can cram into a corner of the garden; it’s about whether that space can actually support the birds without turning into a mud bath that breeds nothing but trouble.

If you get the basics right—the ground, the shelter, and the feed—you’ll do better than most. But don’t expect a shortcut. You’ll spend more time watching the weather and checking the perimeter for foxes than you will enjoying the novelty of it. My advice is to keep your overheads low and your eyes on the actual margins. If you focus on the health of the birds and the quality of the ground they stand on, you might actually come out ahead. If you focus on the gadgets, you’ll just be a person with an expensive, empty shed.

Five things that’ll actually keep you in the black

  • Stop looking at the price of the birds and start looking at the price of the feed. I’ve seen plenty of people buy a fancy flock of heritage breeds thinking they’re getting something special, only to realize they’re spending three times the market rate just to keep them from starving. If the feed conversion doesn’t make sense on paper, you aren’t farming; you’re just running a very expensive charity for birds.
  • Don’t get blinded by shiny new coop designs on the internet. Most of those kits are built for aesthetics, not for a wet Tuesday in November. If you can’t walk through it with a shovel or a broom to clear out the muck, it’s a waste of money. Ventilation and dry feet are the only two things that matter when the temperature drops; everything else is just decoration.
  • Watch your ground before you decide how many birds you can handle. People love to talk about “stocking density” like it’s a fixed number, but a hundred birds on well-drained, sloping ground is a different world to a hundred birds on heavy clay that turns to a bog the moment it drizzles. If you overstock a small patch, you’ll turn your yard into a swamp, and then you’ll be paying for vet bills and extra bedding just to keep them upright.
  • Invest in a good perimeter fence before you buy a single chick. I’ve spent more money replacing lost stock to foxes and badgers than I care to admit. A cheap wire fence might look fine in the summer, but once the wind picks up or a hungry predator finds a soft spot, that “bargain” setup will cost you your entire season’s profit in a single night.
  • Keep your records on paper or a simple spreadsheet, not some fancy app that costs a monthly subscription. You need to know exactly what a dozen eggs or a single bird is costing you in terms of grain, bedding, and your own time. If you aren’t tracking the inputs, you won’t know you’re losing money until the bank account tells you, and by then, it’s too late to change course.

The Bottom Line Before You Start

Don’t let the idea of “homesteading” blind you to the feed bill; if you haven’t calculated the cost of every kilo of grain against your projected yield, you aren’t farming, you’re just subsidizing your hobby.

Forget the fancy automated drinkers and heated nesting boxes for a moment and look at your ground—if you don’t have a plan for drainage and mud management, your birds will be walking on rot before the first season is out.

Focus on the basics of health and biosecurity over expensive equipment, because a single bout of preventable disease will wipe out your entire investment far faster than any piece of high-tech kit can save it.

The Bottom Line on the Birds

If you’ve taken anything from this, let it be this: don’t get blinded by the shiny brochures or the promise of easy organic eggs. Keeping poultry on a small scale isn’t about having the most expensive automatic drinkers or the prettiest coop you saw on Instagram; it’s about the relentless management of feed, floor, and finances. You have to watch your margins like a hawk—ironic, I know—because a single bad run of damp bedding or a sudden spike in grain prices will swallow your profit faster than a hungry fox. Keep your eyes on the birds’ feet, keep your records straight, and for heaven’s sake, never underestimate the cost of a bird that isn’t producing.

At the end of the day, farming—even on a patch of garden—is a lesson in humility. You will have seasons where the weather turns foul and the birds just won’t settle, and you will undoubtedly buy a piece of kit that ends up rusting in the corner of the shed. But if you approach it with a bit of common sense and a willingness to learn from the mistakes I’ve already paid for, there is a deep, quiet satisfaction in it. There is nothing quite like seeing a healthy flock thrive on ground you’ve managed well. It’s not about getting rich; it’s about doing it right, and that’s a reward that doesn’t show up on a balance sheet.

Frequently Asked Questions

How much of a buffer do I actually need in my bank account before I start buying birds, considering the feed prices fluctuate like the weather?

Don’t look at the cost of the birds; that’s just the entry fee. Look at the feed and the vet bills. If you haven’t got three months of operating costs—feed, bedding, and a contingency for when a sudden chill takes out a dozen birds—sitting in the bank, you aren’t starting a business, you’re starting a hobby that’ll bleed you dry. When grain prices spike, you won’t have the luxury of waiting for a market turnaround.

If I’m working with limited ground, how do I stop the birds from turning my patch into a mud bath that’ll ruin the grass for next season?

You’re asking about the ground, so you’re already thinking better than most. If you let them sit on one patch, you won’t have grass next year; you’ll have a bog. You need to move them. Rotational grazing isn’t just a fancy term; it’s survival. Divide your space with cheap electric fencing and move the birds before they break the sward. If the rain’s heavy, keep them off the wet bits entirely. Protect the soil, or the birds won’t have anything to eat.

At what point does the cost of the specialized housing and equipment stop being an investment and start being a way to bleed my margins dry?

It stops being an investment the moment you’re buying gear for the “ideal” bird rather than the one you actually have. I’ve seen men spend five figures on automated climate-controlled houses only to realize their margin can’t cover the electricity bill when the wind picks up. If the kit doesn’t directly reduce mortality or shave a penny off your feed conversion, it’s just expensive scrap metal waiting to happen. Stick to what works, not what looks good in a brochure.

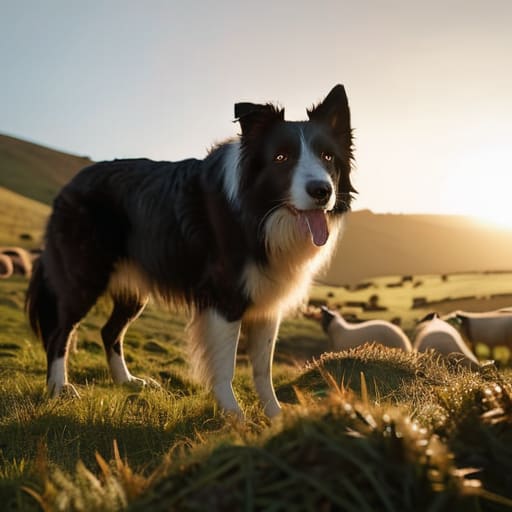
How to train a working dog.

Training a Dog on Stock Without Ruining Either

I’ve lost count of how many times I’ve seen a young lad walk into the mart with a pedigree pup that looks like a million pounds but has the work ethic of a house cat. The problem is, most of the books and fancy seminars out there on how to train a working dog are written by people who have never had to chase a stray ewe through a bramble thicket in a driving rain. They talk about “positive reinforcement” and “complex cues” as if you’re teaching a poodle to sit for a biscuit, rather than trying to instill the instinctive grit required to move a flock when the weather turns foul and the sheep get flighty.

I’m not here to sell you a miracle cure or a piece of high-tech gear that’ll be gathering dust in the shed by November. What I’m going to give you is the truth about what actually works when you’re standing in a muddy field at five in the morning. We’ll talk about the patience required to build a partnership, the mistakes that cost me a season of lambing, and the hard reality of turning a pup into a tool that actually earns its keep.

Table of Contents

Understanding How to Train a Working Dog

Understanding How to Train a Working Dog.

Before you even think about whistling for a dog, you need to look at what’s standing in front of you. I’ve seen lads buy a high-strung Border Collie because it looked good in a catalogue, only to find out they’ve bought a ball of nerves that won’t listen to a word they say. You have to respect the working breed temperament; some dogs are built to drive, others to hold, and some are just built to be a nuisance in a small kitchen. If the dog doesn’t have the innate drive to work, no amount of expensive schooling is going to fix it. You can’t train instinct into a dog that doesn’t have it.

Once you’ve got the right animal, you have to stop treating it like a pet and start treating it like a partner. Most of the fancy manuals talk about advanced task training as if it’s some magic trick, but it’s really just about consistency. I’m a firm believer in positive reinforcement methods—not because I want to be soft, but because a dog that’s terrified of you is a dog that’s going to make a mistake when the pressure is on in the field. If he’s working for a reward rather than just avoiding a boot, he’ll stay focused when the weather turns foul.

Key Things to Know

Key Things to Know: Working breed temperament.

First, you have to stop looking at a dog as a pet and start looking at it as a piece of livestock equipment that breathes. If you get the wrong working breed temperament for your specific terrain, you’re just wasting your time and your feed bill. A dog that’s all instinct and no discipline is a liability when you’ve got a mob of sheep heading for a boggy corner of the north field. You aren’t looking for a companion to sit on the sofa; you’re looking for a partner that understands the boundary between the gate and the hill.

I’ve seen plenty of lads try to skip the basics, thinking they can jump straight into the field, but you can’t build a working animal on a shaky foundation. You need to focus on herding instinct development through controlled, incremental steps, not by throwing them into the deep end with a hundred head of ewes. If they haven’t mastered basic control in the yard, they’ll be useless when the weather turns and the sheep get flighty. It’s about building a reliable response, not just hoping they feel like working when the pressure is on.

Practical Tips and Steps

Practical Tips and Steps for herding training.

Now, you can’t just throw a pup into a field of ewes and expect a miracle. If you want to avoid the heartbreak of a dog that’s more interested in chasing its own tail than moving stock, you have to start with the basics of herding instinct development when they’re still young enough to listen. I learned the hard way that trying to force a dog into a job it isn’t built for is a quick way to lose both the animal and your patience. You need to observe the working breed temperament first; some dogs have the drive, but they lack the head for it.

When you actually get down to the work, skip the fancy gadgets and stick to what works. I’ve found that using consistent positive reinforcement methods—and I mean actual rewards, not just a pat on the head—gets them to connect the command to the result much faster. Don’t get caught up in the heavy-duty training manuals that promise a finished product in a week. It’s about small, repeatable wins in the yard before you ever let them loose on a hillside. If they can’t hold a position in the kitchen, they won’t hold a line in the rain.

Common Mistakes to Avoid

The biggest mistake I see is people trying to fight a dog’s natural wiring instead of working with it. You can’t drill a Border Collie like it’s a prize poodle in a suburban garden; you have to respect the working breed temperament or you’ll just end up with a frustrated animal and a ruined season. I’ve seen lads try to break a dog’s spirit through sheer force, thinking they can command the sheep into submission. All they do is create a dog that’s too terrified to make the split-second decisions required when a ewe decides to bolt for the gate.

Another trap is getting ahead of yourself with fancy gear or complex commands before the basics are settled. People jump straight into advanced task training when the dog hasn’t even mastered basic recall or staying steady under pressure. It’s a waste of time and, more importantly, a waste of money. You need to focus on solidifying the foundations through consistent positive reinforcement methods before you expect that dog to hold a mob of cattle in a heavy rain. If the foundation is soft, the whole thing will collapse when the weather turns.

Final Thoughts

At the end of the day, you aren’t just buying a pet; you’re investing in a piece of essential farm machinery that happens to breathe. I’ve seen too many lads go out and buy a high-drive pup thinking they can just wing it, only to end up with a dog that’s more of a liability than an asset when the weather turns and the sheep start moving. You have to respect the working breed temperament from day one. If you try to force a dog into a role it isn’t built for, or if you ignore the subtle signs of its natural herding instinct development, you’re just setting yourself up for a very expensive headache come lambing season.

Don’t expect miracles overnight. A dog that works well in the yard won’t necessarily hold a flank in a heavy gale on a steep hill without months of consistent, grit-filled work. Stick to the basics, keep your expectations grounded in reality, and remember that consistency is the only thing that matters when the pressure is on. If you put in the time now, you’ll have a partner; if you cut corners, you’ll just have a dog that sits in the shed while you do all the heavy lifting yourself.

Five things they don't tell you in the expensive training manuals

  • Stop treating your dog like a pet when you’re out in the field. I’ve seen too many lads try to be their dog’s best mate while they’re working, and all they end up with is a distracted animal that thinks a day’s work is an excuse for a game of fetch. When the gate is open, you’re the boss, not a playmate.
  • Don’t go buying the fanciest gear before the dog has even learned to sit. I’ve got a shed full of high-tech collars and specialized harnesses that were meant to “improve performance,” but they’re just sitting there gathering dust because the dog didn’t have the basic discipline to use them. Get the brain working before you spend the cash on the kit.
  • Watch the weather and the ground, not just the dog. If you try to run a high-intensity training session on ground that’s turned to soup by a week of rain, you aren’t training a worker; you’re just teaching your dog how to get a limp. A lame dog is a massive drain on the books, and a poorly trained dog that’s constantly slipping is halfway to a vet bill.
  • Consistency isn’t just a buzzword; it’s the difference between a dog that works and a dog that waits for you to get tired. If you let a command slide on Tuesday because you’re too busy with the cattle, don’t be surprised when the dog ignores you on Friday. You can’t be “mostly” in charge.
  • Learn to read the dog’s fatigue before it becomes a problem. I once pushed a young collie through a full day of sheep work when he was clearly flagging, thinking I was “building character.” All I did was break his spirit and teach him that working through pain was the norm. A tired dog makes mistakes, and in this business, mistakes cost money.

The Bottom Line on Training

Don’t mistake a dog with high energy for a dog with high intelligence; if you don’t invest the time in basic control now, you’ll spend the next three years chasing a liability across your best grazing.

Training isn’t a seasonal task you tick off a list; it’s an ongoing cost of doing business, much like maintaining your fences or checking your soil, and if you stop, the dog stops working.

Stop looking for the magic breed or the expensive gadget and start looking at your own consistency, because a dog will only work as hard as the man holding the lead is willing to be disciplined.

The Long View on a Good Dog

At the end of the day, training a working dog isn’t about mastering some fancy command or buying the most expensive whistle on the market. It’s about the basics: consistency, understanding the temperament of the animal, and having the patience to realize that nature won’t be rushed. You can spend all your time obsessing over high-tech gear, but if you haven’t established that fundamental bond and a clear sense of direction, you’re just wasting your time and your diesel. Remember, a dog that doesn’t listen when the weather is turning and the sheep are scattering isn’t an asset; it’s just another mouth to feed that’s costing you money every single hour it sits idle.

I’ve seen plenty of young lads come onto farms thinking they can whip a dog into shape in a weekend, only to find themselves out in the muck with a useless creature when the real work begins. A truly great working dog is built over seasons, not days. It takes a bit of grit from you, and a fair amount of trial and error. But when you finally get it right—when that dog reads the field as well as you do and moves a flock with nothing but a look—it becomes the most valuable partner you’ll ever have on this land. Stick to the fundamentals, watch your margins, and let the dog grow into the job.

Frequently Asked Questions

How much of my time is actually going to be swallowed up by this before the dog is useful enough to take out to the hills?

If you’re looking for a quick fix, you’ve bought the wrong dog. You’ll be looking at a year of daily, disciplined work before that animal is reliable enough to trust with a flock in the hills. It’s not just about the time spent in the field; it’s the mental load of constant supervision. If you try to shortcut the training to save time now, you’ll just spend twice as long fixing his mistakes later.

At what point do I stop spending money on specialized trainers and just trust my own eye and the dog's instinct?

You stop paying for trainers the moment you stop looking at the dog and start looking at the work. If you’re hiring a man to tell you whether a dog has the instinct to hold a mob or if it’s just running for the sake of running, you’ve already lost the plot. Once you can read the animal’s body language as well as your own, and the dog is responding to your whistle more than a stranger’s command, put the chequebook away. Trust your eye, but only if you’ve actually spent enough time watching the sheep.

If I've already got a dog that's a bit too headstrong, is it worth trying to fix him, or am I better off starting fresh with a pup?

It depends on whether that headstrong streak is intelligence or just pure, stubborn defiance. If he’s got the drive but just thinks he’s the boss, you can work him. It’ll take more time and a lot more patience than I’d like, but you can break that ego. But if he’s got no desire to listen to a whistle or a command, don’t waste your season. Save your money and start with a pup.

How to care for working dogs.

A Working Dog Is an Athlete, Feed It Like One

I’ve lost count of how many glossy brochures I’ve seen claiming that “how to care for working dogs” requires a diet of boutique organic kibble and a subscription to some high-tech wellness app. It’s enough to make you sick. I remember sitting in the yard ten years ago, watching a lad spend a small fortune on fancy supplements while his collie was working half-dead because he hadn’t bothered to check the condition of its joints or the quality of the actual fuel in its belly. You don’t need a lifestyle brand; you need a dog that can hold a flank in a driving rain without flagging.

I’m not here to sell you on the latest gadget that’ll end up gathering dust in the corner of the shed come November. What I’m going to do is talk about the hard numbers and the real costs—from the feed that actually keeps them steady to the preventative maintenance that keeps a vet’s bill from eating your profit margins. I’ve made enough mistakes with my own stock to know that true care isn’t about pampering; it’s about ensuring your best worker stays on the hill when the weather turns foul.

Table of Contents

Understanding How to Care for Working Dogs

Understanding How to Care for Working Dogs

You can’t treat a working dog like a pet that spends its days sleeping on a rug in a heated kitchen. If you try to feed them the same kibble you’d give a lapdog, you’re asking for trouble when the weather turns and the work gets heavy. They have specific working dog nutrition requirements that most people ignore until the animal starts losing condition or, worse, loses the drive to move. It isn’t about the most expensive bag on the shelf; it’s about the right balance of fats and proteins to keep them from burning out by mid-season.

I’ve seen too many lads think a bit of extra grain is the answer to a tired dog, but it’s usually a sign of poor canine athletic conditioning. A dog needs to be fit enough to handle the terrain without tearing a ligament, but you have to watch the workload. If they aren’t built for the miles you’re asking of them, you’ll be paying the vet to fix what you should have managed with a bit of common sense and a steady training regime.

Key Things to Know

Key Things to Know: Working dog nutrition.

First, let’s talk about the fuel. You can’t run a tractor on watered-down diesel and expect it to pull a plough through heavy clay, and the same goes for your dogs. Most people think a handful of standard kibble is enough, but if they’re working twelve-hour days in the hills, their working dog nutrition requirements are going to be far higher than what you’d give a pet living on a sofa. If you’re skimping on the quality of the protein or the fats, you’ll see it first in their coat and last in their energy levels—and by then, you’ve already lost the day.

Then there’s the physical toll. I’ve seen too many lads ignore the small things until a dog is suddenly hobbling or refusing to move. You need to be looking at canine athletic conditioning not as some fancy fitness regime, but as a way to make sure their joints and muscles can actually handle the terrain. It’s about more than just strength; it’s about ensuring they don’t blow a ligament when the ground is uneven. If you aren’t watching their movement daily, you’re just waiting for a vet bill that’ll cost more than the dog was worth to replace.

Practical Tips and Steps

Practical Tips and Steps for dog nutrition.

First, stop looking at your dog as a pet and start looking at him as a piece of living, breathing machinery. If you’re skimping on the fuel, the engine will seize when you need it most. You can’t just throw standard kibble at a dog that’s spent ten hours navigating brambles and steep hillsides; you need to understand working dog nutrition requirements to ensure they aren’t running on empty by mid-season. If the weight is dropping or the coat looks dull, you aren’t just losing a dog, you’re losing the ability to move stock efficiently.

Second, watch the feet. I’ve seen more money lost to a limp than to a bad calf crop, simply because a man was too busy to check his dog’s pads after a wet spell. Preventing paw injuries in dogs isn’t about fancy gear; it’s about the daily habit of checking for stones, cuts, or rot before they turn into a limp that puts the dog in the shed for a month. If you wait until they’re actually hobbling, you’ve already lost the battle.

Common Mistakes to Avoid

The biggest mistake I see is treating a working dog like a pet that just happens to go to work. If you’re feeding them the same bag of kibble you give the neighbor’s poodle, you’re asking for trouble. You can’t expect a dog to pull a full day’s shift on a diet that lacks proper working dog nutrition requirements. When the energy levels drop or the coat goes dull, that’s not just a health issue; it’s a performance failure that costs you time and money in the field.

Then there’s the habit of ignoring the small things until they become massive, expensive problems. I’ve seen too many lads skip basic working dog health monitoring because they’re too busy with the sheep. They miss the slight limp or the subtle change in gait, and by the time they realize there’s an issue, the dog is sidelined for a month. It’s much cheaper to check a paw or a joint every single evening than it is to pay a vet to fix a preventable injury that keeps your best worker in the shed.

Final Thoughts

At the end of the day, a working dog isn’t a piece of machinery you can just service when the light comes on. You can buy the most expensive supplements on the market, but if you aren’t paying attention to working dog health monitoring on a daily basis, you’re just throwing money into a hedge. I’ve seen too many lads treat their dogs like they’re indestructible, only to find themselves shorthanded when a prize collie goes down with a preventable injury.

If you want to keep your margins tight and your stock moving, you have to treat the dog’s fitness as a business necessity. That means understanding that recovery protocols for working dogs aren’t a luxury; they are part of the job. You wouldn’t run a tractor into the ground without checking the oil and the tyres, so don’t do it to the animal that actually does the heavy lifting. Keep your eyes on the ground, keep an eye on the dog, and for heaven’s sake, don’t wait for them to limp before you start worrying about the cost.
Five ways to stop your dog from becoming a liability

  • Stop treating their feed like an afterthought; if you’re skimping on the quality of the kibble to save a few quid on the monthly overhead, you’re just paying for it later when they lack the stamina to finish a job or, worse, start picking up injuries that could have been prevented.
  • Check those pads every single evening, especially if the ground has been wet or the terrain is heavy with stone, because a dog that can’t walk properly is a dog that’s costing you man-hours and lost sheep.
  • Don’t go buying every shiny new gadget or high-tech GPS collar that some salesman tells you is “essential”—half of it will sit in the shed gathering dust after the first frost, so stick to the basics that actually work when the weather turns.
  • Watch the weight more closely than the breed; a dog that’s carrying even five kilos of unnecessary fat is putting undue stress on its joints, and I’ve seen enough “well-fed” dogs go lame in the middle of a season to know it’s a recipe for disaster.
  • Keep a strict routine for rest, because a tired dog makes poor decisions in the field, and a bad decision from a dog usually ends up being a very expensive mistake for the farmer.

The bottom line on your working dogs

Stop looking at dog food as an expense to be trimmed; if you’re skimping on their nutrition to save a few quid, you’ll just pay for it tenfold when they lose their edge or end up on the vet’s table.

A working dog is an asset, not a pet, and that means treating their physical condition—especially their feet and joints—with the same scrutiny you’d give a prize heifer.

If a piece of kit or a new training regime doesn’t directly improve your ability to move stock or save you time in the field, it’s just more clutter that’ll end up gathering dust in the shed.

The Bottom Line

At the end of the day, caring for a working dog isn’t about following some glossy manual or buying the most expensive supplements on the market. It comes down to the basics: decent fuel in the bowl, a dry place to sleep, and keeping a sharp eye on their feet and their temperament before a small issue becomes a bankrupting disaster. If you treat them like a piece of machinery that you can just switch off when the job is done, you’ll find out the hard way that a broken-down dog is the most expensive tool on the farm. Stick to the fundamentals of nutrition, preventative care, and listening to what the dog is telling you through its movement and energy.

I’ve seen plenty of men spend a fortune on the latest quad bikes and fencing systems, only to lose a season’s profit because their best collie went lame or dropped out due to neglect. A good dog is a partner in the business, not just an asset on the balance sheet. If you look after them with the same rigorous attention to detail that you give your best breeding ewes, they’ll pull their weight through the hardest winters and the toughest lambing seasons. It’s not about being sentimental; it’s about being a sensible farmer who knows that the strength of the herd often starts with the health of the dog.

Frequently Asked Questions

When does the cost of a high-end working pedigree actually start to pay for itself in terms of efficiency and longevity?

You don’t see the return on a pedigree dog in the first season; you see it in the third. A cheap dog might work well enough for a few months, but if he lacks the temperament or the drive to stay steady when the weather turns sour, he’s just an expensive liability. A top-tier dog pays for itself when he stays sound for six years instead of two, and when he does the job right the first time without you having to chase him.

How do I work out if a dog is actually underperforming, or if it's just a bad season with the weather and the ground?

You can’t judge a dog by a single season of muck and heavy rain. If the ground’s been a sponge and the sheep are flighty, even a top-tier dog will look sluggish. Look at the data, not the weather. Is the dog losing its instinct, or is it just physically exhausted from working heavy ground? If the drive is still there but the legs are gone, it’s the season. If the head’s dropped, it’s the dog.

At what point do I stop putting money into an older dog that's slowing down and just accept the loss?

You stop when the cost of keeping them afloat starts eating into the margin of the livestock they’re meant to be working. It’s a hard calculation. If you’re spending more on vet bills and supplemental feed than the dog is actually adding in value to your stock handling, you’ve gone too far. A dog that’s more of a liability in the field than an asset is just a hole in your cash flow.
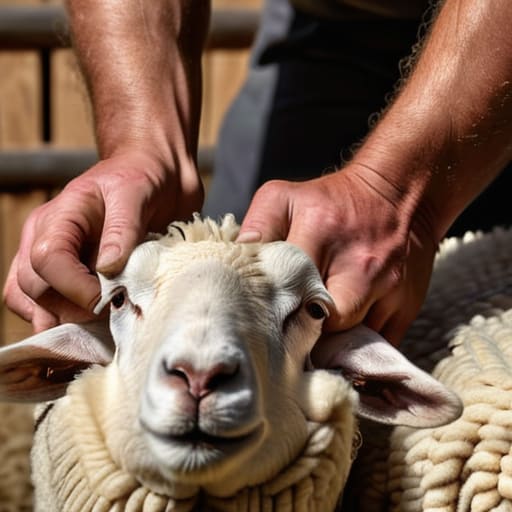
Learning how to shear and handle wool.

Shearing Timing and Welfare

I remember standing in a muddy pen back in ’94, watching a man charge me a premium to clip my best ewes, only to see him leave the fleece looking like it had been through a hedge backwards. He talked a grand game about “fleece quality,” but he didn’t know the first thing about how to shear and handle wool without contaminating the lot with bits of manure and lanolin. You can spend your whole life obsessing over the pedigree of your sheep, but if your shearing process is a shambles, you aren’t producing wool—you’re just producing waste. Most people think the profit is in the sale price, but the real truth is that you lose your margin the second a dirty fleece hits the bale.

I’m not here to sell you some shiny new electric clipper or a course on “holistic fiber management.” I’m going to tell you how to do it right so you don’t end up with a shed full of useless, stained fluff. We’ll look at the actual mechanics of a clean clip, the proper way to manage the fleece from the sheep to the sack, and most importantly, how to avoid the expensive mistakes that turn a decent clip into a total loss.

Table of Contents

Guide Overview

Total Time: 3-5 hours per animal
Estimated Cost: $150-300
Difficulty: Intermediate

Tools & Supplies

  • Electric sheep shears or hand blades for cutting fleece
  • Skirting knife for removing dirty edges
  • Wool combs to straighten fibers
  • Large clean tubs for washing
  • Mild wool wash or specialized detergent (5 liters)
  • Drying racks or clean clotheslines

Step-by-Step Instructions

  • 1. First, you need to sort your sheep by temperament and condition before they even see a blade. I’ve seen men try to rush a job by throwing the nervous, flighty ones in with the calm ones, and all they end up with is a bruised animal and a half-day wasted on nicks and cuts. Get them into a tight race, check their feet, and make sure they’re clean; if you’re shearing sheep that have been rolling in manure for three days, you aren’t just losing wool quality, you’re losing your profit to the cleaning bill later on.
  • 2. Set up your shearing stand so it actually works for your height and the sheep’s size. It sounds like common sense, but I’ve watched enough lads bend over like a question mark until their backs are shot by lunchtime. If your gear is poorly positioned, you’ll spend more time fighting your own body than you will the fleece, and fatigue is the quickest way to start making mistakes that cost you money.
  • 3. When you start the clip, focus on the direction of the grain rather than just trying to move fast. The temptation is to race against the clock, but if you aren’t following the natural flow of the wool, you’ll end up pulling at the skin. A clean, even clip is what matters; a ragged job might save you ten minutes, but it’ll tank the value of that fleece the moment it hits the auction floor.
  • 4. Once the sheep is off the stand, don’t just toss it back into the main mob like a sack of spuds. You need to handle the animal with enough respect to ensure it doesn’t go off and injure itself or another sheep. A sheep that’s been handled roughly will be on edge for days, and an injured animal is just another line item on the ledger that you’ll have to pay for in vet bills and lost weight.
  • 5. Dealing with the wool itself requires a steady hand and a bit of discipline regarding how it’s collected. Don’t let the fleece get trampled into the dirt by the very animals you’re trying to manage. If you let the wool get “dirty” with hay, dung, or even just excessive lanolin buildup from poor handling, you are essentially throwing money into the muck before you’ve even left the farmyard.
  • 6. Finally, keep a sharp eye on your equipment throughout the day. A blunt comb is a thief; it steals your time, it steals your energy, and it steals the quality of the clip. I’ve learned the hard way that stopping for five minutes to sharpen and clean your gear is far cheaper than trying to power through a dull blade and ending up with a field full of nicked sheep and ruined wool.

Understanding How to Shear and Handle Wool

Understanding How to Shear and Handle Wool

Now, before you go running out to the shed to grab the combs, you need to understand that you aren’t just cutting hair; you’re managing a biological asset. Most lads make the mistake of thinking the job is done once the fleece is off the back. They forget that shearing fleece quality is dictated by how you treat the animal in the ten minutes leading up to the first cut. If the sheep is stressed, sweating, or fighting you, that wool is going to be stained, crimped, or dirty, and you’ll be looking at a price per kilo that wouldn’t buy you a decent lunch.

You also have to be realistic about the calendar. There is no point in forcing the issue just because a salesman tells you it’s time; the best time of year to shear sheep is when the ground isn’t a bog and the weather isn’t going to strip the heat right out of them. If you shear too early or too late, you’re either risking the animal’s health or ruining the clip. It’s a balance of the weather, the weight of the fleece, and the state of your gear. If your equipment is blunt, you aren’t just being slow—you’re being expensive.

Key Things to Know

Key Things to Know: Sheep Shearing Timing

First, let’s get one thing straight: timing isn’t just a suggestion, it’s the difference between a clean clip and a disaster. You might be tempted to get the job done whenever the weather looks fair, but the best time of year to shear sheep is dictated by the condition of the animal and the state of the ground, not your diary. If you shear too early, you’re leaving them vulnerable to the damp; too late, and you’re dealing with heat stress and a fleece that’s already seen too much grit.

Secondly, don’t go chasing fancy gadgets before you’ve mastered the basics of the craft. I’ve seen lads spend a small fortune on high-end sheep shearing equipment only to find they haven’t got the hands to use it properly. It’s a waste of capital. If you want to see any return, you have to focus on shearing fleece quality from the very first pass. If you’re hacking at the skin or leaving uneven patches, you aren’t just risking the animal’s health; you’re essentially throwing money into the muck pile.

Five Ways to Stop Bleeding Money at the Shearing Shed

  • Watch the hands, not just the fleece. You can have the finest clip in the county, but if your shearer is nicking sheep or if your lads are bruising the animals during handling, you’re paying for it in vet bills and lost weight gain. A stressed sheep is a sheep that isn’t converting grass into profit.
  • Keep the wool clean, or don’t bother collecting it. I’ve seen men spend a fortune on high-quality breeds only to have the wool value tank because they let dung and burrs get worked into the fleece during a rushed shearing. If it’s dirty, the buyer will price it like it’s rubbish, and they aren’t wrong.
  • Don’t buy a fancy new handling system just because the brochure says it’s “revolutionary.” If it doesn’t work on your specific ground and your specific sheep, it’s just a very expensive piece of metal that’ll be gathering rust in the shed by November. Stick to what works for your layout.
  • Timing is everything, and it isn’t just about the weather. If you shear too late because you were waiting for a better price or a dry spell that never came, you’re risking the animal’s condition and the quality of the wool. You have to work with the season, not against it.
  • Check your kit before the sheep arrive. There is nothing more expensive than a shearer standing idle while you hunt for a spare part or a blunt comb. If the gear isn’t ready, the day is lost, and lost time is the one thing you can’t buy back when the margins are this tight.

The Bottom Line on Wool and Handling

Stop chasing fleece quality if your handling is rough; a premium clip won’t pay for the time you waste wrestling sheep or the stress you’ve put into a flock that’ll take twice as long to settle.

Treat your shearing gear like your tractor—if you’re skimping on the sharpest blades or the right combs to save a few quid, you’re just paying for it later in skin damage and wasted labor.

Remember that everything in this business is about the margin; if the time spent on a specific wool procedure doesn’t result in a cleaner clip or a faster turnaround, it’s just a hobby, not a farm business.

The Bottom Line on the Fleece

The Bottom Line on the Fleece.

At the end of the day, shearing isn’t just about getting the animal naked; it’s about managing the transition from the field to the market without losing your shirt in the process. If you’ve ignored the handling, you’ll end up with a stressed animal and a ruined clip. If you’ve ignored the equipment, you’ll spend more on repairs and downtime than the wool is worth. You can obsess over the micron levels all you want, but if you haven’t mastered the basics of animal restraint and kept your gear sharp, you’re just performing an expensive circus act. It all comes down to how much time you waste and how much quality you preserve before that fleece hits the bale.

I’ve seen plenty of men come in with the latest high-speed clippers and a fancy degree, only to find themselves staring at a pile of stained, uneven wool and a mounting debt. Don’t be one of them. Real success in this business isn’t found in a glossy brochure; it’s found in the quiet competence of a job done right the first time. Treat your sheep with respect, respect your tools, and keep a sharp eye on your margins. It won’t make you rich overnight, but it’ll stop you from being the fool who spends a year’s profit on a single season of mistakes.

Frequently Asked Questions

How much is this actually going to cost me in terms of man-hours versus the price I'll get at the mart?

You’re asking the only question that matters. If you’re paying a hand by the hour to wrestle sheep that haven’t been handled right, you’re burning money. Between the man-hours spent chasing strays and the time lost to a nervous flock, you’ll likely spend more on labour than the mart price will ever return. Unless you’ve got a clean clip and a fast rhythm, you aren’t making a profit; you’re just subsidising the shearer’s holiday.

If the weather turns and the fleece gets damp before it's bagged, am I looking at a total loss on the clip?

Not necessarily, but you’re dancing on the edge of a disaster. If it’s just a bit of surface damp, you might save it by getting it out into the air immediately—but don’t let it sit in a clumped, heavy mass in a bag. If that moisture hits the core and starts to rot, you aren’t just looking at a bad price; you’re looking at a total loss. Get it dry, or don’t bother bagging it at all.

At what point does the cost of hiring a professional shearer outweigh the money I'm losing by doing a messy job myself?

If you’re spending more time nursing nicked skin or trying to salvage a fleece that looks like it was shorn with a blunt butter knife, you’ve already lost. You have to look at the math: the hours you lose, the stress on the animal, and the value of the wool. If you can’t get them clean and off the board in a reasonable time without making a mess, pay the professional. Your time isn’t free, and neither is a wounded sheep.

Learn how to manage external parasites.

Telling Scab From Lice Before You Treat

I’ve spent more money than I care to admit on shiny new pour-on treatments and high-tech diagnostic kits that promised to revolutionise my flock management. Most of the “experts” will tell you that managing parasites is about finding the latest chemical breakthrough, but they’re usually just trying to clear their own inventory. If you’re looking for a magic bottle to solve everything, you’re going to find yourself staring at an empty bank account while your ewes continue to scratch. Learning how to manage external parasites isn’t about chasing the newest label; it’s about understanding the cycle of your own ground and knowing when a spray is a genuine necessity versus just flushing your cash flow down the drain.

I’m not here to sell you a subscription or a miracle cure. I’m going to tell you what actually works when the weather turns wet and the flies start biting, based on forty years of watching what happens to the bottom line. We’ll look at the real costs of neglect, the specific timing that matters, and which bits of kit are actually worth the space in the shed. This is about protecting your margins and keeping your livestock healthy without being taken for a ride by the marketing departments.

Table of Contents

The Invisible Leak How to Manage External Parasites Without Losing Cash

The Invisible Leak How to Manage External Parasites Without Losing Cash

You can spend a fortune on fancy sprays that just sit in the shed, but if you aren’t watching your load, you’re essentially just flushing your cash flow down the drain. I’ve seen lads buy every new bottle of topical parasite remedies the salesman brings in the back of his van, thinking a quick drench will fix a bad season. It won’t. If you aren’t actually watching the animals, you’re just paying for expensive urine. You have to look for the subtle things—a sheep that’s rubbing more than usual against the fence or a cow that’s lost that bit of sheen on her coat.

Identifying common skin parasites isn’t about being a vet; it’s about knowing your stock better than the person selling you the cure. If you wait until the whole herd is scratching themselves raw, you’ve already lost the battle and a chunk of your margin to weight loss and poor fleece quality. Don’t go looking for a magic bullet. Real parasite prevention strategies start with keeping an eye on the ground and the weather, because a damp, stagnant field is where your profit goes to die.

Identifying Common Skin Parasites Before They Eat Your Profits

Identifying Common Skin Parasites Before They Eat Your Profits

You won’t find much help in a glossy brochure about what a real infestation looks like when it’s actually costing you money. Most people wait until they see a sheep rubbing its skin raw against a gate before they even think about identifying common skin parasites, but by then, the damage to the fleece and the animal’s condition is already done. I’ve learned the hard way that you have to look for the subtle signs first—the way a cow stands a bit too long in the shade, or that slight, constant twitch in the flank that tells you something is wrong.

If you’re seeing patchy hair loss or those tell-tale skin irritation symptoms around the ears and neck, don’t just assume it’s the weather or a bit of seasonal grit. It’s usually something living on them, and it’s eating your margins while you’re busy looking at the wrong part of the balance sheet. You can trial all the topical parasite remedies you like, but if you aren’t catching the problem in those early, quiet stages, you’re just applying expensive Band-Aids to a leaking bucket.

Skin Irritation Symptoms That Signal a Failing Parasite Prevention Strategy

Skin Irritation Symptoms That Signal a Failing Parasite Prevention Strategy

If you’re walking the field and you see a sheep or a heifer that’s more interested in rubbing against the gate than grazing, you’ve already lost the battle. Most people wait until they see a patch of hairless skin or a bloody lesion before they start worrying, but by then, the damage to your margins is done. You need to be looking for the subtle things—the constant twitching, the restless nights in the yard, or a coat that looks dull and “scruffy” despite a good season of grass. These skin irritation symptoms are the early warning signs that your current routine is failing.

It isn’t just about the animal feeling miserable, either; it’s about the energy they’re wasting. Every minute a cow spends fighting off lice or mites is a minute she isn’t converting feed into weight. I’ve seen plenty of lads try to fix this with every expensive topical parasite remedy they can find in the catalogue, but if you aren’t catching the irritation early, you’re just applying expensive medicine to a problem that’s already outgrown it. Keep your eyes on the behavior, not just the skin.

Topical Parasite Remedies Dont Buy Kit That Sits Unused

You’ll see the lads at the mart talking up the latest “revolutionary” pour-on or some new spray that promises to clear a flock in a single pass. Most of it is just expensive marketing designed to separate you from your margins. I’ve seen enough of these fancy bottles sit in the corner of the shed, gathering dust because they either don’t work on our specific strain of lice or they’re too fiddly to apply when you’ve actually got work to do. If you’re looking at topical parasite remedies, don’t just buy into the glossy brochure; ask yourself if the application method actually fits your workflow.

The truth is, a remedy is only as good as your ability to use it consistently. I’ve learned the hard way that buying a bulk supply of something that requires a precise, slow-moving application is a recipe for disaster when you’re chasing a deadline. If the kit is too cumbersome, it won’t get done, and you’ll end up back where you started, watching your animals suffer through skin irritation symptoms that could have been avoided. Stick to what you can actually deploy across the whole herd without breaking your back or your bank balance.

Natural Parasite Deterrents or Expensive Mistakes in the Making

I see the adverts every other week, promising that some herbal concoction or “organic” oil will solve your problems without the chemical bill. They talk about natural parasite deterrents as if they’re a magic wand, but let’s look at the ledger. If you’re running a commercial suckler herd, you don’t have the luxury of “trying things out” to see if they work. You need results that show up in the weight gain and the condition of the animal, not just a bit of peace of mind for your conscience.

The trouble is, most of these natural remedies are either too weak to actually stop a heavy infestation or too expensive to be practical when you’re looking at the cost per head. You might find a bit of relief for a few sheep, but if you aren’t careful, you’ll end up spending more on these “eco-friendly” sprays than you would have on a proper, proven program. Don’t let a desire for something “natural” blind you to the fact that an untreated parasite load is the fastest way to bleed a farm dry.

Five Lessons Learned from Watching Money Walk Off in the Form of Flies and Lice

  • Stop treating the whole herd when only the corner of the field is itching. If you’re spraying every animal because three sheep look a bit ragged, you’re just subsidising the parasite’s resistance and emptying your bank account for no reason. Watch the ground, watch the animals, and only pull the trigger where it’s needed.
  • Don’t get blinded by the “new and improved” labels on the back of a bottle. I’ve seen enough expensive drenches and sprays sit in the shed gathering dust because they didn’t work on our specific soil or our specific stock. If it hasn’t worked on your best ewes through a wet spring, it’s not worth the shelf space.
  • Check your fencing and your shade before you check your medicine cabinet. A lot of what people call a “parasite problem” is actually just a “bad management problem”—animals crowding into the only bit of shelter or rubbing against a broken fence line. Fix the environment first, and you might find you need half the chemicals you thought you did.
  • Timing is everything, and it’s rarely when the salesman says it is. If you wait until the flies are thick enough to make the cattle restless, you’ve already lost the weight gain. You have to work with the season and the rainfall, not against it. If the ground is soaked and the air is heavy, your prevention strategy needs to be ahead of that curve.
  • Keep your records as tight as your breeding lines. If you don’t know which group of animals is consistently coming back with skin issues, you aren’t managing a farm; you’re just guessing. I’ve kept notes on my ewes since ’89, and I can tell you exactly which ones are worth the cost of treatment and which ones are just a drain on the cash flow.

The Bottom Line on Parasites

Stop chasing the latest shiny bottle of spray and start looking at your margins; if a parasite treatment doesn’t directly improve your weight gain or lambing percentages, you’re just subsidising the chemist.

Early detection is cheaper than a cure—if you’re waiting until the whole flock is scratching and losing condition to act, you’ve already lost the money on the feed they’ve wasted.

Stick to what works for your specific ground and weather; a fancy “natural” remedy or a high-end chemical won’t mean a thing if it hasn’t been proven to hold up when the rainfall turns the fields to soup.

The Bottom Line on the Itch

At the end of the day, managing parasites isn’t about finding the miracle spray that the salesman promised will solve everything in one go. It’s about realizing that every minute a sheep spends scratching instead of grazing is a minute it’s not putting weight on, and that’s money you’ll never see again. You’ve got to watch the ground, watch the weather, and most importantly, watch your margins. Don’t get distracted by the shiny new gadgets or the expensive “natural” blends that do little more than empty your pockets. Stick to a consistent routine, keep your eyes on the skin and the coat, and remember that preventative maintenance is always cheaper than a crisis.

Farming has never been about easy wins; it’s about the slow, steady accumulation of small, sensible decisions. You’ll have years where the parasites win despite your best efforts, and you’ll have years where your vigilance pays off in a heavier carcass at market. Don’t let the frustration of a bad season make you overspend on unproven kit. Just keep your head down, keep your records straight, and treat your livestock like the living assets they are. If you focus on the grass, the feet, and the cash flow, the rest of the noise tends to settle itself.

Frequently Asked Questions

When do I actually pull the trigger on a chemical treatment versus just watching the animals and waiting for the grass to grow out?

You don’t pull the trigger based on a calendar; you pull it based on the condition of the animal and the state of the ground. If they’re still putting on weight and the skin isn’t raw, let the grass do the work. But if you see them losing condition or rubbing holes in themselves, you’re already losing money. Don’t wait for a full-blown outbreak just to save a few quid on a pour-on.

If I’ve been using the same pour-on for five years, how do I know if the parasites have just stopped caring about it?

If you’ve been using the same pour-on for five years without changing the active ingredient, you’re likely just watering down your margins. You’ll know it’s failing when you see “the itch” returning mid-season, or if you spot lice and mites despite a fresh application. Don’t just guess; check the ground and the weather first, as heavy rain can wash it off, but if the animals are still rubbing, your resistance is climbing.

Is it worth the extra headache of managing flies and lice in the winter, or am I just chasing losses that won't show up in the till until spring?

If you wait until spring to see the damage, you’ve already lost the battle. Lice don’t care about your calendar; they’ll strip the condition off a ewe in February, and that’s weight you won’t get back come lambing. It’s a headache, aye, but it’s a controlled one. I’d rather deal with a bit of hassle in the cold than watch my weaning weights drop because I was too cheap to treat them in January.

Tips on how to manage flystrike.

Flystrike: Prevention Has a Calendar

I remember standing in a damp field back in ’98, the smell of rot hitting me before I even saw the sheep, realizing I’d spent the last three seasons chasing every fancy new chemical spray the salesmen had shoved in my hand. They’ll tell you that the secret to success is a more expensive canister or a proprietary blend that costs more than the ewe it’s meant to protect, but they never mention that most of those products are just expensive ways to feel productive while the problem festers. If you’re looking for a magic wand to solve your problems, you’ve come to the wrong place; I’m here to talk about the reality of how to manage flystrike without letting a chemist bleed your bank account dry.

I’m not going to give you a lecture from a textbook or a list of ingredients to memorize. Instead, I’m going to tell you what actually works when the weather turns foul and the flies start moving in. We’ll look at the real costs of being reactive versus being proactive, and I’ll share the mistakes I made so you don’t have to pay for them. This is about watching your stock, understanding your ground, and keeping your cash flow intact.

Table of Contents

The Invisible Drain Why Flystrike Risks Bleed Your Cash

The Invisible Drain Why Flystrike Risks Bleed Your Cash

You can spend all your time obsessing over the price of concentrate or the latest subsidy paperwork, but flystrike is the kind of thief that works in the dark. It isn’t just about the animal; it’s about the unseen math of a dying margin. When a sheep goes down with a strike, you aren’t just losing the value of the carcass at the mart; you’re losing the time it took to raise it, the labor of the person who found it, and the peace of mind that comes with a clean flock. I’ve seen men lose a whole season’s profit because they were too busy looking at the market and not enough at the flystrike seasonal risks hitting their hills.

It starts small—a bit of damp wool or a nick from a bramble—but that’s when the real bleeding begins. If you aren’t diligent with livestock wound care, you’re essentially leaving the door open for the blowflies. By the time you’re spotting the obvious sheep flystrike symptoms, the damage to your cash flow is already well underway. You can buy every insecticidal spray for animals on the market, but no bottle of chemicals can replace the money lost to a sheep that’s been neglected for forty-eight hours.

Spotting the Signs Identifying Critical Sheep Flystrike Symptoms

Spotting the Signs Identifying Critical Sheep Flystrike Symptoms

You don’t need a degree in veterinary science to spot a problem, but you do need to be out in the field when the sun is actually out. I’ve learned the hard way that if you’re only checking the flock when you’re doing the weekly weigh-in, you’ve already lost. You’re looking for the subtle shifts: a sheep that’s lagging behind the rest, or one that’s standing strangely in the shade rather than grazing. If you see a ewe looking unusually lethargic or rubbing against a fence post, don’t assume she’s just having a slow day. That’s often the first warning sign that something is brewing under the fleece.

Once you get close, you’re looking for more than just a bit of damp wool. The real sheep flystrike symptoms often start with a distinct, sickly sweet smell that hits you before you even see the animal. If you spot a patch of wool that looks matted, soiled, or strangely dark, don’t wait. That’s where the larvae are working. It’s easy to think you can just nip in with an insecticidal spray for animals once you see the movement, but by then, the damage to the skin is usually done and the profit is already leaking out of the animal.

Mastering the Essentials of How to Manage Flystrike

Mastering the Essentials of How to Manage Flystrike.

Now, once you’ve spotted the problem, you can’t just stand there looking at it; you have to act, and you have to act fast. If you’re dealing with a live case, your first job is cleaning up the mess. I’ve learned the hard way that half-hearted attempts at livestock wound care are just a waste of time and good product. You need to clear the wool away, get the maggots out, and apply a proper insecticidal spray for animals to stop the cycle. It’s messy, it’s unpleasant, and if you’re doing it in a hurry, you’ll likely miss a spot—but that’s exactly how you end up with a sheep that’s still suffering three days later.

However, I’d much rather you spent your energy on preventing blowfly infestation than playing surgeon in a muddy field. If you wait until the sheep are already flagging, you’ve already lost the battle. I look at the calendar and the weather; once those warm, humid spells hit, the flystrike seasonal risks skyrocket. Don’t wait for a crisis to buy your supplies. Get your preventative treatments sorted when the weather turns, because proactive dipping or spraying is always cheaper than treating a dying animal.

The Right Tools Choosing an Insecticidal Spray for Animals

Now, don’t go thinking you can just grab the first bottle of blue liquid you see at the local co-op and call it a day. I’ve seen enough lads waste a fortune on fancy, expensive sprays that evaporate off the skin before the blowflies even finish their first pass. When you’re looking for an insecticidal spray for animals, you aren’t just buying a chemical; you’re buying time. You need something with enough “stick” to stay put, especially if the weather turns and you’re dealing with the typical dampness that makes flystrike seasonal risks so much harder to pin down.

You also have to be smart about the residue. If you’re working with sheep that are heading to market, you’d better know your withdrawal periods inside out, or you’ll be explaining a failed test to the buyer instead of enjoying your profit. It’s not just about killing the flies; it’s about reliable livestock wound care that doesn’t leave you with a headache at the mart. Stick to the brands that have been around long enough to have a proven track record, and don’t let a salesman convince you that a new, unproven formula is going to save your season.

Beyond the Spray Proper Livestock Wound Care Protocols

Now, don’t get it into your head that once you’ve applied an insecticidal spray for animals, the job is done. If you’re just spraying over a wound without actually looking at what’s underneath, you’re essentially putting a fresh coat of paint on a rotting fence post. You have to get in there and clean the site properly. I’ve seen many a lad rush the job, only to find the maggots were tucked deep under a flap of skin where the spray couldn’t reach. Proper livestock wound care means cleaning away the filth, removing the dead tissue, and ensuring the area is actually dry before you even think about sealing it up.

If you’re dealing with a nick from a bramble or a scrape from a gate, treat it like a priority. A small tear in the skin is nothing until the flies catch the scent; that’s when you’re facing a real crisis. I always tell my daughter that preventing blowfly infestation starts with how you handle the initial injury. If you leave a wound open and dirty, you’re basically rolling out a red carpet for every fly in the parish. Keep your antiseptic handy, keep the area clean, and don’t be afraid to get your hands dirty.

Five Things I’ve Learned the Hard Way About Keeping the Flies at Bay

  • Don’t wait for a warm spell to start looking; by the time the temperature hits twenty degrees and the flies are swarming, you’re already playing catch-up with a losing hand.
  • Watch the ground as much as the sheep—if you’ve got damp, boggy patches where they’re huddling, you’re essentially building a nursery for every fly in the county.
  • Check your records for the “problem” ewes; if the same three or four animals are consistently coming back with strike, stop wasting expensive spray on them and start looking at why their fleece or their health is failing.
  • Cleanliness isn’t just for show; if you’re leaving old, soiled bedding or letting manure build up near the pens, you’re inviting the very thing that’ll cost you a week’s profit in vet bills.
  • Stop buying the cheapest dip just because the margin looks better on paper; a cheap product that doesn’t hold up when the humidity rises is just money you’ve thrown into the muck.

The Bottom Line on Flystrike

Don’t wait for a crisis to start looking; by the time you see a sheep acting strange, you’ve already lost the profit from that animal and likely several more through sheer negligence.

A spray bottle isn’t a magic wand—if you haven’t addressed the underlying filth or the wound that invited the flies in the first place, you’re just throwing good money after bad.

Treat flystrike as a financial leak, not just a welfare issue; managing it properly is about protecting your margins and ensuring your hard work doesn’t end up as a pile of dead weight in a field.

The Bottom Line on Flystrike

At the end of the day, managing flystrike isn’t about having the fanciest sprayer in the yard or the latest chemical that promises the world; it’s about being out in the field when the weather turns. You have to balance your spray regime with a sharp eye for wound care and an even sharper understanding of your sheep’s condition. If you ignore the basics—the cleanliness of the fleece, the promptness of your response, and the actual cost of a lost animal—you aren’t just losing sheep, you’re throwing hard-earned money into the muck. It comes down to being proactive rather than reactive, because by the time you smell it, the damage to your margins is already done.

Farming is a series of hard lessons bought with time and sweat, and I’ve certainly paid my dues with flystrike in years past. But if you take the time to master these protocols now, you’ll find that the peace of mind is worth more than any quick fix suggested by a salesman. Don’t let a preventable nuisance dictate your season’s success. Keep your eyes on the ground, your records straight, and never underestimate the small things. If you get the fundamentals of animal welfare right, the cash flow usually has a way of following suit.

Frequently Asked Questions

At what point in the season should I stop relying on preventative sprays and start looking at the actual sheep in the field?

The moment the thermometer stays above 15 degrees and the humidity starts to feel heavy, you stop looking at the calendar and start looking at the backs of your sheep. You can spray until you’re blue in the face, but if the weather turns muggy and the flies are active, the spray won’t save a sheep that’s already nursing a nick or a bit of damp wool. When the heat hits, you move from the spray gun to the dog.

Is it worth the extra cost of a high-end chemical if the weather's been nothing but wet and cold, or am I just throwing money at the wind?

If the ground is sodden and the temperature is hovering in the low teens, you aren’t just throwing money at the wind, but you aren’t buying magic either. In wet, cold weather, flies are sluggish, but the moisture is what’s doing the damage to the skin. Don’t waste your capital on the most expensive brand just because the salesman says it’s “premium.” Buy something reliable that holds up in the damp, because if that wool stays wet, you’ve got bigger problems than the chemical’s price tag.

How much of this is down to my ewes' genetics versus just bad luck with the rainfall and the flies?

It’s a bit of both, but don’t let the weather be your only excuse. A wet, warm spell is the trigger, certainly, but your ewes’ genetics determine how much of a target they are. If you’ve got heavy-woollers with skin that doesn’t breathe, you’re asking for trouble when the rain hits. I’ve seen plenty of lads blame the clouds, but if your flock is naturally predisposed to filth and moisture, no amount of luck will save your margins.

Learning how to trim feet properly.

Over-trimming Causes More Lameness Than It Cures

I spent three thousand pounds on a specialist trimming kit three years ago because a glossy brochure promised it would revolutionize my herd’s mobility. Now, that kit sits in the corner of the shed, gathering dust and looking more like a monument to my own stupidity than a tool for progress. Most of the advice you’ll find online about how to trim feet properly is written by people who have never had to chase a three-hundred-kilo heifer through a muddy, rain-soaked pen at five in the morning. They talk about “optimal angles” and “precision tools,” but they don’t talk about the actual cost of a cow that’s too sore to walk to the trough or the sheer, bone-deep exhaustion of doing it yourself when the weather turns foul.

I’m not here to sell you a new brand of nippers or a complicated system that requires a degree in geometry. I’m going to tell you what I’ve learned from forty years of watching margins disappear into the mud. We’re going to talk about the real way to handle a hoof—the way that keeps the animal sound, the worker sane, and the cash flow intact. I’ll show you how to spot the trouble before it becomes a vet bill, because if you don’t get the basics right, you’re just throwing money into the muck.

Table of Contents

Understanding How to Trim Feet Properly

Understanding How to Trim Feet Properly.

Now, don’t go thinking this is some delicate bit of grooming you do for show. When I talk about the mechanics of it, I’m talking about the difference between a cow that stays in the field and one that spends her life looking at a feeder because she can’t walk. You have to understand the anatomy of the foot before you even pick up a knife. If you’re just hacking away at the horn without an eye for the sole and the interdigital space, you’re doing more harm than good. You aren’t just cutting back growth; you are managing the weight distribution of a half-ton animal.

The biggest mistake I see is people treating it like a chore rather than a precision job. It isn’t about proper nail clipper usage—though I know some of the newer lads like their fancy electric tools—it’s about knowing exactly where the sensitive tissue ends and the hard horn begins. If you’re sloppy, you’ll end up preventing ingrown toenails in one animal only to slice wide open the digital cushion of the next. You need to be looking for the way the hoof meets the ground. If the balance is off, the whole animal is off, and no amount of good silage will fix a gait that’s gone crooked.

Key Things to Know

Key Things to Know: Proper nail clipping.

First, you need to understand that you aren’t performing a cosmetic service; you are performing maintenance on a walking machine. I’ve seen lads treat it like a hobby, but if you aren’t focused on proper nail clipper usage—or more accurately, the heavy-duty nippers and saws required for a heifer—you’re just making a mess. You have to watch the angle. If you clip too deep or at the wrong slant, you’re inviting the very thing we’re trying to stop: a lesion that invites bacteria into the soft tissue.

Secondly, don’t go thinking a quick snip once a year is enough. It’s about the rhythm of the season and the condition of the ground. If the spring has been a sodden mess, you’ll be looking at the feet much more often. Neglect is how you end up avoiding nail infections in theory but failing in practice because the buildup of organic matter has already done the damage. It’s not about being fancy; it’s about keeping the hoof wall at a height where the animal can actually stand without putting undue pressure on the coronary band. Keep it simple, keep it clean, and for heaven’s sake, keep it regular.

Practical Tips and Steps

Practical Tips and Steps for hoof trimming.

First, don’t go at it like you’re hacking at a hedge. You need the right tool, and I don’t mean a rusty pair of shears you found in the back of the shed. Invest in a decent set of nippers and learn proper nail clipper usage before you start slicing into anything vital. You want to take off the excess growth and level the sole, but you aren’t performing surgery. If you’re too aggressive, you’ll leave the animal vulnerable to the very things you’re trying to avoid. I’ve seen enough men ruin a good heifer because they thought they could “fix” a foot in five minutes with a blunt blade.

Second, watch the angles. You’re looking for a flat, even surface that allows the animal to stand comfortably on the ground without putting undue pressure on the coronary band. If you leave it uneven, you’re essentially inviting trouble; you’ll end up constantly fighting a losing battle against infection. A clean, level trim is your first line of defense in avoiding nail infections that can turn a profitable season into a write-off. Keep the workspace clean, keep your tools sharp, and for heaven’s sake, don’t rush it.

Common Mistakes to Avoid

The biggest mistake I see—and I’ve made it myself when I was younger and in a rush—is treating a cow’s foot like you’re just tidying up a bit of overgrown grass. People grab a tool and start hacking away without looking at the structure. If you aren’t careful with your proper nail clipper usage, you’ll end up taking too much off the sole or, worse, nicking the sensitive tissue. Once you hit that quick, you aren’t just dealing with a bloody foot; you’re looking at a week of a cow refusing to walk to the trough, and that’s where the real money starts leaking out of the farm.

Another one that kills margins is ignoring the depth of the groove. I’ve seen lads try to skim the surface to save time, but if you don’t get deep enough to clear the overgrowth, you’re essentially preventing ingrown toenails from being solved. You’re just masking the problem until the infection takes hold. It’s not about speed; it’s about whether that animal can stand comfortably on a slope without shifting its weight. If you’re rushing, you’re likely just setting yourself up for a much more expensive vet bill come autumn.

Final Thoughts

At the end of the day, don’t go looking for a quick fix or a fancy new tool that promises to do the work for you. I’ve seen enough lads buy the most expensive electric grinders only to let them gather dust because they didn’t take the time to actually learn the angle of the cut. It isn’t about being delicate; it’s about being precise. If you’re rushing through the pen just to get back to the tea, you’re likely skipping the very details that keep a cow walking straight through a wet winter.

Success here is measured in the quiet months, not the busy ones. If you stay on top of your foot hygiene best practices and keep a sharp eye on the gait, you won’t be chasing shadows when the weather turns. It’s a lot easier to spend twenty minutes on a steady trim now than it is to spend three days trying to fix the fallout from avoiding nail infections that you should have caught in the spring. Keep your tools sharp, keep your eyes on the ground, and remember: the profit is in the prevention.

Five things I’ve learned the hard way about the hoof

  • Stop rushing the job just to get back to the tractor. If you’re hacking away at a foot because you’ve got a dozen more to go before tea, you’re going to leave a nick in the sole or take too much off the wall. A rushed trim is just a slow way of inviting a vet bill.
  • Invest in a decent set of tools and actually maintain them. I’ve seen lads trying to do a proper job with blunt, cheap blades that tear the horn rather than slicing it. It’s like trying to shave with a butter knife; it’s messy, it’s painful for the animal, and it’s a waste of your time.
  • Watch the weight distribution, not just the shape. You can make a hoof look like a work of art, but if that cow is still leaning heavy on one side because you haven’t corrected the angle, you haven’t actually fixed the problem. You’re just masking a structural issue that’ll cost you more in milk or calf weight later.
  • Don’t ignore the wet ground. If you’re trimming in a muck heap or a muddy pen, you’re fighting a losing battle against bacteria. You have to get them into a clean, dry environment if you want to see the true state of the foot. You can’t judge a problem you can’t see through two inches of slurry.
  • Keep your eyes on the cow, not just the hoof. A good trim isn’t just about the horn; it’s about how that animal moves. If you aren’t looking at the gait and how the limb sits on the ground, you’re just a carpenter, not a farmer. You need to be looking at the whole animal to know if the trim actually worked.

The Bottom Line on Foot Health

A lame cow is a leaking tap in your cash flow; by the time you see her limping, she’s already cost you more in lost milk or weight gain than a proper trimming routine ever will.

Don’t go chasing the latest expensive footbath chemicals until you’ve sorted the basics—if your ground is a bog and your trimming is sloppy, no amount of copper sulphate is going to save your margins.

Invest in the skill and the right blade, not the fancy gadget; a man who knows how to read a hoof is worth ten men with a brand-new, unused kit sitting in the corner of the shed.

The Bottom Line on the Hoof

At the end of the day, trimming feet isn’t some fancy veterinary science project; it is basic maintenance, no different from checking your oil or mending a fence. If you take nothing else from this, remember that you can have the best genetics in the county and the most expensive supplemental feed on the market, but it won’t mean a damn thing if the animal can’t walk comfortably to get to it. You have to watch the angles of the sole, keep your tools sharp, and never, ever rush a job just to get back to the kitchen table. If you treat foot health as an afterthought, you are essentially inviting a leak into your cash flow that you’ll be trying to plug for the rest of the season.

I’ve spent forty years watching men lose their shirts over things they could have prevented with a bit of patience and a decent pair of nippers. Farming is hard enough without fighting your own stock because you were too busy to do the dirty work properly. Don’t look for a magic pill or a new piece of kit to solve your problems; just get your hands dirty and respect the animal’s foundation. If you get the feet right, the rest of the farm tends to follow suit. It’s about building a system that lasts, one cow at a time, and ensuring that when you eventually hand the keys over, you’re leaving behind a herd that actually works for you, rather than one you’re constantly working for.

Frequently Asked Questions

When does a bit of uneven wear become a problem that actually justifies the time and the risk of getting a cow into the crush?

If you’re waiting until she’s limping, you’ve already lost the battle. Once a cow is visibly favoring a leg, she’s stopped eating properly and she’s stopped walking to the best grass. That’s when the profit starts leaking out. I look for the subtle stuff: a slight tilt in her gait or a change in how she holds her weight. If the wear looks uneven in the crush, get the blades out. Don’t wait for the lameness to cost you a calf.

How do I know if I’m cutting too deep into the sole and risking a permanent abscess versus just getting the hoof level?

You’ll know you’ve gone too far when you stop seeing white and start seeing pink. If you’re hitting the quick, you’ve messed up. A little bleeding is one thing, but if you’re digging into that sensitive, vascular tissue, you’re inviting an abscess that’ll cost you more in vet bills than the trim was worth. Keep your eyes on the structure, not just the level. If it looks angry and red, back off.

At what point do I stop trying to do it myself with a knife and admit I need to call in a professional trimmer before I do more damage than good?

You stop when you start seeing more blood than horn. If you’re squinting at a deep lesion or a twisted claw that looks like it’s fighting you, put the knife down. There’s no pride in a botched job that turns a minor issue into a week of antibiotics and a dead calf. If the foot looks angry and you’re second-guessing your angle, call the professional. Better to pay a man for an hour than lose a cow to a mistake.

How dentition affects condition in horses.

Checking Teeth Before Blaming the Feed

I remember standing in a muddy field ten years ago, staring at a heifer that looked like she’d been carved out of stone, despite the fact we’d been feeding her the best silage on the farm. I was looking at the nutritional charts, the mineral supplements, and the soil testing results, trying to figure out why she wasn’t putting on the frame. It wasn’t the grass, and it wasn’t the additives; it was the simple, brutal reality of how dentition affects condition. I’d spent a fortune on high-spec feed only to realize the animal couldn’t even process it because her mouth was a wreck.

I’m not here to sell you a new brand of lick or a fancy diagnostic tool that’ll sit in the back of the shed gathering dust. What I want to do is strip away the nonsense and show you the direct line between a cow’s mouth and your bank balance. I’ll tell you exactly what to look for when you’re walking the pens, why a few bad teeth can turn a profitable year into a massive loss, and how to spot the difference between a hungry animal and one that’s simply unable to eat.

Table of Contents

The Invisible Thief How Dentition Affects Condition and Cash Flow

The Invisible Thief How Dentition Affects Condition and Cash Flow

You can look at a cow all day, admiring the frame or the coat, but if you aren’t looking at the mouth, you’re missing the whole picture. I’ve seen plenty of animals that look fine on the surface but are essentially running on empty. When a beast starts losing its ability to grind, you aren’t just seeing a bit of age; you’re seeing a collapse in mastication efficiency and body mass. If they can’t process the forage, they aren’t converting that grass into muscle or fat, no matter how much you pour into the trough.

It’s a slow leak in your bank account. You don’t notice it in a week, but by the time you realize a heifer isn’t hitting her target weight, the damage is done. The impact of tooth wear on livestock is exactly that—an invisible drain. You end up paying for the same hectare of grazing twice because the animal is just passing the nutrients through without absorbing them. It’s a hard lesson to learn, but a cow with bad teeth is just a very expensive way to turn grass into manure.

Mastication Efficiency and Body Mass the Math of Missing Teeth

Mastication Efficiency and Body Mass the Math of Missing Teeth

You can look at a cow’s frame all you want, but if she isn’t processing the forage, the size of the animal is a lie. It comes down to the simple physics of the mouth. When you see a cow that’s “thin for her frame,” most people jump straight to checking the wormer or the mineral lick. But I’ve spent enough mornings looking at older ewes to know that mastication efficiency and body mass are inextricably linked. If a beast can’t grind that fiber down into a fine enough paste, she isn’t actually eating; she’s just passing expensive fuel through her system without catching the energy.

It is a slow, quiet leak in your bank account. You won’t see a sudden crash like you would with a disease, but rather a gradual decline in how much they can actually pull from the field. As you see more dental deterioration and aging in your older stock, you’re essentially watching your profit margin get ground down along with their molars. You might think you’re saving money by keeping a hard-working older animal, but if she’s spending more energy trying to chew than she’s getting from the grass, she’s costing you more than a replacement ever would.

Oral Health and Nutritional Intake Why Good Grass Isnt Enough

Oral Health and Nutritional Intake Why Good Grass Isnt Enough

You can spend all your time and money trying to breed the perfect genetics or buying the highest-quality clover mix, but it won’t mean a damn thing if the animal can’t actually process it. I’ve seen plenty of heifers that look like they should be thriving on a good flush of spring grass, only to find they’re lagging behind in weight because their mouths are a mess. It’s a hard truth, but oral health and nutritional intake are inextricably linked; if the mechanical part of the process fails, the biology follows suit.

When you see dental deterioration and aging in your older cows, you aren’t just looking at a few missing teeth; you’re looking at a decline in how much energy they can actually extract from the field. A cow with worn or broken teeth spends more time searching for the right bite and less time actually swallowing. You might think you’re getting your money’s worth from that pasture, but you’re really just watching your profit margin get chewed up by an animal that can’t do the basic work of being a ruminant.

Dental Deterioration and Aging Watching Your Profits Wither Away

You can’t cheat the clock, and you certainly can’t cheat the mouth. I’ve spent forty years watching the same cycle: a cow looks fine on paper, she’s got the right pedigree and she’s standing well on her feet, but as she hits that sixth or seventh year, the math starts to fail. Dental deterioration and aging isn’t just a biological fact; it’s a slow leak in your bank account. You’ll see them grazing the best clover in the field, but they aren’t actually utilizing it. They’re just passing through it.

Once those molars lose their ridges or a premolar goes missing entirely, the efficiency of the whole animal drops off a cliff. You might think a slightly slower rate of gain is just “the way old cows are,” but it’s actually the impact of tooth wear on livestock performance hitting your bottom line. When they can’t grind the fiber down, they can’t get the energy out. You end up paying to grow a carcass that’s mostly expensive, unrefined forage. It’s a hard lesson to learn, but a cow with bad teeth is essentially a high-maintenance guest that’s stopped paying rent.

A Veterinary Assessment of Dentition Avoiding the Most Expensive Mistake

Now, I’m not a vet, and I’ve never claimed to be, but I’ve learned that waiting for a professional to tell you a cow is “unprofitable” is a very expensive way to run a business. By the time a vet walks onto your yard and confirms that dental deterioration and aging have finally compromised a beast’s ability to thrive, you’ve already paid for that mistake in wasted feed and lost weight gain. You don’t need a degree to see a cow struggling to process a good bit of silage, but a formal veterinary assessment of dentition is the only way to get a hard number on what you’re actually looking at.

The mistake most people make is treating a mouth issue like a minor inconvenience. It isn’t. If you’re looking at a herd and seeing animals that look “thin despite plenty of grass,” you aren’t dealing with a forage problem; you’re dealing with a mechanical one. You need to get in there and look at the incisors and the molars yourself. If the teeth are worn down to the gums or the gaps are wide enough to let the good stuff slide right through, you aren’t farming livestock anymore—you’re just subsidising their slow decline.

Five Ways to Stop Losing Money Through a Cow's Mouth

  • Don’t just look at the coat; look at the jaw. If you see a cow with a shiny back but a hollowed-out flank, she isn’t “efficient”—she’s struggling to process what’s in front of her. A cow with broken molars is basically running on a deficit every time she grazes.
  • Stop treating dentition as an afterthought for the cull list. If you’re waiting until the vet comes for the annual check to notice a mouth is gone, you’ve already lost the margin on that animal. You need to be checking the mouth during weaning or when they hit the yearling stage, not just when they look half-dead.
  • Watch your grass quality against the age of the beast. You can put the finest clover-rich sward in the world under a cow with poor dentition, and it won’t matter. She can’t break down the fiber, so you’re effectively paying to grow high-quality forage that ends up as wasted energy.
  • Learn the difference between a “working” mouth and a “wasting” mouth. A few worn teeth are part of the game, but once you see gaps or sharp edges that prevent a clean grind, that animal is no longer a producer; she’s a consumer. Know when to pull the trigger before she eats through your profit.
  • Avoid the “shiny new kit” trap. You don’t need a fancy digital scanner to tell you a cow has bad teeth. You need a pair of steady hands, a bit of light, and the willingness to actually get stuck in and look. The most expensive mistakes I’ve seen aren’t caused by a lack of technology, but by a lack of looking.

The Bottom Line: What You’re Actually Losing

Stop looking at the grass and start looking at the mouth; you can have the finest clover in the county, but if the animal can’t grind it down, you’re just feeding the soil instead of the beast.

A cow with bad teeth isn’t just “getting old,” she’s a walking leak in your cash flow that stays open every single day until she’s culled.

Don’t wait for the animal to look thin before you act; by the time the ribs are showing, the money has already been lost to inefficient chewing and wasted forage.

The Bottom Line

At the end of the day, you can buy the best genetics in the country and the most expensive mineral lick on the market, but if that animal can’t physically process the forage in front of it, you’re just subsidizing a loss. We’ve looked at how bad teeth turn a high-quality pasture into a wasted resource and how that inefficiency shows up first in the condition score and last in your bank balance. It isn’t about being sentimental about an old cow; it’s about recognizing that dentition is the gatekeeper to every calorie she consumes. If that gate is broken, you aren’t farming livestock—you’re just feeding a deficit.

My advice is to stop looking for a magic supplement to fix a problem that requires a keen eye and a bit of common sense. Don’t wait for the weight to drop or the condition to crash before you start asking questions about what’s happening inside their mouths. Farming has never been about the flashy new tech that promises the world; it’s about the quiet, steady management of the basics. Get your eyes on the animals, respect the math of the mouth, and remember that profit is grown in the gut, but it starts with the teeth.

Frequently Asked Questions

At what point do I stop trying to fix a problem and just accept that the cow is a write-off?

You stop when the cost of the fix outweighs the margin she’ll ever bring in again. I’ve spent too many years trying to nurse a mouth back to health only to realize I was just subsidizing a losing bet. If she’s not converting grass to condition because she can’t chew, she’s just a walking expense. When the vet’s bill and the lost weight exceed her weaning value, you don’t fix her—you cull her.

Is there any actual point in investing in dental tools for the herd, or should I just leave that to the vet and focus on something else?

Look, if you’re asking whether you should go out and buy a kit of dental rasps and pliers, the answer is no. Don’t be a fool. You aren’t a vet, and trying to play at it usually ends with a bruised hand and a cow that’s more annoyed than helped. Pay the vet to do the proper work. Your job isn’t the dentistry; it’s spotting the cow that’s losing condition despite the grass being fine. That’s where the money is.

How do I tell the difference between a cow that's just having a hard season and one that's actually losing condition because of her mouth?

Look at the way she moves through the field. A cow having a hard season will still head straight for the best grass and graze with purpose, even if she’s looking a bit thin. A cow with a mouth problem is different; she’ll stand there, looking at the clover, but she won’t commit to it. She’ll take a few bites, look frustrated, and move on. If she’s working harder to eat than she is actually gaining, her teeth are costing you.